Is your drill stuck and refusing to reverse? It’s frustrating when your tool won’t work the way you need it to, especially in the middle of a project.
But don’t worry—you don’t have to toss it out or rush to buy a new one. You can fix your drill’s reverse function yourself, even if you’re not an expert. In this guide, you’ll discover simple steps to get your drill turning the right way again.
Keep reading, and you’ll save time, money, and frustration by solving this common problem quickly.

Credit: www.amazon.com
Common Causes Of Drill Reverse Issues
Drill reverse issues happen for many reasons. Knowing the common causes helps fix your drill faster. The reverse function often stops working due to simple problems. These problems involve parts that wear out or get damaged. Understanding each cause makes troubleshooting easier and saves time.
Worn Or Damaged Reverse Switch
The reverse switch controls the drill’s direction. Over time, the switch can wear out or break. Dirt and dust can also block the switch’s contacts. A bad switch may stop the drill from reversing. Replacing or cleaning the switch often solves this issue.
Electrical Connection Problems
Loose or broken wires can cause reverse problems. Inside the drill, wires connect the switch to the motor. These wires can become disconnected or damaged. Check connections carefully for breaks or poor contacts. Fixing electrical problems restores the drill’s reverse function.
Motor Malfunctions
The motor powers the drill’s spinning action. Motor problems may prevent reversing. Worn brushes or a faulty armature can cause this. Sometimes the motor runs only in one direction. Repairing or replacing the motor parts may be necessary.
Gearbox And Clutch Issues
The gearbox and clutch move power from the motor to the drill bit. Damage or wear here can stop reverse motion. Gears might slip or break inside the gearbox. Clutch parts can also fail, blocking reverse. Inspecting and fixing these parts helps restore function.
Basic Troubleshooting Steps
Fixing a drill that won’t reverse starts with simple checks. Basic troubleshooting saves time and money. You can often find the problem without special tools. Follow these clear steps to narrow down the cause. Each step helps you understand what might be wrong.
Check The Power Source
Make sure the drill is properly plugged in or charged. A loose connection can stop the drill from working right. Try another outlet or power source to rule out problems. Power issues often cause the drill to fail in reverse mode.
Inspect The Reverse Switch
Look closely at the reverse switch for dirt or damage. Dust or debris can block the switch from moving. Press the switch back and forth several times to loosen it. A stuck switch may prevent the drill from reversing.
Test The Trigger Mechanism
Press the trigger slowly and listen for changes in sound. A faulty trigger can stop the motor from running backward. Check if the trigger feels loose or sticky. Sometimes, cleaning or replacing the trigger fixes the issue.
Examine The Battery Or Power Cord
Check the battery charge level or inspect the power cord for cuts. A weak battery or damaged cord can limit drill functions. Swap batteries or cords with a working one to test. Replace any damaged parts to restore reverse action.
Fixing The Reverse Switch
The reverse switch controls the drill’s direction. If your drill won’t reverse, the switch might be dirty or broken. Fixing the reverse switch can solve this problem quickly. You can clean, replace, or lubricate the switch parts to get your drill working again.
Cleaning The Switch Contacts
Turn off the drill and unplug it. Remove the switch cover carefully. Use a small brush or compressed air to clean dust and dirt. Clean the metal contacts gently with rubbing alcohol and a cotton swab. Let the parts dry before reassembling. This can restore the electrical connection and fix reversing issues.
Replacing The Reverse Switch
Find the exact replacement switch for your drill model. Remove the old switch by disconnecting the wires and screws. Attach the new switch, connecting wires exactly as before. Secure the switch with screws. Test the drill to check if the reverse function works. Replacing the switch is simple if cleaning does not help.
Lubricating Moving Parts
Apply a small amount of light machine oil to the switch mechanism. Use a cloth to spread the oil evenly on moving parts. Avoid using too much oil, which can attract dirt. Lubrication helps the switch move smoothly and prevents sticking. This step can improve the switch’s performance and extend its life.
Repairing Electrical Problems
Fixing a drill that won’t reverse often means addressing electrical issues inside. Electrical problems can stop the drill’s switch from working properly. Checking and repairing these parts can bring your drill back to life. This section shows simple steps to find and fix electrical faults safely.
Checking Wiring Connections
Start by unplugging the drill to stay safe. Open the drill’s casing carefully. Look for wires that are loose, broken, or burnt. Loose wires can stop the drill from reversing. Tighten any loose connections. Replace wires that look damaged. Make sure all wires connect firmly to their terminals.
Testing With A Multimeter
Use a multimeter to check if wires and switches work. Set the multimeter to measure continuity or resistance. Touch the probes to each wire and switch terminal. A beep or low resistance means good connection. No beep or high resistance shows a break or fault. Test the reverse switch carefully. This tool helps find hidden electrical problems.
Soldering Loose Wires
If you find loose wires, solder them back in place. Heat the soldering iron and apply solder to the wire and terminal. Make sure the connection is strong and shiny. Avoid cold or weak joints that can cause more trouble. Let the solder cool before closing the drill. Proper soldering restores a solid electrical path.
Addressing Motor And Gear Issues
Fixing a drill that won’t reverse often involves checking the motor and gears. These parts control the drill’s direction and power. Problems here stop the reverse function from working. Simple steps can help identify and fix motor and gear issues. This saves money and extends your drill’s life.
Start with the motor brushes. They wear down over time and cause poor contact. Then move to the gearbox. Dirt or damage inside can block the reverse function. Careful inspection and cleaning can restore smooth operation.
Inspecting The Motor Brushes
Motor brushes transfer power to the drill’s motor. They are made of carbon and wear down with use. Remove the brush covers on the drill. Look for cracks, breaks, or worn tips. Check if the brushes move freely in their holders. Stuck or damaged brushes stop the motor from reversing.
Replacing Worn Brushes
Replace brushes if they are shorter than 1/4 inch. Buy exact matches for your drill model. Remove old brushes carefully to avoid damage. Insert new brushes fully and secure them. Test the drill to see if the reverse function works again. New brushes improve power and control.
Servicing The Gearbox
The gearbox directs the drill’s rotation. Dirt, dust, or old grease cause it to jam. Open the gearbox cover using the correct tools. Clean gears with a soft brush or cloth. Apply fresh grease designed for power tools. Check gears for cracks or wear. Replace damaged gears for smooth reversing.
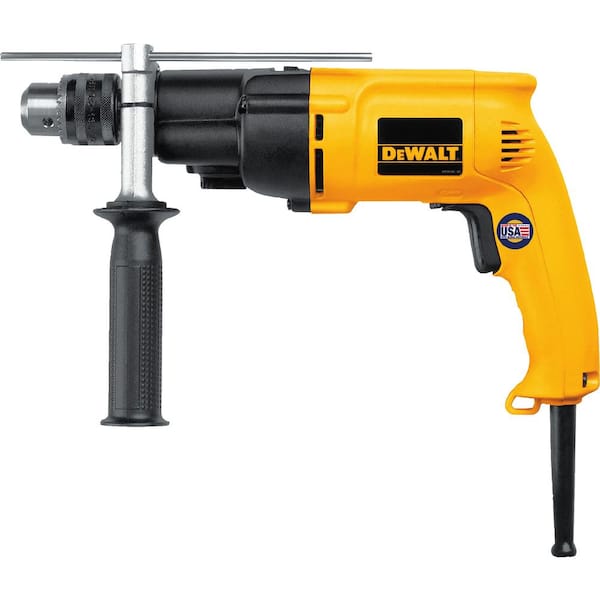
Credit: www.homedepot.com
Preventive Maintenance Tips
Preventive maintenance keeps your drill working well. It stops problems before they start. Small actions can save time and money. Follow these simple tips to avoid drill issues.
Regular Cleaning And Lubrication
Dust and dirt can block moving parts inside the drill. Clean the drill after each use with a dry cloth. Use a small brush to clear hard-to-reach areas. Apply light machine oil to the moving parts. This stops rust and keeps the drill running smoothly.
Proper Usage Techniques
Use the drill for tasks it is designed for. Avoid forcing the drill, as it strains the motor and gears. Switch directions gently using the reverse button. Hold the drill firmly to prevent slipping. These habits extend the life of your tool.
Routine Inspections
Check the drill regularly for loose parts or damage. Inspect the switch to ensure it moves freely. Look at the chuck for wear or dirt. Tighten screws and replace worn parts quickly. Early fixes stop small problems from growing.

Credit: www.youtube.com
Frequently Asked Questions
Why Won’t My Drill Reverse When I Switch It?
Your drill may not reverse due to a faulty direction switch or worn internal parts. Check the switch for damage and clean any debris. If the problem persists, internal gears might need repair or replacement.
How Do I Fix A Stuck Drill Reverse Switch?
To fix a stuck reverse switch, first unplug the drill. Use compressed air to clean the switch area. Gently wiggle the switch to free it. If stuck, disassemble the drill to inspect and replace any broken components.
Can Battery Issues Cause Drill Reverse Problems?
Yes, low or faulty batteries can affect drill functions, including reversing. Ensure your battery is fully charged and properly connected. Try using a different battery to rule out power issues before inspecting the drill mechanics.
What Tools Do I Need To Repair A Drill That Won’t Reverse?
You will need a screwdriver set, multimeter, compressed air can, and possibly replacement parts. These tools help you open the drill, test the switch, clean components, and install new parts if necessary.
Conclusion
Fixing a drill that won’t reverse can save time and money. Start by checking the switch and wiring for any issues. Clean or replace worn parts to restore proper function. Test the drill after each step to find the problem.
Simple tools and careful steps make the job easier. Regular maintenance helps prevent future problems. Keep your drill working smoothly with these easy tips. Don’t give up—small fixes often bring big results. Your drill will be ready for use again in no time.