Drilling a square hole in wood seems like a puzzle. Most people know how to use a round drill bit. But what if you want a perfect square? Maybe you want to fit a mortise lock, create a custom joint, or add a decorative feature. This challenge is common in woodworking, carpentry, and even DIY home repairs. The good news: with the right tools, guidance, and a bit of patience, you can make sharp, clean square holes—even if you’re not a professional.
Let’s explore the smart ways to drill square holes in wood. This article will show you the tools you need, when to use each method, and practical tips to get the result you want. You’ll also learn about the pitfalls to avoid and the little details that can make or break your project.
Whether you have basic tools or want to try advanced options, you’ll find clear steps and honest advice here.
Why Drill A Square Hole? The Practical Reasons
Before jumping into the methods, it’s good to understand why someone would need a square hole instead of a round one. Knowing the “why” helps you choose the best method and avoid wasted effort.
- Mortise and Tenon Joints: Many furniture pieces, doors, and windows use these strong joints. The mortise (hole) is usually square or rectangular.
- Fitting Hardware: Some locks, switches, and handles need a square opening.
- Decorative Purposes: Woodworkers sometimes create inlays or patterns with sharp corners.
- Electrical and Mechanical Uses: Certain boxes, connectors, or devices require a square cutout.
Trying to force a round hole to fit a square object rarely works well. The fit is loose, and the final look is rough. That’s why learning the right way to make a square hole can take your projects to the next level.
Can You Drill A Square Hole? The Physics Explained
Let’s clear up a big misunderstanding. A standard drill bit always makes a round hole because it spins in a circle. So, how can you get a square hole? There are three main approaches:
- Specialty Drill Bits: Some bits, like the Reuleaux triangle bit, move in a special path to create a nearly square hole.
- Combination Methods: Drill a round hole, then use chisels or files to square the corners.
- Power Tools with Guides: Machines like a mortising machine or a jig help guide the tool in a square path.
Many beginners think you can just buy a “square drill bit,” but most drills are not designed for this. True square holes need either special tools or a two-step process. That’s why technique matters as much as the tool you choose.

Credit: www.amazon.com
Main Methods To Drill Square Holes In Wood
Let’s break down the most popular and effective ways to make a square hole. Each method has its own pros and cons, depending on your budget, skills, and available tools.
1. Drill And Chisel Method (manual Mortising)
This is the most common way for hobbyists and professionals who don’t own special machines.
Steps:
- Mark the Square: Use a sharp pencil and a square ruler to outline the exact hole you need.
- Drill Out the Center: Use a drill bit slightly smaller than the finished square. Drill several overlapping holes to remove most of the wood inside the lines.
- Square the Corners: Use a sharp wood chisel to pare away the rounded corners and refine the edges. Work slowly and carefully.
- Test the Fit: Check with the part that will fit into the hole. Adjust as needed.
Pros:
- No special tools needed.
- Good for small to medium square holes.
Cons:
- Takes time and patience.
- Not as clean as machine-made holes.
Tip: Always use a sharp chisel and work with the grain to avoid splitting the wood.
2. Mortising Machine (hollow Chisel Mortiser)
A mortising machine is designed to make square or rectangular holes quickly and precisely. It uses a hollow square chisel with a drill bit inside.
How it Works:
- The drill bit removes most of the wood.
- The square chisel cuts the sides and corners in one motion.
Steps:
- Set the fence and stops on the machine for the hole position.
- Place your wood under the chisel.
- Pull the handle to drive the bit and chisel into the wood.
- Move to the next spot until the full square is cut out.
Pros:
- Fast and accurate.
- Clean, sharp edges.
Cons:
- Expensive tool.
- Bulky; not practical for occasional use.
Tip: Keep both the drill bit and chisel sharp for the best results.
3. Square Hole Drill Bit (reuleaux Triangle Bit)
Some specialty bits, based on the Reuleaux triangle shape, can drill a nearly square hole. These are rare but fascinating.
How it Works:
- The bit wobbles in a special guide, tracing a path that carves out a square.
Limitations:
- Only works with special attachments and drills.
- Usually for small holes.
Pros:
- Unique; fun to use.
- Good for show-and-tell or small projects.
Cons:
- Hard to find.
- Not perfect 90-degree corners.
Tip: These bits are more of a curiosity in most shops—not a daily tool.
4. Router With A Template
A wood router is a versatile power tool. With a straight bit and a custom template, you can route out a square or rectangular hole.
Steps:
- Make a template from hardboard or plastic with the desired square cutout.
- Clamp the template to your workpiece.
- Use a router with a flush trim bit or guide bushing to follow the template.
- Clean up the corners with a chisel.
Pros:
- Good for repeating the same size square many times.
- Very clean edges.
Cons:
- Requires setup and template making.
- Corners will be slightly rounded due to the router bit.
Tip: For perfectly sharp corners, finish with a chisel after routing.
5. Jigsaw Or Scroll Saw
For large square holes, a jigsaw or scroll saw can be used. This is useful for cutouts in panels, speaker boxes, or crafts.
Steps:
- Drill a hole in one corner big enough for the saw blade.
- Insert the blade and cut along the lines.
- Square up the corners with a file or chisel.
Pros:
- Good for big holes.
- Flexible for odd shapes.
Cons:
- Not as precise for small holes.
- Takes practice to cut straight lines.
Tip: Use painter’s tape along the lines to prevent splintering.
6. Cnc Machine
CNC routers can cut any shape—including perfect square holes—with high precision. You program the dimensions, and the machine does the work.
Pros:
- Extremely accurate.
- Repeatable results.
Cons:
- High cost.
- Not practical for one-off jobs.
Tip: If you need dozens of identical square holes, CNC is the gold standard.
7. Hand Saw And Chisel
For larger holes or rustic projects, old-school hand tools can do the job.
Steps:
- Mark the outline.
- Drill starter holes at each corner.
- Use a keyhole saw or coping saw to cut along the lines.
- Clean up with a chisel.
Pros:
- No power needed.
- Can be done anywhere.
Cons:
- Labor-intensive.
- Hard to get perfect results.
Tip: Use a fine-tooth saw for cleaner edges.
Comparison: Main Methods To Drill Square Holes
Here’s a side-by-side look at the most popular methods.
| Method | Best For | Skill Level | Cost | Edge Quality | Speed |
|---|---|---|---|---|---|
| Drill & Chisel | Small holes, DIY | Beginner-Intermediate | Low | Good | Slow |
| Mortising Machine | Joinery, repeated use | Intermediate-Pro | High | Excellent | Fast |
| Router & Template | Multiple same holes | Intermediate | Medium | Very Good | Medium |
| Jigsaw/Scroll Saw | Large holes | Beginner | Low | Fair | Medium |
| CNC Router | High volume, precision | Pro | Very High | Perfect | Fast |

Credit: www.amazon.com
Tools And Materials You’ll Need
The exact tools depend on your chosen method. Here’s a comprehensive list:
- Drill (corded or cordless)
- Drill bits (slightly smaller than your square)
- Sharp wood chisels (preferably 1/4″, 3/8″, 1/2″)
- Hammer or mallet
- Square and marking tools (combination square, pencil, ruler)
- Clamps (to hold wood steady)
- Router and bits (for template method)
- Mortising machine with hollow chisel bits (for advanced users)
- Jigsaw or scroll saw (for large holes)
- CNC router (for high-precision work)
- Files or rasps (for cleaning up edges)
- Safety gear (goggles, dust mask, hearing protection)
Tip: Always secure your wood with clamps before cutting or chiseling. This prevents slips and keeps your hands safe.
Step-by-step: Drill And Chisel Method (most Popular)
This method is reliable for most people. Here’s how to do it well:
1. Plan And Measure
Draw the exact shape and size of the square hole where you want it. Use a sharp pencil and a combination square for accuracy. Double-check the measurements—mistakes are hard to fix.
2. Mark Drill Points
Inside the square, mark several spots for drilling. Place them so the holes overlap, covering as much of the square as possible without going past the lines.
3. Drill Out The Waste
Choose a drill bit slightly smaller than the finished square. Drill straight down at each marked point, making sure the holes overlap. This removes most of the wood quickly.
Common mistake: Drilling too close to the edge can split the wood.
4. Remove Corners With A Chisel
Hold the chisel vertically and tap gently with a mallet. Start at the corners and work toward the center. Pare away thin layers instead of big chunks for better control.
5. Clean Up The Sides
Use the chisel’s flat side against the edge for a smooth finish. Work slowly, checking your progress often.
6. Test And Adjust
Try fitting the part or tool into the hole. If it’s tight, pare away more wood. If you go too far, you can glue a thin shim in place and try again.
Insider tip: Lightly sand the inside edges for a cleaner look.
Using A Mortising Machine: Fast And Precise
If you have access to a mortising machine, the process is faster and gives professional results.
1. Install The Hollow Chisel And Bit
Choose the right size for your hole. Sharpen both the chisel and bit before starting.
2. Set Depth And Position
Adjust the machine’s fence and stops for consistent holes. Clamp your workpiece securely.
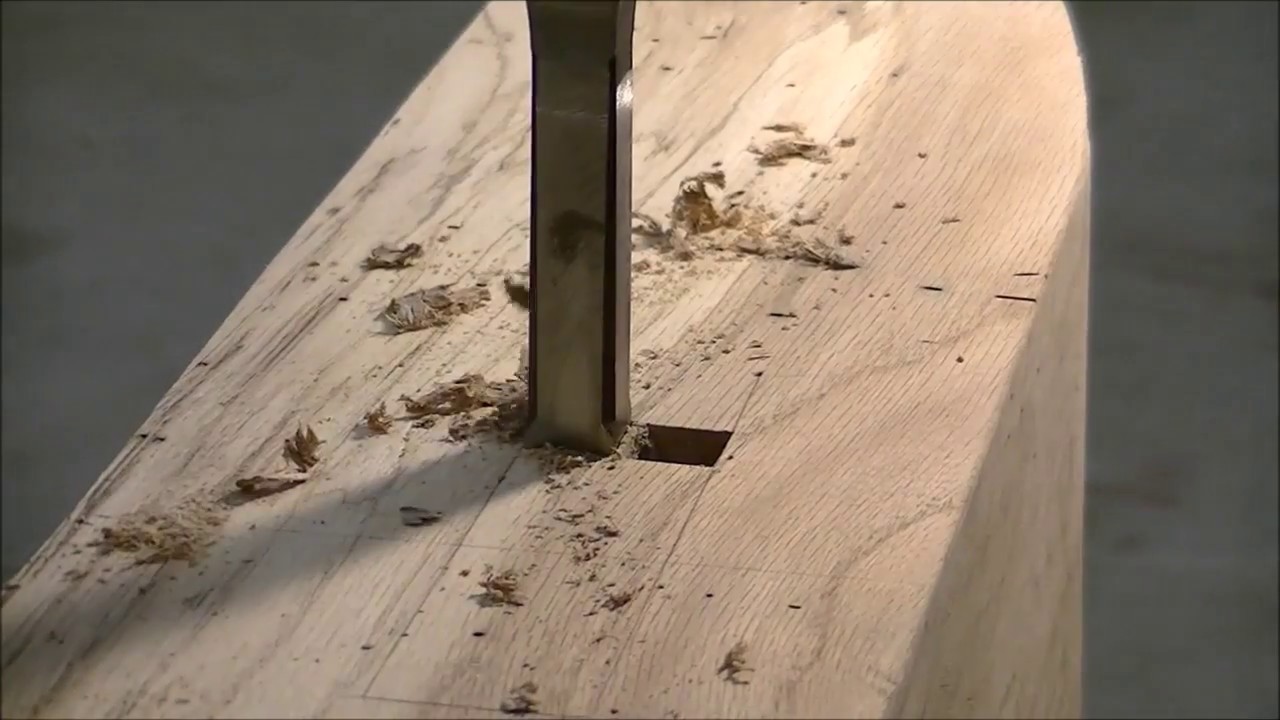
3. Cut The Mortise
Pull the handle to lower the bit and chisel together. Start at one end and work along the line, overlapping each cut slightly.
4. Clean Up
Any small ridges can be smoothed with a chisel.
Advanced tip: For extra clean results, make two light passes instead of one deep cut.
Router And Template: For Multiple Identical Holes
If you need several square holes of the same size, a router and template save time.
1. Make A Template
Cut a piece of hardboard with the exact square opening you need. Make the template opening slightly larger to account for the guide bushing or flush trim bit.
2. Clamp Template To Wood
Use strong clamps so the template doesn’t move.
3. Route Out The Waste
Set the router depth just deeper than the wood thickness. Move the router along the template, removing all the material inside the square.
4. Square The Corners
Finish the corners with a chisel for a true square.
Pro tip: Use double-sided tape to hold the template for extra stability.
Credit: www.youtube.com
How Accurate Does Your Square Hole Need To Be?
This depends on the project:
- For joinery (like mortise and tenon), accuracy is important for strength.
- For hardware installation, tight fit prevents movement.
- For decorative cutouts, appearance matters most.
A loose or sloppy square hole can ruin both looks and function. Spend extra time measuring and marking before you cut.
Table: Tool Selection Guide By Hole Size
Here’s a helpful chart to match your needs to the best tool:
| Hole Size | Best Method | Typical Application |
|---|---|---|
| Up to 1/2 inch | Drill & Chisel, Mortising Machine | Joinery, locks |
| 1/2 to 1 inch | Mortising Machine, Router & Template | Furniture, hardware |
| 1 to 4 inches | Jigsaw, Scroll Saw, Router | Panels, speaker boxes |
| 4 inches and up | Jigsaw, Hand Saw | Access panels, crafts |
Mistakes To Avoid When Drilling Square Holes
Many beginners repeat the same errors. Here’s what to watch out for:
- Not Clamping the Wood: Movement ruins accuracy and can be dangerous.
- Using Dull Tools: Dull bits or chisels tear the wood, leaving rough edges.
- Drilling Too Close to the Edge: This can split your workpiece.
- Rushing the Chiseling: Taking off too much wood at once leads to uneven sides.
- Wrong Size Drill Bit: Too big, and you cut past the lines; too small, and you do extra work.
- Poor Layout: Fuzzy lines or inaccurate marking lead to crooked holes.
- No Test Fit: Always check the fit before moving on.
Non-obvious insight: Even experienced woodworkers sometimes use scrap wood to practice the cut before working on the final piece. This can reveal problems with your setup.
Safety Tips For Drilling Square Holes
Woodworking is rewarding, but safety comes first.
- Wear eye protection: Chips and dust can fly into your eyes.
- Use hearing protection: Power tools are loud.
- Clamp everything: Keeps your hands away from blades and bits.
- Unplug tools when changing bits: Prevents accidents.
- Check for nails or screws: Hitting metal can damage tools or cause kickback.
Overlooked detail: Long sleeves or loose jewelry can catch in moving tools—always secure clothing before starting.
Beyond The Basics: Advanced Tips For Clean Square Holes
If you want your square hole to look as good as possible, try these advanced tricks:
- Back up the wood: Clamp a scrap piece behind your work to prevent tear-out as the bit exits.
- Use a marking knife: Scribe the lines for a cleaner edge, especially in hardwood.
- Sand after chiseling: Start with 120-grit wrapped around a small block for smooth sides.
- Lubricate your chisel: A little wax on the blade makes paring easier.
Hidden insight: For deep holes, clear chips often—packed wood can heat up and dull your tools fast.
When To Hire A Professional
Some jobs are best left to the pros:
- Historic restoration: Old doors or furniture need expert touch.
- Valuable wood: If you’re working with expensive material, mistakes are costly.
- Large volume: Hundreds of holes require specialized machines.
Advice: If in doubt, ask a local carpenter or joiner for help. Many will cut a few holes for a reasonable fee, saving you time and frustration.
Example: Mortising A Door For A Lock
Let’s walk through a real-world example—fitting a square mortise lock.
- Mark the outline: Place the lock on the door, trace carefully.
- Drill overlapping holes: Use a drill bit slightly smaller than the mortise.
- Chisel to the lines: Work slowly, checking the lock fit often.
- Test the action: Insert the lock and check that the latch moves freely.
- Adjust as needed: Remove small amounts until the fit is perfect.
Tip: Some locks include a paper template—use this for best results.
Common Questions Beginners Have
- Can I use a square hole drill bit in a regular drill? Not usually—these bits need a special guide.
- Is a mortising machine worth buying? Only if you do a lot of joinery; otherwise, manual methods work fine.
- What’s the best wood for practicing? Pine is soft and forgiving—great for learning.
- How do I avoid splitting the wood? Drill pilot holes and chisel gently, especially near edges.
Insider’s advice: Don’t be discouraged by slow progress—clean, accurate work takes time.
Table: Square Hole Methods Vs. Round Hole Drilling
To highlight the difference between square and round hole making:
| Feature | Square Hole | Round Hole |
|---|---|---|
| Common Tool | Chisel, Mortiser, Router | Drill bit |
| Speed | Medium to Slow | Fast |
| Edge Quality | High (with care) | High |
| Skill Needed | Moderate to High | Low |
| Versatility | High (various shapes possible) | Limited to round |
Frequently Asked Questions
How Do I Make A Perfectly Square Hole With Only Basic Tools?
First, mark the square outline using a ruler and pencil. Drill several overlapping holes inside the square. With a sharp chisel, pare away the remaining wood up to the lines. Work patiently, removing thin layers for accuracy. Check the fit often.
This approach works well for most DIY projects and doesn’t require special tools.
Is There A Drill Bit That Makes Square Holes?
There are specialty bits, such as the Reuleaux triangle bit, which can make almost-square holes. However, they need a special guide and are not common in most tool shops. For most people, a mortising machine with a square hollow chisel is the most practical option for square holes. Regular drills can only make round holes.
What’s The Fastest Way To Make Multiple Square Holes Of The Same Size?
A router with a template is the best option for making many identical square holes. Once you’ve made the template, you can clamp it to each workpiece and route out the waste quickly and accurately. Clean up the corners with a chisel for a sharp finish. This method saves time and ensures consistency.
How Do I Avoid Splintering Or Tear-out Around The Hole?
Use sharp tools. Clamp a backing board behind your work to support the wood as the bit or chisel exits. Always drill or chisel with the grain, not against it. Tape over the cutting lines can also help minimize splintering, especially with power saws or routers.
Can I Use These Methods On Plywood Or Mdf?
Yes, but take extra care. Plywood and MDF are more likely to splinter or chip, especially at the edges. Use sharp bits, clamp everything tightly, and back up the work with scrap wood. For best results in MDF, use a router with a template and finish with a chisel.
If you want to see some of these specialty tools in action, consider checking a reliable resource like Wikipedia’s mortiser page for more technical details.
Drilling a square hole in wood takes a bit of planning, the right tools, and a steady hand. With practice, you’ll find the method that fits your needs, and your projects will look and work better than ever. Take your time, stay safe, and enjoy the satisfaction of tackling a woodworking challenge that leaves most people scratching their heads.