When a drill bit breaks while drilling stainless steel, frustration, lost time, and increased costs can quickly follow. Stainless steel is prized for its corrosion resistance and strength, but these same properties make it notoriously challenging to drill. Even experienced machinists and DIY enthusiasts often encounter unexpected breakages, wasted bits, and damaged workpieces.
Understanding the causes of this problem and learning how to prevent it can save both professionals and hobbyists significant headaches.
This article dives deep into the reasons drill bits break when drilling stainless steel, explores the science behind the material, compares the best bit types, and provides actionable solutions. Whether you’re an industrial fabricator, an auto mechanic, or a weekend builder, mastering these techniques will help you avoid costly errors and achieve cleaner, safer results.
Key Takeaways
- Stainless steel’s hardness and toughness make drilling challenging and prone to bit breakage.
- Improper drill bit selection and lack of lubrication are leading causes of breakage.
- Correct technique, RPM, feed rate, and cooling are critical for successful drilling.
- Carbide and cobalt bits outperform standard HSS bits for stainless steel applications.
- Adopting best practices and safety precautions extends tool life and enhances work quality.
Why Does Drilling Stainless Steel Break Bits?
Drilling through stainless steel tests both the tool and the operator. The unique properties of stainless steel contribute to drill bit breakage more than most other metals.
The Metallurgy Of Stainless Steel
Stainless steel is an alloy containing at least 10.5% chromium, along with iron, nickel, and other elements. Its high tensile strength (up to 220,000 psi for some grades) and work hardening tendency make it durable but difficult to penetrate with conventional tools.
- Austenitic stainless steels (e.g., 304 and 316) are the most common and the hardest to drill due to their ability to rapidly harden under friction. These grades are frequently used in the food, medical, and marine industries due to their superior corrosion resistance, but their high nickel and chromium content increases their resilience to cutting forces.
- Martensitic and ferritic grades are somewhat easier, but still more challenging than mild steel or aluminum. Martensitic stainless steel is often used for cutlery and turbine blades, while ferritic types are common in automotive and industrial applications.
The microscopic structure of stainless steel enables it to retain strength at high temperatures, which, while beneficial for end-use performance, becomes a significant obstacle during drilling.
Work Hardening: The Silent Drill Killer
When a drill bit contacts stainless steel, the heat and pressure at the cutting edge cause the steel to harden locally—a process called work hardening. If the bit isn’t sharp, or the feed rate is too low, the bit rubs rather than cuts, compounding the problem.
- Consequences: The bit encounters an increasingly hard surface, requiring more force to penetrate. This leads to excessive heat, dulling, and ultimately, breakage.
- Example: If a machinist hesitates or pauses drilling, allowing the bit to spin in place, the localized temperature spikes and surface hardness can increase dramatically, sometimes making it nearly impossible to resume drilling without switching to a new, sharper bit.
Heat Generation And Poor Chip Removal
Stainless steel is a poor conductor of heat compared to regular steel or aluminum. This means that heat accumulates at the drilling site, accelerating wear and causing drill bits to lose their temper or snap.
- Chip removal is also a challenge; chips can weld to the bit or clog flutes, especially in deeper holes, increasing the chance of jamming and breakage.
- Built-up edge: Chips that stick to the cutting edge can further blunt the bit, causing inefficient cutting and raising the risk of bit failure.
Without proper chip evacuation, even the best drill bit materials will struggle. This issue is exacerbated when using handheld drills that lack the power or stability to maintain proper feed rates, leading to more frequent breakages.
Common Operator Errors
Several avoidable mistakes increase the likelihood of breaking drill bits:
- Incorrect bit selection (using standard HSS instead of cobalt or carbide).
- Too high spindle speeds (RPM) generating excess heat.
- Insufficient or improper lubrication.
- Inadequate clamping or support of the workpiece.
- Applying sideways force or not aligning the bit perpendicular to the surface.
- Skipping pilot holes—starting with a large bit can overload and snap it, especially in hard stainless.
- Not monitoring bit condition—using a dull bit increases friction and heat, accelerating failure.
Real-world Example: Automotive Repair Shop
A mechanic tries to drill out a snapped exhaust manifold bolt on a stainless steel flange. Using a regular HSS bit at high speed, he breaks three bits in succession. Switching to a cobalt bit, slowing the RPM, and applying cutting oil, he completes the job with a single bit and no further breakages.
This example highlights the direct impact of tool and technique selection on productivity and tool longevity.

Credit: senmit.com
Choosing The Right Drill Bit For Stainless Steel
Not all drill bits are created equal—especially when it comes to stainless steel. The wrong bit will dull quickly, heat up, and snap, while the right one will cut cleanly and last longer.
Drill Bit Material Comparison
| Type | Material | Strength | Cost | Best For |
|---|---|---|---|---|
| High-Speed Steel (HSS) | Steel alloy with tungsten/molybdenum | Good | Low | Soft metals, wood, plastic |
| Cobalt (M35/M42) | HSS + 5-8% cobalt | Very High | Medium | Stainless steel, hardened steel |
| Carbide | Tungsten carbide | Exceptional | High | Industrial, hard alloys, stainless |
| Titanium-coated | HSS with TiN/TiAlN coating | Moderate | Medium | General metalworking |
Why Hss Bits Fail
Standard HSS bits are designed for mild steel and softer materials. When used on stainless steel, they quickly overheat and dull, especially if work hardening occurs. Even with careful use, their lifespan is limited.
- Example: Attempting to drill multiple holes in a stainless steel sink with HSS bits will often result in a blue-tinted tip, indicating overheating, and require frequent bit changes.
Cobalt Drill Bits: The Workhorse For Stainless
Cobalt bits (M35 or M42 grades) are specifically formulated for hard metals. The cobalt content increases heat resistance, allowing them to stay sharp longer and cut through tough alloys without failing. They are the top choice for serious stainless steel work.
- Tip geometry: Split point or 135-degree tips reduce walking and improve penetration.
- Sharpening: Cobalt bits can be resharpened for extended life.
- Example: For frequent tasks such as mounting stainless brackets or fabricating custom exhausts, cobalt bits provide consistent performance and reduce overall tool costs.
Carbide Drill Bits: For Extreme Cases
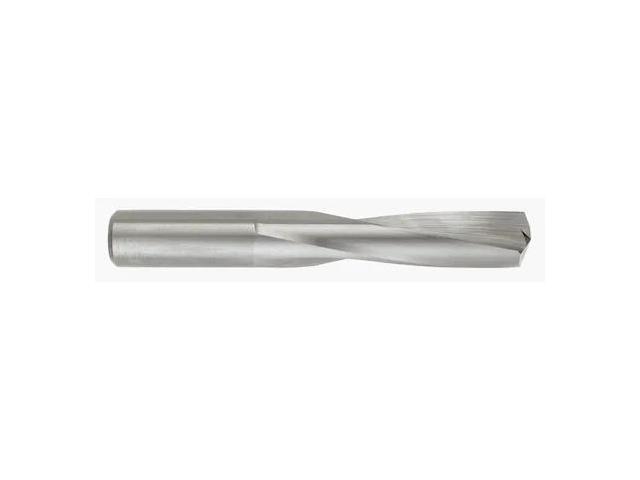
Carbide bits offer the highest hardness and wear resistance. Used primarily in production settings or for thick stainless, they are brittle and expensive, but unmatched in performance for demanding jobs.
- Note: Carbide’s brittleness means it’s best for rigid setups like drill presses; handheld use risks chipping.
Coated Bits: When Are They Worth It?
Titanium-coated bits offer improved hardness and reduce friction, but their advantage is mostly lost once the coating wears through. They are better than plain HSS but inferior to cobalt or carbide for stainless steel.
- Practical use: For occasional stainless drilling, they’re a reasonable compromise, but not for repetitive or industrial tasks.
Real-world Example: Fabrication Shop
A metal fabrication shop compared bit longevity in a project requiring 200 holes in 316 stainless steel. HSS bits averaged 8 holes before dulling or breaking, cobalt bits achieved 55 holes, and carbide bits lasted the entire job with only minor sharpening needed halfway through.
This significant difference in tool life translated into substantial savings in both time and material costs.
Credit: www.nallhillsanimalhospital.com
Optimal Drilling Techniques For Stainless Steel
Even with the best bit, poor technique will lead to breakages. Understanding and applying the correct drilling practices is essential.
Setting The Correct Drill Speed (rpm)
Lower RPMs are essential for stainless steel. High speeds generate heat, dulling the bit and causing breakages. For a 1/4” (6.35mm) bit, recommended speeds are:
- Stainless steel: 500-700 RPM
- Mild steel: 1000-1200 RPM
Always consult the drill bit manufacturer’s chart for specific recommendations. For larger diameters, further reduce speed to manage the increased friction and heat. Many drill presses offer a speed chart for quick reference, and slowing down is always safer than running too fast.
Feed Rate And Pressure
A steady, firm feed is needed to keep the bit cutting rather than rubbing. Too little pressure leads to work hardening; too much can snap the bit, especially smaller diameters.
- Rule of thumb: Apply enough force to produce continuous chips, not powder or dust.
- Peck drilling (periodic withdrawal) helps clear chips and cool the bit.
- Tip: Listen for the sound of the cut—a smooth, steady noise usually indicates proper technique, while squealing or chattering signals problems.
Lubrication And Cooling
Heat is the enemy. Use high-quality cutting fluids or oils specifically for stainless steel to reduce friction and cool the bit. Water-based coolants are acceptable, but specialized oils (e.g., sulfurized cutting oil) work best.
- Apply lubricant to both the bit and hole frequently during drilling.
- For deep holes, inject lubricant periodically as you withdraw the bit.
- Tip: Use a small brush or squeeze bottle to direct lubricant exactly where it’s needed.
Workpiece Clamping And Alignment
Secure the workpiece in a vise or clamp to prevent movement. Misalignment or shifting can cause the bit to bind, bend, or snap.
- Use a center punch to create a starting dimple, preventing bit walk.
- Ensure the drill is perpendicular to the work surface.
- For thin sheet, sandwiching the stainless between two layers of scrap material can help reduce burrs and prevent bit wandering.
Real-world Example: Diy Home Project
A homeowner attempted to drill stainless steel kitchen hardware with a cordless drill and no lubricant. After breaking two bits, they switched to a cobalt bit, slowed the speed, used cutting oil, and successfully completed the installation without further breakage.
This straightforward adjustment in approach made the difference between repeated frustration and a smooth, professional result.
Preventing Drill Bit Breakage: Best Practices
Prevention is always better than replacement. Adopting a systematic approach can minimize breakages and improve results.
Step-by-step Checklist For Success
- Select the right bit: Choose cobalt or carbide for stainless steel.
- Mark and punch: Use a center punch to mark hole locations.
- Secure the workpiece: Clamp firmly before drilling.
- Apply lubricant: Generously lubricate both bit and hole.
- Set speed and feed: Use the correct RPM and steady pressure.
- Peck drill: Withdraw periodically to clear chips and cool.
- Check for dullness: Replace or sharpen bits showing signs of wear.
- Start with a pilot hole: For large diameters, always drill a small pilot hole first to reduce stress and heat buildup on the larger bit.
Maintenance And Bit Care
Proper maintenance extends tool life:
- Sharpen bits regularly using a bench grinder or specialized sharpener. Keeping the tip geometry correct is crucial for efficient cutting.
- Inspect for cracks or chips before each use. Even small imperfections can lead to catastrophic breakage under load.
- Store bits in a dry, organized case to prevent corrosion and tip damage. Moisture can degrade tool steel over time, especially in humid environments.
- Clean bits after use to remove any chips or residue, which may cause buildup or corrosion.
Table: Common Causes Of Drill Bit Breakage And Solutions
| Cause | Symptom | Prevention/Remedy |
|---|---|---|
| High RPM | Overheated, blue-tinted bit | Use lower speeds; consult charts |
| Insufficient lubrication | Squealing sound, smoke | Apply cutting oil regularly |
| Incorrect bit type | Rapid dulling, chipping | Use cobalt or carbide bits |
| Poor chip removal | Clogged flutes, bit jams | Peck drill, clear chips often |
| Misalignment | Bit bends or snaps | Clamp workpiece, use center punch |
| Worn or dull bit | Slow progress, excessive heat | Sharpen or replace bit promptly |
Safety Considerations
- Always wear eye protection and gloves when drilling.
- Secure loose clothing and hair to avoid entanglement.
- Keep a fire extinguisher nearby when using oil-based lubricants.
- Use hearing protection if working with power tools for prolonged periods, as drilling stainless can be especially noisy.
- Be cautious of sharp chips and swarf, which can cause lacerations.
Troubleshooting: When Drill Bits Keep Breaking
Even with good practices, persistent breakage can indicate deeper issues. Use this troubleshooting guide to identify and resolve recurring problems.
Diagnosing Persistent Breakage
- Bit snaps immediately: Likely misalignment or excessive force.
- Bit dulls rapidly: High speed, insufficient lubrication, or wrong bit material.
- Bit jams and breaks: Poor chip removal, insufficient peck drilling.
- Workpiece gets hot and discolors: Overheating due to high speed or dry drilling.
- Bit wobbles or skips: Could indicate a bent bit or uneven surface.
Solutions For Specific Scenarios
Small Diameter Holes (<1/8”)
- Use pilot holes to reduce stress on small bits.
- Drill at even lower RPMs and feed gently.
- Consider using a more rigid setup (e.g., drill press) to minimize flexing.
Deep Holes (>2x Bit Diameter)
- Peck drill every 2-3 seconds.
- Use extra-long bits designed for deep holes.
- Blow out chips with compressed air between pecks if possible.
Drilling At An Angle
- Start with a spot drill or use a jig to guide the bit.
- Gradually increase the angle rather than plunging at once.
Laminated Or Layered Stainless
- Clamp layers tightly to prevent shifting.
- Use backing material to reduce burrs and prevent delamination.
When To Replace Or Sharpen
- If the bit fails to cut and only produces heat, it’s time to sharpen or replace.
- Inspect for chipped or deformed tips before each use.
- Replace bits showing signs of excessive wear to prevent damaging workpieces.
Real-world Example: Industrial Setting
A manufacturing line suffered frequent drill bit breakage on 304 stainless panels. After an audit, it was discovered that bits were being run at 1200 RPM with no lubrication. By switching to 600 RPM, applying cutting oil, and using M42 cobalt bits, breakage dropped by 80% and throughput improved.
This illustrates the significant impact of even small process changes in high-volume settings.
Comparing Lubricants And Cutting Fluids
The choice of lubricant plays a critical role in cooling and chip evacuation.
Types Of Cutting Fluids
- Sulfurized cutting oil: Excellent for stainless steel, adheres to surfaces, withstands high heat.
- Synthetic or semi-synthetic coolants: Used in CNC and production settings for continuous cooling. These fluids often include additives that enhance lubricity and inhibit corrosion.
- WD-40 and light oils: Minimal benefit, not recommended for stainless steel. They lack the necessary high-pressure performance for metal-on-metal contact.
- Paste lubricants: Such as those based on molybdenum disulfide, are effective for overhead or vertical holes where liquid lubricants would drip away.
Comparison Table: Cutting Fluids For Stainless Steel
| Fluid Type | Effectiveness | Application | Cost |
|---|---|---|---|
| Sulfurized oil | Excellent | Manual drilling, tapping | Medium |
| Synthetic coolant | Very Good | CNC, high-volume | High |
| WD-40 | Poor | General lubrication | Low |
| Motor oil | Fair | Emergency use | Low |
| Paste lubricant | Good | Vertical/overhead drilling | Medium |
Application Tips
- Apply lubricant before drilling and reapply with each peck.
- For overhead or vertical holes, use a gel or paste lubricant to reduce drips.
- Avoid over-lubrication, which can cause slippage or mess; aim for a consistent film on the bit and hole.
External Resources
For in-depth guidance on cutting fluids, see Wikipedia: Cutting fluid and the Machinery Lubrication Guide.
The Role Of Drill Presses And Power Tools
Tool selection impacts both safety and drill bit longevity. Let’s compare handheld drills and drill presses for working with stainless steel.
Handheld Drills Vs. Drill Presses
- Handheld drills are convenient for fieldwork and small jobs but can be difficult to control for straight, precise holes in tough materials. Variable speed triggers provide some control, but maintaining constant pressure and alignment is more challenging.
- Drill presses provide better alignment, consistent pressure, and adjustable speed control, making them ideal for stainless steel. The fixed platform allows for safe, repeatable operations.
- Magnetic drills (mag drills) are portable but provide the rigidity and power of a drill press, making them ideal for large or thick stainless steel plate on job sites.
Table: Tool Comparison
| Tool | Control | Speed Adjustment | Ideal Use |
|---|---|---|---|
| Handheld Drill | Low-Moderate | Limited | Fieldwork, small jobs |
| Drill Press | High | Excellent | Precision, repetitive tasks |
| Magnetic Drill | High | Good | Thick steel, on-site fabrication |
Power Tool Features For Stainless Steel
- Variable speed control is critical. This allows you to match the RPM precisely to the bit size and material.
- Depth stops help avoid over-penetration and breakage, especially when drilling to precise depths.
- Reverse function can help back out a jammed bit.
- Torque control can prevent bit breakage by reducing force if the bit binds.
External Resources
For tips on using drill presses, consult Family Handyman: Drill Press Guide and for magnetic drills, see Lincoln Electric: Using a Mag Drill.
Advanced Tips And Case Studies
For those drilling stainless steel regularly or in high-stakes environments, advanced strategies and lessons from real projects can deliver significant gains.
Advanced Techniques
Step Drilling
- Start with a small pilot hole (1/8″ or 3mm) before switching to the final diameter bit.
- Reduces friction and heat on larger bits.
- For holes larger than 3/8”, consider a two- or three-step drilling process for best results.
Annular Cutters
- For holes >1/2″, use annular cutters on a mag drill for faster, cleaner cuts with less heat.
- Annular cutters remove material around the periphery of the hole, creating a slug rather than chips, which minimizes heat and improves finish.
Cryogenic Cooling
- In CNC or industrial settings, liquid nitrogen cooling can dramatically extend bit life by keeping the cutting edge below the temperature at which work hardening occurs.
- This technology is usually reserved for high-value applications due to cost and complexity.
Tool Coatings And Custom Geometry
- Advanced coatings like TiAlN (titanium aluminum nitride) or AlCrN (aluminum chromium nitride) can further enhance heat resistance and reduce friction.
- Custom-ground bits with special point geometries may be used for automated or high-precision applications.
Case Study: Aerospace Component Fabrication
An aerospace supplier needed to drill hundreds of holes in 17-4PH stainless steel. Initial attempts with HSS and standard coolant led to frequent bit breakage and production delays. By switching to carbide-tipped annular cutters, using high-pressure synthetic coolant, and implementing a two-step drilling process (pilot then final size), the team reduced bit consumption by 70% and increased output by 40%. Read more at Modern Machine Shop.
Case Study: Diy Metal Art Project
A metal artist creating a stainless steel sculpture found that bits were breaking every few holes. After consulting online resources and switching to cobalt bits, slowing the drill speed, and using sulfurized oil, the artist completed over 50 holes without a single breakage. The experience was shared on the Practical Machinist Forum.
External Resources
For more advanced drilling techniques, see Engineering Toolbox: Drilling Speeds and Feeds.
Frequently Asked Questions
Why Do Drill Bits Break So Often In Stainless Steel Compared To Regular Steel?
Stainless steel’s hardness and ability to work harden make it much tougher on drill bits than mild steel. The heat generated and the metal’s low thermal conductivity cause bits to dull or snap if not properly managed. Even small mistakes in speed, lubrication, or alignment are magnified due to the material’s properties.
What Is The Best Type Of Drill Bit For Stainless Steel?
Cobalt drill bits (M35 or M42) are the best all-around choice for stainless steel. For extremely tough jobs or production work, carbide bits may be preferable, but they are more brittle and expensive.
Is Lubrication Necessary, And What Kind Should I Use?
Lubrication is essential to reduce heat and friction. Use sulfurized cutting oil or a synthetic coolant designed for metalworking. General-purpose lubricants like WD-40 are not effective for stainless steel.
How Can I Tell If My Drill Bit Is Dull Or About To Break?
Signs include squealing sounds, excessive heat, blue discoloration, and slow progress. Replace or sharpen bits at the first sign of dullness to avoid breakage. Chips changing from continuous to powder or dust is also a red flag.
Can I Use A Regular Handheld Drill For Stainless Steel?
Yes, but a variable speed drill with good control is recommended. For best results, use a drill press or magnetic drill to ensure alignment and consistent feed rate, especially for larger holes or thicker material.
Drilling stainless steel may seem daunting, but with the right tools, techniques, and preparation, you can achieve professional results and minimize the risk of breaking drill bits. By understanding the unique challenges of stainless steel and taking a systematic approach, both professionals and DIYers can work more efficiently, safely, and cost-effectively. For further reading, check out the Wikipedia: Drill Bit page and industry guides on material machining.