Have you ever struggled with a stripped screw that just won’t come out? It’s frustrating, time-consuming, and can stop your whole project in its tracks.
But don’t worry—you can fix this quickly using a drill. You’ll learn simple, effective steps to remove a stripped screw without damaging your materials or tools. Keep reading, and you’ll be back on track in no time!
Tools Needed
Removing a stripped screw can be tricky without the right tools. A drill is essential, but the drill bits and extra tools make the task easier. Choosing the correct drill bits and helpful accessories saves time and frustration. Prepare well to handle stripped screws quickly and safely.
Types Of Drill Bits
Drill bits come in many shapes and sizes. For stripped screws, use a screw extractor bit. These bits grip the damaged screw head firmly. A left-handed drill bit can help loosen stuck screws by turning opposite the usual way. Standard drill bits may be needed to make a pilot hole before extraction. Choose bits made from strong materials like high-speed steel for durability.
Additional Tools For Help
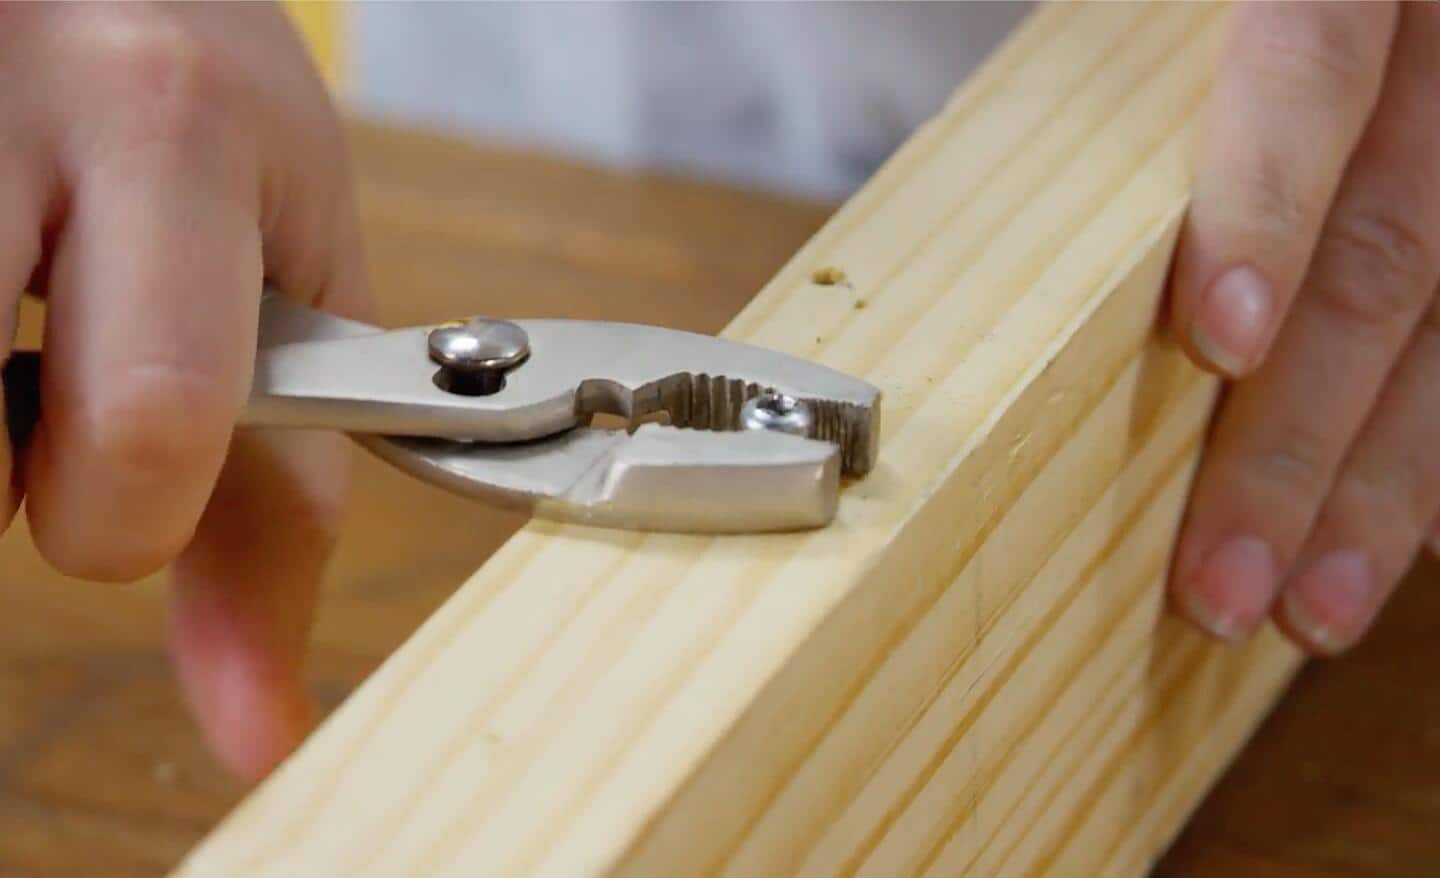
Besides drill bits, other tools improve success. Needle-nose pliers can grip and turn screws with damaged heads. A rubber band placed over the screw head adds extra grip for the drill bit. A center punch helps mark the screw center for precise drilling. A wrench or vise grips provide extra torque when needed. These simple tools support the drill and make removal easier.

Credit: www.knafs.com
Why Screws Get Stripped
Screws can get stripped during many common tasks. A stripped screw means the head is damaged. This damage makes it hard to turn or remove the screw. Understanding why screws strip helps you avoid the problem. It also makes removing stripped screws easier.
Common Causes
Using the wrong screwdriver size can strip a screw. A loose or worn screwdriver slips in the screw head. Over-tightening a screw puts too much pressure on it. This pressure can wear down the head quickly. Poor quality screws break or strip more easily. Rust or dirt in the screw head also causes stripping. Finally, working at an angle, not straight, can damage the screw.
Signs Of A Stripped Screw
The screwdriver slips out when turning the screw. The screw head looks rounded or worn down. It becomes hard or impossible to turn the screw. The screwdriver does not grip the screw head. The screw might spin freely without moving in or out. These signs show the screw is stripped and needs special care.
Preparation Before Removal
Preparing before removing a stripped screw with a drill is important. It helps you work safely and effectively. Taking time to get ready can prevent damage and frustration. Follow simple steps to set up properly and protect yourself.
Safety Precautions
Wear safety glasses to protect your eyes from flying debris. Gloves can help protect your hands from sharp edges. Ensure your work area is clean and well-lit. Keep bystanders, especially children, away from your workspace. Unplug the drill when changing bits or adjusting settings. Avoid loose clothing or jewelry that could get caught.
Setting Up Your Drill
Choose the right drill bit for the screw size and type. Use a drill with adjustable speed for better control. Set the drill to reverse mode to back out the screw. Check the drill’s battery or power cord for damage. Make sure the drill bit is tight in the chuck. Test the drill on scrap material to confirm settings.

Credit: www.amazon.com
Using A Drill To Remove A Stripped Screw
Using a drill to remove a stripped screw can save time and effort. It is a practical way to deal with screws that no longer grip a screwdriver. The drill helps grip the screw better and can pull it out carefully. Learning the right steps can make this task easier and prevent damage.
Selecting The Right Drill Bit
Choose a drill bit slightly smaller than the screw head. This size helps the bit grip the screw tightly. Avoid bits that are too large because they may damage the material around the screw. A good fit is key to removing the screw smoothly.
Drilling In Reverse
Set your drill to rotate backward. Drilling in reverse helps unscrew the stripped fastener. Slow and steady rotation allows the bit to catch the screw edges. This technique reduces slipping and protects the surface around the screw.
Applying Steady Pressure
Press the drill firmly but not too hard. Consistent pressure helps the bit stay in place. Too much force can break the screw or drill bit. Keep your hand steady and let the drill do the work. This careful approach improves the chance of success.
Alternative Methods With A Drill
Sometimes, a stripped screw does not come out with the usual methods. Using a drill offers alternative ways to remove it. These methods help create a better grip or use special tools. They make the removal process easier and faster. Below are two effective techniques using a drill.
Creating A New Groove
A drill can help make a new groove on the screw head. Use a small drill bit to carefully cut a straight line across the screw. This new slot lets you use a flathead screwdriver to turn it. Work slowly to avoid damaging the material around the screw. This method works best on screws with worn-out grooves.
Using A Screw Extractor Bit
Screw extractor bits are designed to remove stripped screws with a drill. First, attach the extractor bit to your drill. Drill into the stripped screw slowly. The bit will bite into the screw and help pull it out. These bits come in sets to fit different screw sizes. They work well on screws stuck deep inside materials.
Credit: www.homedepot.com
Tips To Prevent Stripped Screws
Stripped screws can cause delays and frustration during any project. Preventing stripped screws saves time and effort. Simple steps can help keep screws intact and easy to remove later.
Proper Screwdriver Use
Choose the right screwdriver for the screw head. Using the wrong size or type increases the risk of stripping. Apply steady pressure while turning the screw. Avoid twisting too fast or forcing the screwdriver. Turn screws slowly to maintain control and grip. Keep the screwdriver bit clean and in good condition. A worn or damaged bit slips more easily and strips screws.
Choosing The Right Screws
Select screws made for the specific material. Hard materials need tougher screws to prevent stripping. Use screws with heads that fit your tools well. Coated screws reduce friction and make driving easier. Longer screws offer better grip but require more care. Match screw size to the project to avoid damage. Proper screws reduce resistance and lower stripping chances.
Frequently Asked Questions
How Do I Remove A Stripped Screw With A Drill?
Use a drill bit slightly smaller than the screw head. Drill slowly to grip the stripped screw. Then, turn it counterclockwise to remove the screw without damaging the material.
What Drill Bit Works Best For Stripped Screws?
A left-handed drill bit is ideal for stripped screws. It drills and unscrews simultaneously. This bit grips the screw and helps remove it easily.
Can I Remove Stripped Screws Without Special Tools?
Yes, you can use rubber bands or pliers if no special tools are available. Place a rubber band over the screw head for grip or use pliers to turn the screw manually.
Is It Safe To Use A Drill On Stripped Screws?
Yes, it is safe if you use the right drill bit and low speed. Drilling carefully prevents damage to the surrounding material and helps remove the screw effectively.
Conclusion
Removing a stripped screw with a drill is easier than it seems. Use the right drill bit and go slowly for best results. Patience helps avoid damage to your project. Practice these steps to build your confidence. Soon, you will handle stripped screws without stress.
Keep your tools ready and stay calm. This skill saves time and frustration in many tasks. Try these tips next time a screw strips. You can do it!