If you’ve ever stood in front of your tool bench, squinting at a tap and wondering, “What size drill bit do I need for this 1/4-20 tap?”—you’re not alone. That question comes up a lot, especially for DIYers, mechanics, woodworkers, and even seasoned pros like myself. Getting the size wrong can mean stripped threads, broken taps, or a wasted piece of material—and nobody wants that.
I’ve spent the better part of two decades working with drills, taps, and just about every thread size you can think of. From custom automotive builds in the garage to large-scale steel fabrication jobs, knowing the correct drill bit size for each tap has saved me countless hours (and headaches). Trust me, I’ve broken enough taps in hardened steel to know the importance of doing it right the first time.
This guide is here to give you the exact drill bit size for a 1/4-20 tap, yes—but it’s also here to help you understand why it matters, how to adjust for different materials, and how to actually perform the tapping process safely and efficiently. Whether you’re working on a new woodworking jig, fixing a motorcycle, or setting up a machine part, I’ll walk you through it all in plain, easy-to-follow language—no engineering degree required (though it doesn’t hurt that I’ve got one myself).
So, let’s dive in and make sure you never second-guess your drill bit choice again.
Article Summary
Understanding the 1/4-20 Tap
What Does 1/4-20 Mean in Threading?

Let me break this down in simple terms. When you see “1/4-20,” it’s referring to the size and threading of a screw or bolt. The “1/4” means the outer diameter of the screw is one-quarter of an inch. The “20” refers to the number of threads per inch (TPI). This thread count is what we call a coarse thread in the world of fasteners.
Why does this matter? Because if you’re tapping a hole for a 1/4-20 bolt, your tap needs to match both the diameter and the thread pitch perfectly. If you get it wrong, your bolt either won’t fit, or worse—it might strip the threads.
I’ve worked on dozens of projects where threading tolerance was the difference between solid assembly and a shaky mess. Knowing what that “1/4-20” label means is the first step toward doing the job right. You can also find a great explanation of this sizing on ASME’s standards for screw threads if you’re ever curious about where the numbers come from.
This tap size is extremely common. You’ll find it used in everything from furniture hardware to automotive panels to machine parts. It’s one of those all-purpose thread sizes I always keep in my tap and die set.
UNC vs UNF Threads
Now let’s talk thread types. The 1/4-20 tap uses what’s called UNC, or Unified National Coarse threads. These are threads with fewer turns per inch and deeper grooves. UNC threads are more forgiving. They resist stripping and are easier to use in softer materials like aluminum, plastic, or even wood. That’s one reason I use them often in my DIY builds and on job sites.
On the other hand, UNF stands for Unified National Fine. A 1/4-28 tap, for example, is the fine-thread version of 1/4 inch diameter. These threads are tighter, have more threads per inch, and provide a stronger hold when you’re dealing with hard materials or high-stress connections—like in automotive engine assemblies.
Here’s a quick table I use to compare the two:
| Thread Type | Example Tap Size | Threads Per Inch (TPI) | Best Used For | Notes |
| UNC (Coarse) | 1/4-20 | 20 | Wood, soft metals, general use | Easier to tap, more durable in soft materials |
| UNF (Fine) | 1/4-28 | 28 | Hard metals, precision builds | Stronger thread hold, harder to tap |
I recommend using UNC taps like the 1/4-20 unless your project specifically calls for a fine thread. It’s simpler, faster, and easier to fix if you make a mistake.
Correct Drill Bit Size for a 1/4-20 Tap
Standard Drill Bit Size
For a 1/4-20 tap, the standard drill bit size is a #7 drill bit. That’s a decimal size of 0.201 inches. This size gives you the right amount of material left inside the hole for the tap to cut proper threads without too much resistance or breakage.
I learned early in my workshop days that using the wrong drill bit size—even by a small margin—can wreck your threads or snap your tap. A #7 bit gives just the right fit for steel, aluminum, and even softer plastics. It’s also the size recommended in most machinist reference guides, so it’s not just a guess—it’s based on precision and years of testing.
Here’s a simple tip: if you’re ever unsure, keep a drill bit and tap size chart nearby. It’s saved me many times when switching between thread types during big projects.
Drill Bit Size for Different Materials
Now, depending on the material you’re working with, you might need to tweak that size a bit. Harder metals like stainless steel or tool steel may require a slightly larger hole—something like a 13/64″ drill bit, which is 0.203 inches. That’s just enough to ease the load on your tap without weakening the threads too much.
On softer materials like wood or plastic, you can usually stick with the standard #7 bit. But if you’re working in fragile materials, you might actually want to start smaller and test-fit first. In my own builds, I often grab a piece of scrap from the same material to check tap fit before touching the final piece.
Here’s a comparison of sizes I often use:
| Material Type | Recommended Drill Bit | Decimal Size (inches) | Notes |
| Mild Steel / Aluminum | #7 | 0.201″ | Standard fit for clean threads |
| Stainless Steel | 13/64″ | 0.203″ | Reduces tap stress in harder metals |
| Plastic / PVC | #7 or test smaller | 0.201″ | Test on scrap first |
| Wood | #7 | 0.201″ | Works well for softwood and hardwood |
For reference, McMaster-Carr provides excellent charts on drill and tap pairings across materials, and I recommend checking them out if you work with a wide variety.
Metric Equivalents and Alternatives
What if you only have metric drill bits on hand? That’s a question I get a lot, especially from folks outside the U.S. or when you’re stuck on a Sunday and the hardware store is closed.
The closest metric drill bit to a #7 is 5.1 mm. That converts to about 0.2008 inches—very close to the 0.201″ you need for a 1/4-20 tap. In practice, I’ve used a 5.1 mm bit plenty of times when tapping with a 1/4-20 tap, especially on aluminum or plastic. It works just fine and threads hold well.
Here’s a quick comparison for clarity:
| Drill Bit Size | Type | Decimal Equivalent | Use for 1/4-20 Tap? |
| #7 | Imperial | 0.201″ | Yes (Standard) |
| 13/64″ | Imperial | 0.203″ | Yes (for harder metals) |
| 5.1 mm | Metric | 0.2008″ | Yes (close enough) |
If you’re switching between metric and imperial systems often, I recommend investing in a quality digital caliper. It’ll make sure your conversions are spot on. There’s a great guide here on drill size conversions if you want a deeper dive.
How to Tap a 1/4-20 Thread Correctly
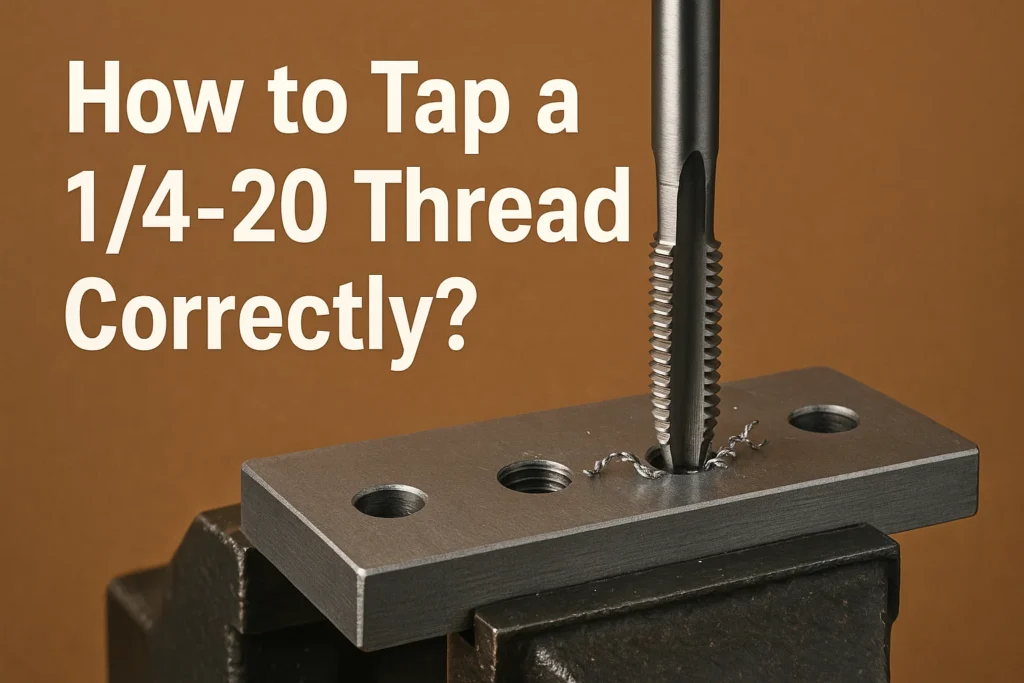
Step-by-Step Guide
Tapping a hole may sound simple, but doing it right can save you from broken taps, poor threads, and wasted material. Over the years, I’ve learned that rushing this process is a recipe for disaster. Here’s the method I follow every time:
- Mark and center punch your hole. This keeps the drill bit from walking and ensures your tap goes in straight.
- Drill the hole using a #7 bit. Make sure it’s straight and at the correct depth.
- Apply cutting fluid. This reduces heat and friction. I use Tap Magic or WD-40 for metals.
- Insert the tap slowly. Keep it straight—use a tap guide if you have one.
- Turn the tap clockwise. After every half turn, reverse a quarter turn to break the chips.
- Continue until you reach full depth. Then back the tap out carefully.
- Clean the hole. Remove chips using compressed air or a soft brush.
That’s it. Take your time, keep your tools sharp, and don’t force anything.
Tools You’ll Need
Whether I’m working on a steel frame or tapping threads in plastic, I always make sure I have the right tools within reach. Here’s my go-to list:
- #7 drill bit or 5.1 mm for metric users
- 1/4-20 tap (I recommend high-speed steel for metal work)
- Tap wrench for better control
- Cutting fluid (like Tap Magic or even vegetable oil for soft materials)
- Center punch and hammer
- Drill or drill press for accurate pilot holes
- Safety glasses and gloves
Having the right gear makes the job smoother and safer. I personally recommend buying quality tools from trusted brands like Irwin Tools or Starrett, which I’ve used for years on job sites and in the shop.
Safety Tips
Safety is often overlooked when tapping holes, but it shouldn’t be. A broken tap can cut your hand or ruin your workpiece. Here are a few simple but powerful tips I always follow:
- Wear safety glasses. Metal shavings can fly up when drilling or tapping.
- Clamp your workpiece. Loose parts can twist or spin.
- Don’t rush. Let the tap do the cutting. Forcing it can snap the tool.
- Use proper lubrication. This reduces heat and keeps the tap sharp.
- Back out often. Cutting threads creates chips that can jam up the tap.
You can find more essential tips on tool safety from sources like OSHA’s hand and power tools guide.
Conclusion
Getting the drill bit size right for a 1/4-20 tap is more than just knowing a number—it’s about understanding the full process. A #7 drill bit is the standard choice, but knowing when to use alternatives like 13/64″ or 5.1 mm can really make a difference, especially with harder or softer materials.
I’ve tapped thousands of holes across dozens of materials—from hardened steel to soft pine—and I can tell you this: preparation, patience, and the right tools are your best friends. Follow the steps I’ve laid out, use the safety tips I’ve shared, and you’ll avoid stripped threads and broken taps.
If you’re serious about quality threads, always keep a drill and tap chart handy, use sharp tools, and practice on scrap when you can. It’s the kind of habit that pays off every time.