If you’ve ever tried to drill into something with a dull bit, you know the struggle is real. I’ve been there—pressing harder, getting nowhere, and ending up with a smoking drill and a ruined workpiece. That’s when I realized it’s not about more force. It’s about sharper tools.
Let me walk you through how to sharpen a drill bit—the easy, do-it-yourself way. I promise, no complicated machinery, no confusing jargon. Just real talk, practical steps, and a whole lot of common sense.
Article Summary
- Why Drill Bits Go Dull (And Why It Matters)
- Tools You’ll Need to Sharpen a Drill Bit
- How to Know When Your Bit Needs Sharpening
- How to Sharpen a Drill Bit Using a Bench Grinder (Step-by-Step)
- How to Sharpen a Drill Bit Without a Grinder
- How Often Should I Sharpen My Drill Bits?
- Pro Tips for Drill Bit Sharpening
- What to Avoid When Sharpening Drill Bits
- Table: Sharpening Tool Comparison
- My Personal Experience with Sharpening
- How to Sharpen a Drill Bit with a Bench Grinder
- How to Sharpen a Drill Bit with an Angle Grinder
- FAQs: Quick Answers to Common Questions
- Final Thoughts: Sharpening is a Skill Worth Learning
Why Drill Bits Go Dull (And Why It Matters)
Drill bits wear down over time. It’s just how life works. Whether I’m drilling wood, metal, or even tile, heat and friction grind the edges down.
Here’s what happens when a bit is dull:
- Holes look messy and uneven
- You need to press harder (which strains your drill)
- Bits heat up faster and break easier
- The job takes way longer
Keeping bits sharp saves time, effort, and even your drill’s motor. It’s like keeping a knife sharp in the kitchen—you get cleaner cuts with less force.
Tools You’ll Need to Sharpen a Drill Bit
You don’t need a fancy workshop. I started sharpening bits with stuff I had lying around.
Basic Options:
- Bench Grinder (my go-to)
- File (good for light touch-ups)
- Drill Bit Sharpening Tool (great for beginners)
- Angle Grinder (not ideal but possible with care)
If you have a bench grinder, you’re golden. That’s the easiest and most efficient way.
Optional Tools:
- Safety glasses (protect those eyes!)
- Gloves (for heat and grip)
- Permanent marker (more on that later)
- Clamp or vise (to hold the bit steady)
How to Know When Your Bit Needs Sharpening
Sometimes it’s obvious. Other times, it sneaks up on you. Here’s how I know it’s time:
- The bit squeals or smokes while drilling
- I see burn marks on wood or metal
- The bit skates across the surface before biting in
- I’m pushing harder than usual
And let’s be real—if you can feel the struggle, it’s probably dull.
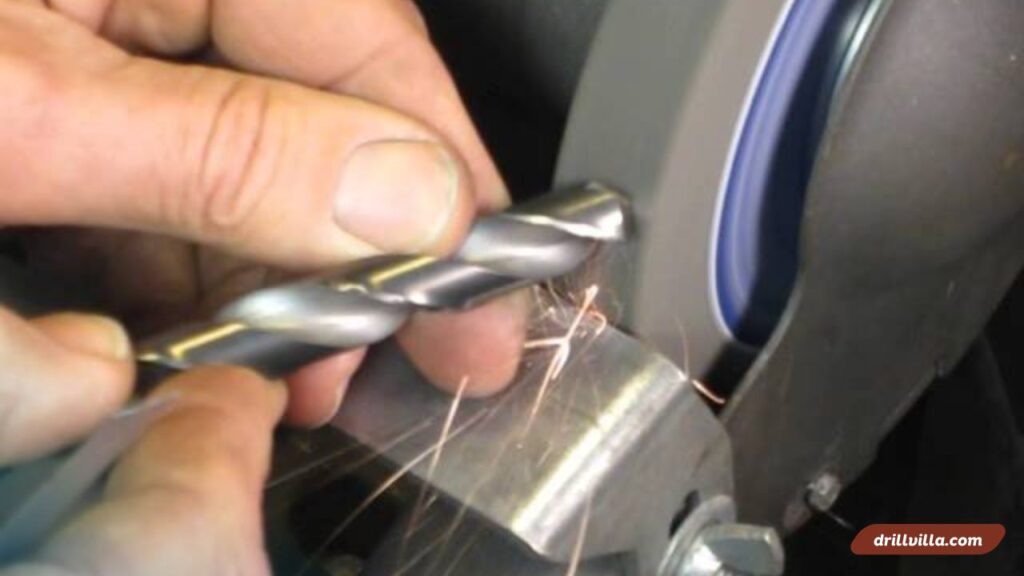
How to Sharpen a Drill Bit Using a Bench Grinder (Step-by-Step)
This is my favorite method. It’s fast and works for almost any bit.
Step 1: Safety First
Put on safety glasses and gloves. Grinders can spark, and bits get hot fast.
Step 2: Mark the Cutting Edge
Use a permanent marker to mark the cutting edges of the drill bit. This helps me keep track of what I’m grinding off.
Step 3: Hold at the Right Angle
This part took some practice. I hold the bit at about a 60-degree angle to the grinding wheel. That keeps the original shape intact.
Step 4: Grind in Short Bursts
I gently press the bit into the grinder for a second or two, then pull back. Repeat in small bursts. You don’t want to overheat the bit.
Step 5: Match Both Sides
This is key. Each cutting edge should be the same length and angle. Uneven sides = wobble and bad holes.
Step 6: Check the Tip
The cutting edges should meet at a clean point. No chips, no flat spots. If it looks symmetrical and sharp—you’re done!
How to Sharpen a Drill Bit Without a Grinder
No grinder? No problem. I’ve done it the old-school way too.
Option 1: Use a Metal File
Great for light touch-ups or if you’re in a pinch.
How I do it:
- Clamp the bit in a vise
- Use a flat file to gently sharpen the edge
- Work one side, then match the other
It takes longer but works surprisingly well on small bits.
Option 2: Buy a Drill Bit Sharpener Tool
There are sharpening jigs you can attach to a bench grinder or use with a Dremel. They hold the bit at the correct angle for you.
Pros:
- Beginner-friendly
- Keeps angles consistent
Cons:
- Can be slow
- May not fit all bit sizes
How Often Should I Sharpen My Drill Bits?
Here’s my general rule:
- Wood bits – every 10–15 uses
- Metal bits – every 5–10 uses
- Masonry bits – as needed (they’re harder to sharpen)
If you’re drilling clean and fast, you’re good. If you’re struggling, time to sharpen.
Pro Tips for Drill Bit Sharpening
Over time, I’ve picked up a few tricks that really help:
- Cool the bit in water between grinds to prevent overheating
- Use a jig if you’re new—it helps maintain the angle
- Practice on old bits before trying to sharpen your favorites
- Label sharp bits with a dot of paint so you know they’re ready to go
What to Avoid When Sharpening Drill Bits
Trust me—I’ve made all these mistakes:
- Grinding too much and ruining the angle
- Making one side longer than the other
- Sharpening without safety gear (bad idea)
- Overheating the bit (leaves it brittle)
Take your time. Once you get the rhythm, it’s actually kind of relaxing.
Table: Sharpening Tool Comparison
| Tool Type | Best For | Difficulty | Cost | Portability |
|---|---|---|---|---|
| Bench Grinder | Regular use, all sizes | Medium | $$ | Low |
| File | Small bits, light jobs | Easy | $ | High |
| Drill Bit Sharpener | Beginners | Very Easy | $$ | Medium |
| Angle Grinder | Heavy-duty bits | Hard | $$ | Medium |
My Personal Experience with Sharpening
I still remember the first time I sharpened a bit. I was mid-project, and my last good bit went dull halfway through. Rather than run to the store, I tried sharpening it on my bench grinder.
It wasn’t perfect, but it worked. The next hole drilled cleaner. And just like that—I was hooked.
Since then, I’ve saved a bunch of money and learned to appreciate the quiet joy of a sharp edge. It’s a small win, but one that makes every DIY job smoother.
How to Sharpen a Drill Bit with a Bench Grinder
The first time I tried sharpening a drill bit with a bench grinder, I was nervous. I thought I’d ruin it. But after a few tries, I got the hang of it — and now it saves me time and money.
Here’s exactly how I do it:
What I Use
- A bench grinder
- A pair of safety glasses
- A bowl of water (to cool the bit)
- A steady hand
Step-by-Step Guide
- Put on safety gear
Safety first — I always wear glasses. Sparks fly when sharpening metal, and I don’t want one in my eye. - Hold the drill bit at the right angle
I hold the bit at a 60-degree angle to the grinding wheel. That’s the sweet spot. Too high or too low, and I risk dulling the edge even more. - Use short, gentle strokes
I touch the bit to the wheel for just a second or two at a time. No pressure. I just let the wheel do the work. - Dip it in water often
Metal heats up fast. I dip the bit into cool water every few seconds. If it gets too hot, it can lose its strength. - Match both sides
This part took me the longest to learn. Both sides of the bit need to be the same. If one side is shorter, the bit won’t drill straight.
My Pro Tip
I mark one side of the bit with a marker before I start. That way, I know which side I’ve already sharpened — and I can match the other side better.
Once I finish, I test it on a scrap piece of wood. If it drills clean and fast, I know I did it right.
How to Sharpen a Drill Bit with an Angle Grinder
I once broke my bench grinder, and all I had was an angle grinder. I didn’t think I could use it for sharpening. But to my surprise, it worked — with a bit of care.
Here’s how I sharpen a drill bit with an angle grinder:
What I Use
- Angle grinder with a metal grinding disc
- A bench vise (to hold the bit)
- Safety glasses and gloves
- A marker
- Water for cooling
My Simple Process
- Clamp the bit tight
I always use a vise. Holding the bit by hand with an angle grinder is risky. I clamp it so only the tip sticks out. - Mark the cutting edge
A marker helps me focus. I mark the edge I want to sharpen so I don’t lose my spot. - Hold the grinder steady
I bring the grinder in gently and aim for that same 60-degree angle. I use light, quick passes to avoid grinding off too much. - Keep checking
I take my time. After each pass, I check the edge and compare both sides. If one side is longer, I trim it slowly until they match. - Cool it down
Just like with a bench grinder, I dip the bit in water every few passes. Too much heat can damage the bit.
What I Learned
Sharpening with an angle grinder takes more patience, but it works when you’re in a pinch. The key is going slow and keeping your hands steady.
I wouldn’t use this method every time, but it’s saved me more than once when I didn’t have access to a bench grinder.
FAQs: Quick Answers to Common Questions
Q: Can I sharpen titanium or cobalt drill bits?
A: Yes, but they’re harder and require a good grinding wheel.
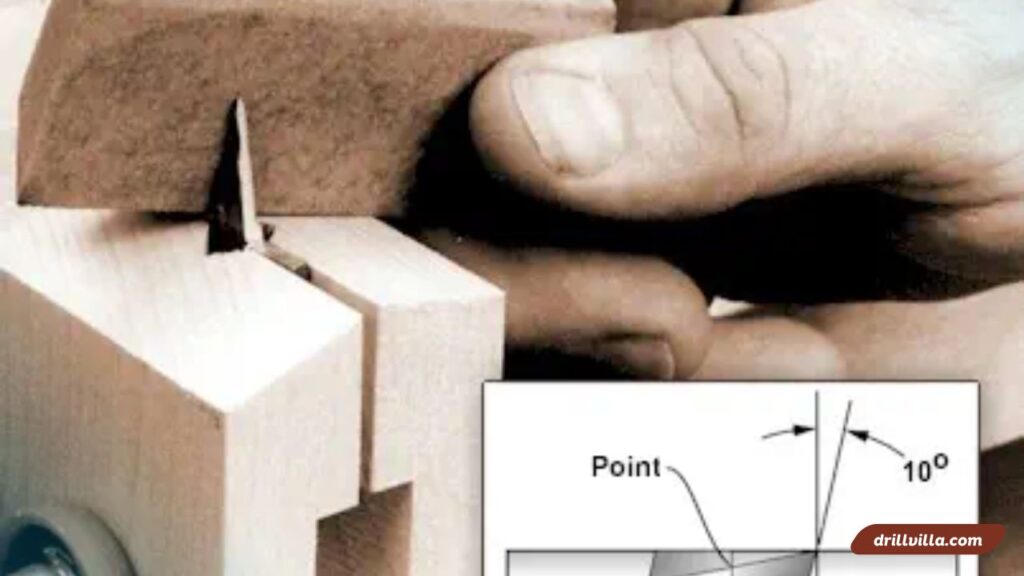
Q: What’s the best angle for sharpening a bit?
A: Usually 59° to 60°, but check your bit type to be sure.
Q: How many times can I sharpen a bit?
A: Until it’s too short to use safely. Most bits can be sharpened 3–5 times.
Q: Is buying a drill bit sharpener worth it?
A: If you sharpen often or struggle with angles—yes!
Q: Why is one side cutting more than the other?
A: Likely uneven sharpening. Make sure both sides are the same angle and length.
Final Thoughts: Sharpening is a Skill Worth Learning
Learning how to sharpen a drill bit changed the way I work. It’s like discovering a secret tool hack that saves time, money, and headaches. And once you learn it, it’s yours forever.
If you’ve got dull bits lying around, give sharpening a try. Worst-case? You learn something. Best-case? You’ll drill better, faster, and feel like a total pro.
Grab your grinder, or your file, and let’s turn those dull bits into cutting machines. Trust me—your future self (and your drill) will thank you.