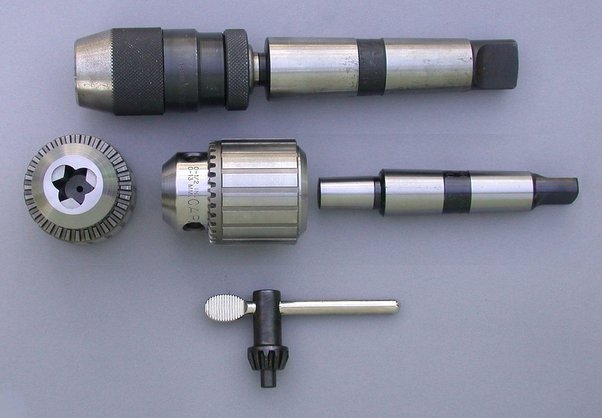
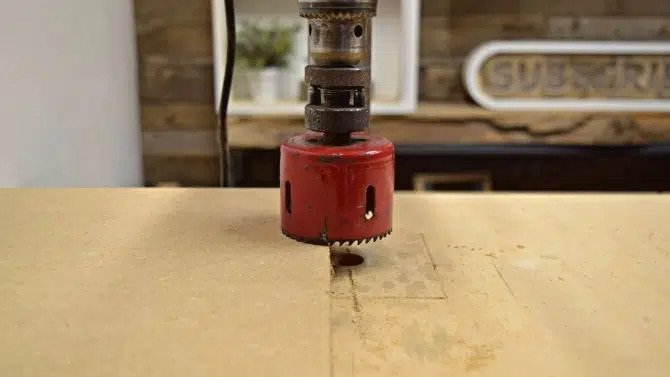
A chuck of a drill press is very important because it enables the tool to function and perform properly. It’s the most frequent problem when the chuck gets stuck on your drill bits. Even sometimes, the chuck gets worn out and damaged.
And when anything happens like this with the drill press chuck, you should immediately remove it. But how to remove drill press chuck?
Unless you know the entire process perfectly, your drill press can be permanently damaged. In this article, we’ll share the best two easy methods to remove the chuck from your drill press. To learn the process, stay with us.
Article Summary
Chuck of A Drill Press

A chuck is located around the shanks of the drill bit, which is tightened and secured with a clamp (three-jawed). Chuck in a drill press can be of several types, for example, torqued chuck, keyed, and keyless. In this case, you’ll require a wrench while removing the chuck.
Recognizing when your drill press chuck needs to be cleaned and removing it from the drill press are two completely different tasks. So, you must know the chuck removal process and cleaning methods as well.
A drill chuck comes with a capacity of 13mm or less. Sometimes, it comes with 25mm, and this capacity is greater but rare. The drill chuck with 25mm is highly capable to hold drill bits and also other rotary tools.
When You Remove the Chuck?
There can be several reasons because of why you need to remove the chuck from your drill press machines. The most fundamental reason can be the chuck faults. If the chuck is out of order and doesn’t work, you must replace it soon. So, here you need to remove the chuck first.
Again, it’s regular maintenance to clean your drill press chuck after a certain period. So, when you need to clean it, you must remove it. Furthermore, if the chuck size doesn’t match the drill press size. Sometimes replacing the chuck get a mess with the chuck size. If it happens, you must remove the chuck and match the accurate size.
How To Remove Drill Press Chuck?
You can remove the chuck with two different methods. And we’ll help you learn both these methods so that you can use the one that seems trouble-free. Here these are-
Method 1: Chuck Removal Tool
The effortless way to remove the chuck from a drill press is by using a chuck removal tool. It’s a metal wedge that comes in handy in terms of the different size ranges. This tool can change the size according to your drill press and your remaining chuck.
If you’re unsure about your machine’s size, take the removal tool in a few sizes. Getting several sizes will prevent confusion, and you can easily match the correct size. Once you match the size, wedge the tool in a slot right above the drill press chuck.
You must be padding properly underneath your machine’s chuck to prevent damage. Using a hammer, you can easily remove the chuck from the machine. Now, if you need to clean or replace it, you can.
Method 2: Hardwood/ Metal Piping
You can use this method without a chuck removal tool at home. In this strategy, you need either hardwood or metal piping. Angle the piece of that metal piping or the hardwood piece right above the chuck.
Now take a rubber hammer, or a wooden mallet (can also work) if you have no rubber hammer. Hit the metal pipe or the hardwood with any of these substances (rubber hammer or mallet). Keep hitting until your drill press chuck is removed. Once again, double check you’ve padded underneath the chuck properly to avoid damage.
Tips to Prevent Chuck Damage

Being conscious will help you prevent your drill press chuck damage. So, it will also save you money. Let’s check out how you can prevent the damage:
- Don’t apply any speed level that doesn’t match your machine and the materials you apply to. You should ensure a correct speed level. You can check out the instruction before you set the speed
- Keep your machine clean. Also, inspect if there is any damage and repair soon as you inspect it
- Do not remove the chuck while the machine is on. Turn off the machine before you remove the chuck
- Ensure no debris gets into the chuck because it can damage it even before its life span. In this case, you can keep the working surrounding clean
- During your operation, check whether the chuck key is removed. If not, remove it
- And, of course, you shouldn’t force the machine to stop. Let it stop automatically. Forcing it will decrease its durability
Frequently Asked Questions
What’s the function of a chuck in a drill press?
The drill chucks help hold the drills and allow faster drill bit changes. Since the chucks are spindle-mounted technology, they are frequently linked to the drill press’s spindle. Also, to get precise hole shapes, chuck plays a vital role.
Which tools are perfect for getting support from Chuck?
Standard drills are designed to clamp in chunks perfectly.
What drill chuck size is the best?
The most common chuck size is ⅜ inches. This chuck size is ready to fit the majority of the drill bits. But if you choose for a heavy-duty application, the chuck size should be ½ inch. On the other hand, light-duty applications require a drill chuck size of ¼ inches fixed.
Why my drill chuck doesn’t operate properly?
Make sure the chuck is in the proper alignment and grips the bits securely. If it’s not in the right alignment or stiff in any way, it won’t perform well and disturb your work.
To Wrap Up
Not only you need the drill chuck to remove when it’s damaged. You need to remove it for various purposes. And this is where you must know how to remove drill press chuck?
Once you learn the method, you can do it whenever you need. Remember, having a well-maintained drill press means you have a tremendously key advantage for all your woodworking purposes. So, keep it free from faults to get outstanding performance.