Drilling a hole in an oyster shell might seem tricky. But it’s quite simple with the right tools and steps.
Whether you are crafting jewelry or creating unique art pieces, knowing how to drill a hole in oyster shells can open up a world of creative possibilities. Oyster shells are delicate, and drilling them requires care and precision. In this guide, we’ll walk you through the process, ensuring you get a perfect hole without cracking the shell.
From selecting the right drill bit to handling the shell properly, we’ll cover everything you need to know. Get ready to transform those beautiful shells into stunning pieces with this easy-to-follow tutorial.
Credit: www.pillarboxblue.com
Article Summary
Introduction To Drilling Oyster Shells
Drilling holes in oyster shells can be easy. Gather your tools, mark the spot, and drill slowly to avoid cracks. Perfect for making jewelry or crafts.
Drilling a hole in an oyster shell may seem like a daunting task, but with the right tools and techniques, it becomes quite manageable. You might be wondering why anyone would want to drill holes in oyster shells. Well, this process serves various purposes, from creating beautiful jewelry to making unique art pieces. Let’s dive into the details! ###Purpose And Applications
Drilling holes in oyster shells can serve multiple purposes. You can create stunning pieces of jewelry like pendants, earrings, and bracelets. Another application is in crafting. Oyster shells can be used to make decorations for your home or as unique gifts. Additionally, drilled oyster shells can be used in educational projects to help students learn about marine life. The applications are endless! ###Safety Precautions
Safety should be your top priority when drilling oyster shells. Always wear safety glasses to protect your eyes from debris. Use a mask to avoid inhaling dust, which can be harmful. Make sure your workspace is well-ventilated and keep a first-aid kit handy for any minor injuries. Are you excited to start your project? With these tips, you can safely and effectively drill holes in oyster shells. So, gather your materials, follow safety guidelines, and unleash your creativity. What will you create today?
Credit: www.tiktok.com
Tools And Materials Needed
Drilling a hole in an oyster shell requires a drill, a small diamond drill bit, water, and a clamp. Ensure the shell stays wet to prevent cracking.
Drilling a hole in an oyster shell can be a fun and creative activity, especially if you want to make jewelry or crafts. However, to ensure you get the job done safely and efficiently, you need the right tools and materials. Let’s dive into what you’ll need.Essential Tools
First, you will need a rotary tool or a Dremel. These tools are perfect for drilling through tough materials like oyster shells. They offer precision and control, making the drilling process smooth. A diamond-tipped drill bit is crucial. Oyster shells are hard and abrasive, and a regular drill bit won’t cut it. Diamond-tipped bits are durable and can drill through the shell without breaking it. You’ll also need a clamp or a vise to hold the shell steady. This keeps the shell from slipping and ensures your safety while drilling.Additional Supplies
Having a bowl of water nearby is very helpful. Drilling can generate heat, and dipping the shell in water keeps it cool and prevents cracking. A marker or pencil to mark the exact spot where you want to drill is essential. This helps you be precise and avoid mistakes. Consider using safety goggles and gloves. Protecting your eyes and hands is important when working with sharp tools and hard materials. Finally, keep some sandpaper handy. After drilling, you might need to smooth out any rough edges around the hole. Do you have any other tools that have worked well for you in similar projects? Sharing your experience could help others in their creative endeavors.Preparing The Oyster Shell
Drilling a hole in an oyster shell requires a steady hand and the right tools. Start by marking the spot with a pencil. Then, use a small drill bit to carefully create the hole.
Drilling a hole in an oyster shell can be a fun and rewarding project, whether you’re looking to create jewelry, decorations, or other crafts. However, before you can start drilling, it’s important to properly prepare the shell. This step is crucial for ensuring a smooth drilling process and preventing any damage to the shell. ###Cleaning The Shell
First, clean the oyster shell thoroughly. This step is vital to remove any debris, algae, or barnacles that may be attached. You can start by soaking the shell in warm, soapy water for about 30 minutes. This helps to loosen any stubborn dirt. Next, use a soft brush to scrub the shell gently. Be sure to reach all the nooks and crannies, but avoid using too much force to prevent breaking the shell. Once cleaned, rinse the shell under running water and dry it completely. A dry shell is easier to handle and drill. ###Marking The Drill Point
After cleaning, the next step is to mark the spot where you want to drill the hole. This ensures precision and helps you avoid mistakes. Use a pencil or a fine-tip marker to make a small dot on the shell. If you’re making jewelry, position the hole close to the edge but not too close to prevent cracking. Consider using a template or a ruler to make multiple, evenly spaced holes. This technique is especially useful for creating consistent patterns. Take a moment to double-check your markings. This simple step can save you a lot of hassle later on. Preparing the oyster shell properly sets the foundation for a successful drilling project. Have you ever tried drilling into delicate materials before? How did you ensure they didn’t break?Setting Up Your Work Area
Drilling a hole in an oyster shell requires a well-organized workspace. This ensures safety and efficiency. Proper setup prevents accidents and makes the task easier. Follow these steps to set up your work area correctly.
Choosing A Workspace
Select a flat, sturdy surface. A workbench or table works best. Ensure good lighting. Natural light or a bright lamp is ideal. Choose a quiet, distraction-free area. This helps you focus on the task.
Organizing Tools And Materials
Gather all necessary tools before starting. You need a drill, various drill bits, safety glasses, and gloves. Lay tools out in an orderly manner. Keep them within easy reach. Organize materials like oyster shells and a towel. This helps avoid interruptions during drilling.
Prepare a container for shell debris. This keeps your workspace clean. Have a water source nearby. Water helps cool the drill bit and shell. Finally, double-check your setup. Ensure everything is in place before drilling.
Drilling The Hole
Drilling a hole in an oyster shell can be a fun and creative project. Whether you’re making jewelry, ornaments, or other crafts, the key is to approach the task carefully. Let’s dive into how you can secure the shell and use the drill effectively.
Securing The Shell
Before you start drilling, it’s essential to secure the oyster shell properly. This helps prevent the shell from slipping and ensures a clean hole.
Use a small clamp to hold the shell in place. Make sure the shell is positioned on a sturdy surface. You can place a soft cloth or rubber mat underneath to prevent scratches.
If you don’t have a clamp, you can use a piece of non-slip shelf liner. Place the liner on your work surface, then set the shell on top. This method adds enough friction to keep the shell steady.
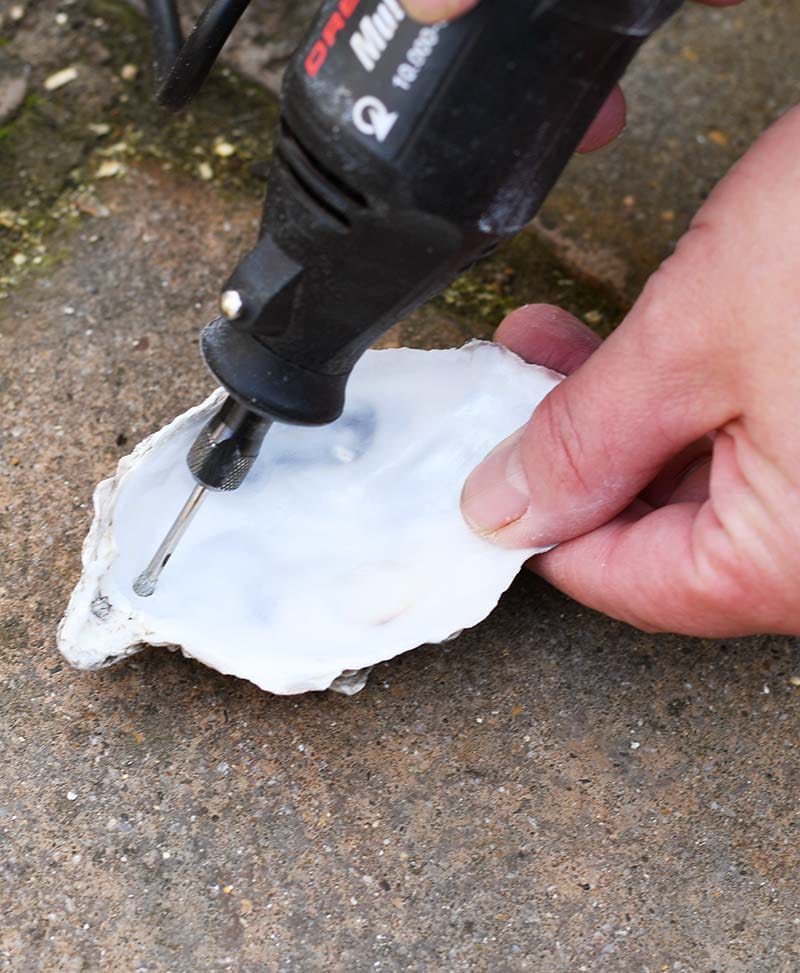
Using The Drill
Now that your shell is secure, it’s time to grab your drill. A rotary tool with a small drill bit works best for this task.
Start by marking the spot where you want the hole. Use a pencil or a small dot of marker. This gives you a clear target and helps prevent mistakes.
Hold the drill perpendicular to the shell. Begin drilling at a slow speed. Apply gentle, consistent pressure. Too much force can crack the shell.
As you drill, make sure to keep the area wet. Use a spray bottle or a damp sponge. The water reduces friction and keeps the drill bit cool.
Once you’ve drilled through the shell, lift the drill away slowly. Check the hole and clean any rough edges with sandpaper. This ensures a smooth finish.
Drilling holes in oyster shells can be rewarding. It requires patience and precision. Have you ever tried a similar project? What tips do you have for fellow crafters? Share your thoughts in the comments below!
Finishing Touches
After you’ve successfully drilled a hole in your oyster shell, it’s crucial to focus on the finishing touches. This ensures not only a polished look but also enhances the durability and safety of your project. Let’s dive into the essential steps to perfect those final details.
Smoothing The Edges
Smoothing the edges is vital to avoid any sharp areas that can cause injury. Use a fine-grit sandpaper to gently sand around the drilled hole. This will remove any rough spots and make the hole smooth to the touch.
Holding the shell firmly, gently rub the sandpaper in a circular motion around the hole. Be patient and thorough, as rushing can lead to uneven edges. If you have access to a Dremel tool with a sanding attachment, this can speed up the process considerably.
I once neglected this step, and the sharp edge of the hole snagged on my clothing. Lesson learned—never skip the smoothing process! Have you ever faced similar issues with rough edges? Take your time here, and your future self will thank you.
Cleaning Up Debris
Drilling a hole can create a lot of debris, including tiny shell fragments and dust. Cleaning up thoroughly ensures your final product looks neat and professional. Use a small, soft brush to sweep away any loose particles from the drilled area.
A damp cloth can also be effective in wiping away residual dust. If the debris is stubborn, a quick rinse under water can help. Just make sure to dry the shell completely afterward to avoid any moisture-related issues.
One time, I skipped the cleaning step and ended up with shell dust everywhere. It made the shell look dull and unappealing. Don’t make the same mistake—clean up thoroughly for a pristine finish. Have you ever noticed how a clean workspace can change your entire project outcome? It’s worth the extra effort.
By paying attention to these finishing touches, you ensure your oyster shell project not only looks great but is safe and durable. What other tips do you have for achieving that perfect finish? Share your thoughts and experiences in the comments below!
Common Mistakes To Avoid
Drilling holes in oyster shells can be tricky. Many people make common mistakes that could damage the shell or cause injury. By avoiding these errors, you can drill perfect holes every time.
Applying Too Much Pressure
One common mistake is applying too much pressure. Oyster shells are delicate. Too much force can crack or shatter the shell. Use gentle pressure and let the drill do the work. A steady hand ensures a clean hole.
Using The Wrong Drill Bit
Another mistake is using the wrong drill bit. Not all bits are suitable for oyster shells. Use a diamond-tipped or carbide drill bit. These are designed for hard materials. The right bit prevents damage and makes drilling easier.
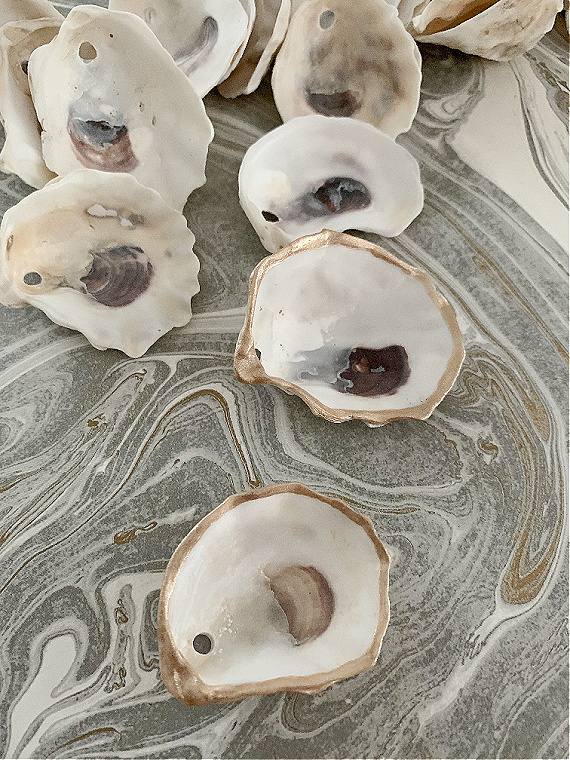
Creative Uses For Drilled Oyster Shells
Drilled oyster shells open up a world of creative possibilities. Their natural beauty and unique shapes add charm to various projects. Whether it’s for jewelry or home decor, these shells can enhance your creations.
Jewelry Making
Drilled oyster shells make stunning jewelry pieces. Their iridescent surfaces catch the light beautifully. You can create necklaces, earrings, or bracelets. Combine them with beads or gemstones for added flair. Shell jewelry stands out due to its organic appeal.
Personalize your jewelry by selecting shells with unique patterns. Each shell tells a story. Mixing different sizes and colors creates visual interest. Shells are lightweight, making them comfortable to wear.
Home Decor
Drilled oyster shells can transform your home decor. Use them to create wall art or wind chimes. Their natural look blends well with coastal or rustic themes. Glue shells to picture frames for a beachy touch.
Shells also work well in centerpieces. Fill a clear vase with shells and candles. Create shell garlands for outdoor spaces. Their versatility makes them perfect for various decor projects. Drilled shells add a unique and personal touch to your home.
Care And Maintenance
Drilling holes in oyster shells can be a rewarding and creative activity. However, to keep your drilled shells and tools in top condition, care and maintenance are crucial. Let’s dive into some practical tips to help you maintain the quality of your shells and tools.
Storing Drilled Shells
After drilling, it’s important to store your oyster shells properly to avoid damage. Place them in a padded container to protect from accidental chipping. A fabric-lined box or a container with bubble wrap works well.
Ensure the container is kept in a dry place. Moisture can lead to mold growth or make the shells brittle. Consider adding silica gel packets to absorb any excess moisture.
Organize shells by size or project type. This makes it easier to find the right shell when you need it and prevents unnecessary handling that might cause damage.
Maintaining Tools
Clean your drill bits and tools after each use. Oyster shells can leave behind residue that can dull the bits. Use a soft brush to remove debris and rinse with water if needed.
Sharpen your drill bits regularly. A sharp bit makes cleaner holes and reduces the risk of cracking the shell. You can use a bit sharpener or take them to a professional if you’re unsure how to sharpen them yourself.
Store your tools in a dry, dust-free environment. Rust can quickly form on metal tools if they are exposed to moisture. Keep them in a tool chest with a desiccant pack to keep them in pristine condition.
Remember, the longevity of your tools and the quality of your drilled shells heavily depend on how well you care for and maintain them. Have you ever neglected a tool and regretted it later? Share your experience in the comments below!
Credit: pleasureinsimplethings.com
Frequently Asked Questions
What Is The Best Drill Bit For Oyster Shells?
The best drill bit for oyster shells is a carbide-tipped or diamond-coated bit. These materials effectively penetrate hard shells without cracking.
What Kind Of Drill Bit Do You Use For Seashells?
Use a small, sharp carbide or diamond-tipped drill bit for seashells. These bits prevent cracking and ensure precision.
How To Put A Hole In A Shell Without A Drill?
Use a nail and hammer to gently tap a hole into the shell. Alternatively, employ a needle or pin to carefully create a hole.
How To Make A Hole In A Thin Shell?
Use a sharp needle or small drill bit. Apply gentle pressure and rotate to create the hole.
Conclusion
Drilling a hole in an oyster shell can seem challenging. But with the right tools and steps, it’s doable. Start with a clean, dry shell. Use a small drill bit. Go slow to avoid cracks. Practice on a few shells before your final project.
Safety is important, so wear goggles and gloves. With patience, you’ll achieve great results. Now, you can create beautiful jewelry or crafts. Enjoy your new skill and happy crafting!