Drilling acrylic seemed easy at first—until I ruined my first sheet.
I’ll never forget the “crack” sound that echoed in my garage like I’d snapped a glass window. That was the moment I realized: drilling acrylic is not like drilling wood or metal. You need a bit of finesse, the right tools, and a little know-how. So, I rolled up my sleeves, did some trial-and-error, talked to pros at the local hardware store, and found a way that works.
In this guide, I’ll walk you through how to drill acrylic without cracking it, melting it, or giving yourself a headache. I’ll keep it simple, share my hard-earned tips, and maybe even make you chuckle along the way.
Article Summary
- What Is Acrylic and Why Is It Tricky to Drill?
- Tools You’ll Need to Drill Acrylic
- Quick Safety Tips Before You Begin
- 📍 Step-by-Step: How to Drill Acrylic Without Cracking It
- Drilling Different Types of Acrylic
- Common Mistakes I’ve Made (So You Don’t Have To)
- Real-Life Example: My First Acrylic Wall Shelf
- Acrylic Drill Bit Comparison Table
- How to Drill Acrylic Sheet Without Cracking
- What Is the Best Drill Bit for Acrylic?
- FAQs: How to Drill Acrylic
- Final Thoughts: Drilling Acrylic Doesn’t Have to Be a Nightmare
What Is Acrylic and Why Is It Tricky to Drill?
Acrylic—also called plexiglass or PMMA (polymethyl methacrylate)—is a tough, clear plastic that looks like glass but is way lighter and more impact-resistant.
But here’s the catch:
- It’s brittle—so it cracks if you use the wrong pressure or speed.
- It’s sensitive to heat—too much heat from the drill can melt it.
- It chips easily at the edges if you rush things.
That’s why drilling acrylic requires a calm hand and a few smart techniques.
Tools You’ll Need to Drill Acrylic
Let’s start with what you need. I learned the hard way that grabbing just any drill bit doesn’t cut it.
Here’s what’s worked best for me:
Basic Tool List
| Tool | Why You Need It |
|---|---|
| Electric drill (variable speed) | You’ll want to control the speed for best results |
| Acrylic drill bits or modified bits | These are less aggressive and don’t crack acrylic |
| Masking tape or painter’s tape | Helps prevent chipping and cracking |
| Clamps | To secure your acrylic sheet |
| Safety glasses | Protect those eyes! |
| Wooden backing board | Supports the acrylic and prevents blow-out |
| Water or lubricant spray | Keeps the drill bit cool |
Optional (but helpful):
- Step drill bit (for larger holes)
- Center punch or sharpie
- Sandpaper (fine grit) for smoothing edges
Quick Safety Tips Before You Begin
I always say: better safe than sorry. Drilling might look harmless, but one slip can ruin your project—or your hand.
- Wear safety goggles: Acrylic chips can fly fast.
- Work in a well-lit space: You’ll want to see clearly.
- Secure your material: Never try to hold it down with your hand while drilling.
📍 Step-by-Step: How to Drill Acrylic Without Cracking It
This is the process I follow every time now—and it hasn’t failed me yet.
🔹 Step 1: Mark Your Drill Spot
Use a sharpie or a center punch to mark exactly where you want the hole.
If I’m being honest, I used to just “eyeball it.” Big mistake. I’ve learned that precise marking saves a lot of cleanup later.
💡 Tip: If you use a center punch, go gentle. You don’t want to crack the acrylic before even starting.
🔹 Step 2: Tape Over the Spot
Place a small piece of masking tape over the drilling area.
Why? It does three things:
- Helps the bit grip instead of skating around
- Reduces chipping
- Gives you a visible surface to mark on
It’s a tiny step that makes a big difference.
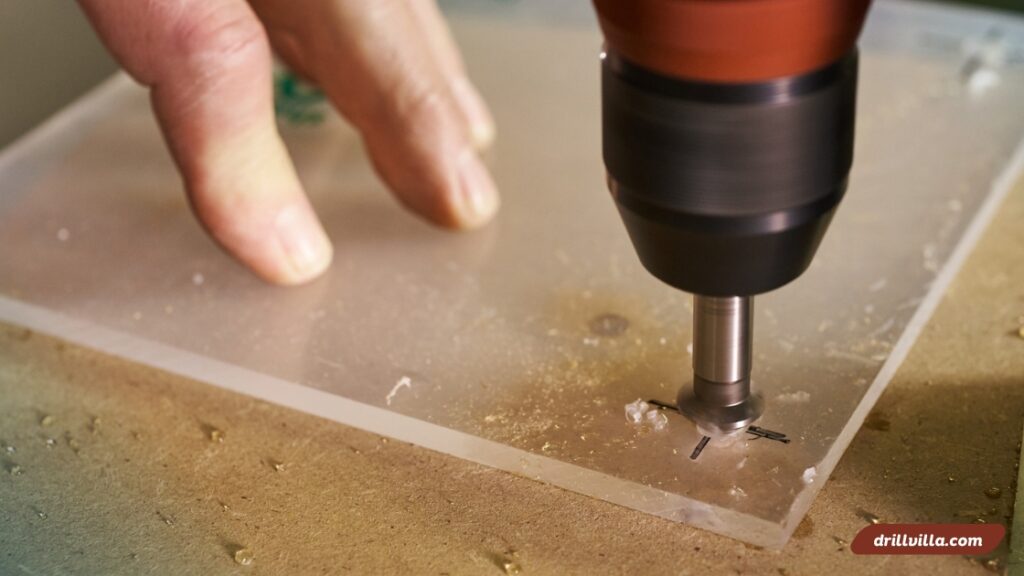
🔹 Step 3: Clamp It Down
This is where I had a facepalm moment once—I tried to drill without clamping, and the sheet spun like a helicopter blade.
Use clamps to secure the acrylic to a wooden backing board. That backing is your safety net—it prevents the bit from punching through too hard and cracking the bottom side.
🔹 Step 4: Choose the Right Bit
If you’re using a standard twist drill bit, you can modify it slightly by dulling the cutting edge with a sharpening stone. Or, better yet, use an acrylic drill bit designed for plastics.
💬 I invested in a set of plastic-specific bits after my second cracked sheet. Game changer.
🔹 Step 5: Drill Slowly and Gently
Now, time to drill!
- Set your drill to low speed. I usually keep mine around 500–1000 RPM for ⅛” to ¼” holes.
- Apply light pressure. Let the bit do the work.
- Back the drill out every few seconds to clear chips and cool the bit.
🚫 Avoid pressing too hard. That’s how heat builds up—and melted acrylic smells terrible, trust me.
🔹 Step 6: Use Water or Lubricant
For thicker sheets or larger holes, I spray a little water or dish soap solution. It cools the drill bit and prevents melting.
Tip: Don’t soak the acrylic—just a quick mist will do.
🔹Step 7: Clean Up the Hole
Once the hole is through, you might have rough edges. I use a countersink bit or gently sand it with fine-grit sandpaper (around 400–600 grit).
That way, cables or screws can go through cleanly, and it looks more polished.
Drilling Different Types of Acrylic
Not all acrylic is the same. Here’s what I’ve learned from working with various kinds.
| Type | Description | Drilling Tips |
|---|---|---|
| Cast Acrylic | Higher quality, more expensive | Less prone to cracking, drills more cleanly |
| Extruded Acrylic | Cheaper, flexible | More likely to melt or gum up, drill slower |
| Colored or Frosted | Same material, just tinted or textured | Tape helps prevent surface marks |
If you don’t know which one you have, try drilling a test hole on a scrap piece first.
Common Mistakes I’ve Made (So You Don’t Have To)
Here’s a quick confession list—because if I can prevent you from making these blunders, it’s a win:
- Using a metal bit at high speed → Melted edges and smoke
- Forgetting the backing board → Cracked underside
- Holding the acrylic by hand → Spinning danger
- Skipping water/lubricant → Heat buildup and gumming
- No tape → Surface chips and scratches
Real-Life Example: My First Acrylic Wall Shelf
A while back, I wanted to make a floating acrylic shelf for my plants. I cut the sheet perfectly, but when I drilled near the corner—snap!—a long crack formed across the entire piece.
Second try, I followed the steps I’ve shared above:
- Marked with a center punch
- Used painter’s tape
- Clamped the acrylic with a wood backing
- Used a step bit on low speed
- Sprayed a little water
Perfect hole. The shelf is still hanging in my kitchen.
That one moment taught me more than a dozen YouTube tutorials.
Acrylic Drill Bit Comparison Table
| Drill Bit Type | Use Case | Pros | Cons |
|---|---|---|---|
| Acrylic Bit | Best for all acrylic types | Clean, precise, crack-free | Can be pricey |
| Standard Twist Bit (Modified) | DIY option | Budget-friendly | Needs manual dulling |
| Step Bit | Larger holes | Smooth finish | Not ideal for small holes |
| Brad Point Bit | For wood, sometimes plastic | Good control | Risky for thin acrylic |
| Hole Saw | For large holes | Fast, efficient | Requires more clamping and cooling |
Sure! Here’s the SEO-optimized, high-readability section for:
How to Drill Acrylic Sheet Without Cracking
The first time I tried drilling acrylic, I cracked the whole sheet. Yep, snapped it right down the middle. And that’s when I realized acrylic isn’t like wood or metal—it’s a bit tricky.
Here’s what finally worked for me after a few trial-and-error moments.
1. Use Tape First
Before I drill, I always stick painter’s tape (or masking tape) over the spot where I plan to drill.
- It stops the drill bit from slipping.
- It helps reduce cracks by giving extra support to the surface.
I usually mark my hole spot with a pen right on the tape.
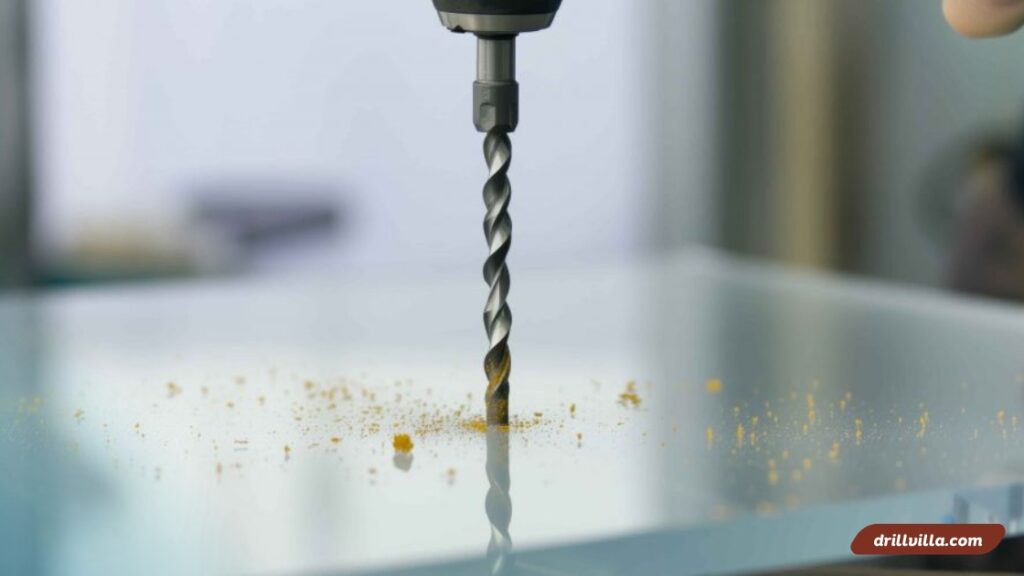
2. Start With a Small Pilot Hole
I learned that starting with a small hole—like using a 1/8″ bit—helps guide the bigger bit later. It takes some time, but trust me, it’s worth it.
Small holes first = smoother drilling later.
3. Go Slow — Like, Really Slow
Speed is your enemy here.
- I use the slowest speed setting on my drill.
- I press lightly, just enough to keep the bit going.
- If I go too fast, the acrylic melts or chips.
A slow and steady pace keeps everything clean and crack-free.
4. Keep It Cool
Friction creates heat, and heat cracks acrylic.
Sometimes, I:
- Stop every few seconds.
- Dip the drill bit in water.
- Even spray a little water mist while drilling (just don’t use too much if your drill isn’t water-safe!).
Cool drill = happy acrylic.
5. Back It Up
I place a piece of scrap wood or MDF underneath the acrylic. That gives solid support and helps prevent “blowout” when the drill bit exits.
Without that backing, I’ve had the bottom side chip more than once.
What Is the Best Drill Bit for Acrylic?
If I had to pick just one thing that changed my results overnight—it was switching drill bits.
Use a Bit Made for Plastics
Standard twist bits (like the ones for wood) are not ideal. They dig in too fast and cause chipping.
The best drill bit for acrylic?
✅ Acrylic drill bit or
✅ Step bit (also called a unibit)
Both are perfect for clear plastics like acrylic, Plexiglas, and Lucite.
I use a step bit when I need larger holes. It drills gradually, which keeps the hole clean and round.
Why It Matters
Here’s what happened when I used the wrong bit:
- Jagged holes
- White, cloudy cracks around the edges
- Melted plastic sticking to the bit
With the right bit:
- The edges stay clear
- No cracks, no melt
- Looks like I actually know what I’m doing
Quick Comparison Table
| Drill Bit Type | Good for Acrylic? | My Notes |
|---|---|---|
| Wood Twist Bit | ❌ No | Chips the edge, not smooth |
| Metal Bit | ❌ No | Heats up too fast |
| Step Bit (Unibit) | ✅ Yes | Great for large, clean holes |
| Plastic/Acrylic Bit | ✅ Yes | Best for small to medium holes |
Let’s face it, learning how to drill acrylic takes a bit of patience—but once I figured out the right speed, drill bit, and support technique, it became a breeze.
I now get clean, smooth holes without cracks—and I didn’t have to buy fancy tools.
Next time you work with acrylic, take it slow and gentle. That’s the trick.
FAQs: How to Drill Acrylic
Q1: Can I use a regular drill bit to drill acrylic?
Yes, but you should dull the cutting edges slightly with a file or use them at slow speed. A proper acrylic bit is much safer.
Q2: What speed should I drill acrylic at?
Low speed—500 to 1000 RPM. High speeds cause heat and melting.
Q3: How do I prevent cracking?
Use masking tape, clamp the sheet, use a backing board, and go slow with light pressure.
Q4: Can I drill holes in thick acrylic (1/2″ or more)?
Yes. Go slow, use lubricant, and back the bit out often to clear chips.
Q5: Can I use a Dremel instead of a drill?
For tiny holes or engraving, yes. But for regular drilling, a power drill with variable speed is better.
Final Thoughts: Drilling Acrylic Doesn’t Have to Be a Nightmare
Look, I get it. Acrylic is beautiful but intimidating. I ruined more than one project before I figured it out. But once you understand the little tricks—low speed, sharp (but not too sharp) bits, and a bit of patience—it all becomes second nature.
Now I can drill holes in acrylic confidently, and you can too.
So go ahead—grab that acrylic sheet and your drill. Just remember: slow and steady wins this race.
And if you ever crack one? Don’t sweat it. That’s how I learned too.
Know More:
- How Much Does It Cost To Drill A Bowling Ball?
- What Size Drill Bit for 10 Screw
- Are You Supposed To Submerge Powered Orthopedic Drills For Decontamination?
- A 135 Split Point Cobalt Letter Drill Bits?
- How Long Does It Take to Drill a Water Well?
- What Type of Drill Bits Won’t Snap?
- What Are the Best Drill Bits for Stainless Steel?