Changing the drill bit on a Dewalt 20V Max Impact is easy. It takes just a few steps to get the job done.
Having the right drill bit is key for any project. Whether you’re drilling into wood, metal, or concrete, the Dewalt 20V Max Impact driver is a powerful tool that makes the work easier. But first, you need to know how to change the drill bit.
This guide will walk you through the process. It ensures you can switch bits quickly and safely. Ready to learn? Let’s get started!

Credit: www.youtube.com
Article Summary
Necessary Tools
Changing the drill bit on your Dewalt 20V Max Impact is a simple task. But first, you need the right tools. This section covers the necessary tools for the job.
Required Equipment
Before you start, gather these essential tools. You will need a Dewalt 20V Max Impact driver. Ensure it is fully charged. A set of drill bits is also necessary. Choose the right size for your project. A pair of safety glasses is crucial. Protect your eyes from debris. Finally, have a soft cloth ready. Use it to clean the drill and bits.
Optional Accessories
Some accessories can make the task easier. A magnetic bit holder is helpful. It keeps bits secure and easy to access. A bit extender can be useful. It helps reach tight spaces. A bit case is another handy accessory. It organizes and protects your drill bits. Lastly, consider using a workbench. It provides a stable surface for your tasks.
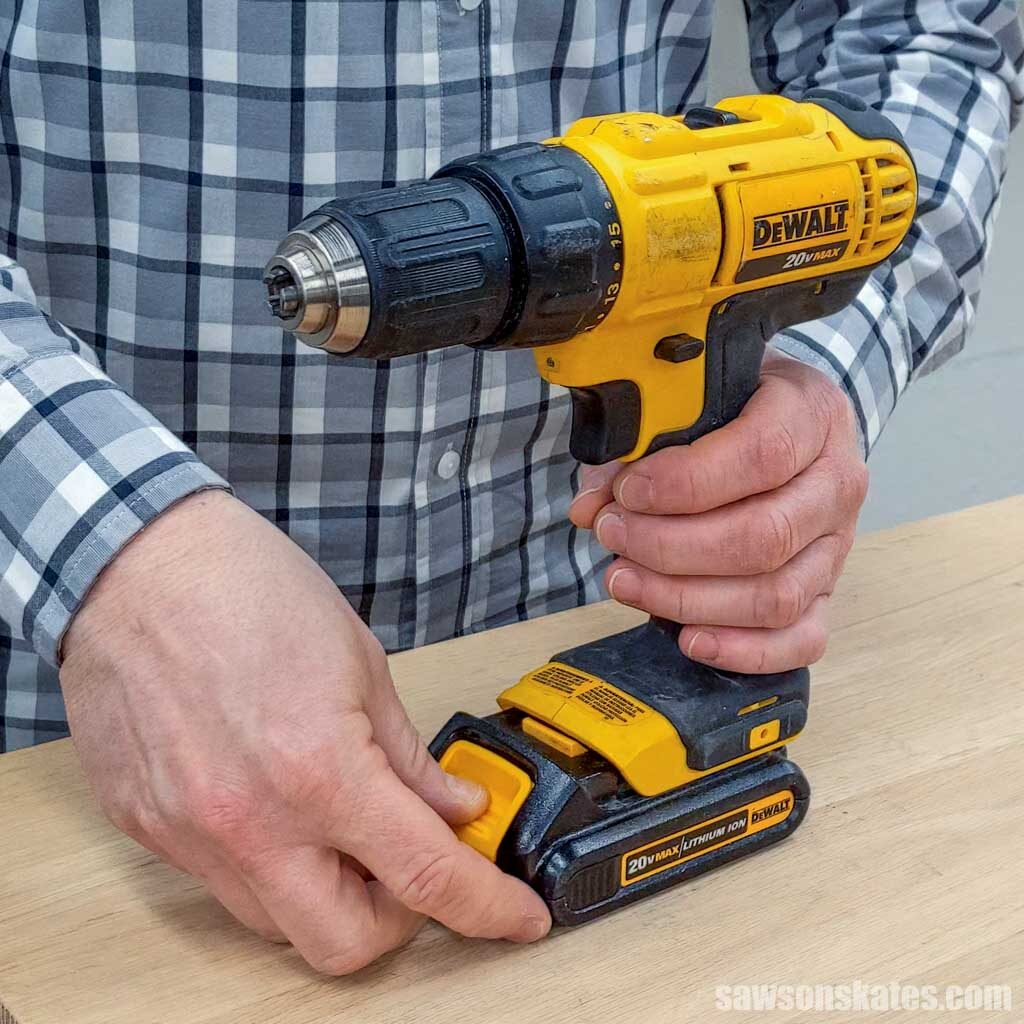
Credit: sawsonskates.com
Safety Precautions
Changing a drill bit on a Dewalt 20V Max Impact Driver is a simple task. However, you need to take certain safety precautions. These precautions help avoid injuries and ensure a smooth process. Let’s explore some important safety measures.
Protective Gear
Always wear protective gear while changing a drill bit. Safety glasses protect your eyes from flying debris. Gloves provide a better grip and protect your hands. Wear a dust mask if working in a dusty environment. These simple items can prevent serious injuries.
Workspace Safety
Ensure your workspace is clean and organized. Clear away any clutter or obstacles. This prevents tripping and falling. Make sure your work area is well-lit. Proper lighting helps you see clearly and avoid mistakes. Keep a first aid kit nearby. Be prepared for any minor injuries.
Removing The Old Bit
Removing the old drill bit from your Dewalt 20V Max Impact driver is a simple task. It ensures that your tool is ready for the next job. Follow these steps to remove the old bit safely and easily.
Loosening The Chuck
First, locate the chuck on your Dewalt 20V Max Impact driver. The chuck is the part that holds the drill bit in place. To loosen it, turn the chuck counterclockwise. This action will open the jaws of the chuck and release the grip on the bit.
Keep turning until the chuck is fully open. You should be able to see the bit coming loose. Make sure to hold the drill steady while you do this. It prevents any accidental slips or falls.
Taking Out The Bit
Once the chuck is loose, you can easily remove the bit. Gently pull the bit out of the chuck. If it feels stuck, wiggle it slightly to free it. Avoid using too much force. It could damage the chuck or the bit.
After removing the bit, place it in a safe spot. Now your Dewalt 20V Max Impact driver is ready for a new bit. This simple process keeps your tool in top shape and ready for any task.
Inserting The New Bit
Changing the drill bit on your Dewalt 20V Max Impact driver is a straightforward process that can save you time and effort. Whether you’re a beginner or an experienced DIYer, knowing how to insert a new bit correctly is essential. Let’s dive into the steps involved, ensuring you get back to your project without a hitch.
Choosing The Right Bit
First things first, you need to select the correct bit for your task. Here are some tips to help you choose:
- Material Type: Make sure the bit is suitable for the material you’re working with, whether it’s wood, metal, or masonry.
- Size: Ensure the bit size matches the screw or hole you need to create. Using the wrong size can damage your workpiece or the bit.
- Condition: Always use a sharp, well-maintained bit. A dull bit can cause slipping and inefficient drilling.
Remember, using the right bit makes a world of difference in the quality and ease of your work. Have you ever tried drilling with a mismatched bit? It’s like trying to cut steak with a butter knife – frustrating and ineffective!
Securing The Bit
Now that you have the right bit, it’s time to secure it in your Dewalt 20V Max Impact driver. Follow these simple steps:
- Turn Off the Drill: Safety first! Ensure your drill is turned off and the battery is removed to prevent accidental starts.
- Open the Chuck: Use your hand to rotate the chuck counterclockwise to open it. The chuck is the part of the drill that holds the bit in place.
- Insert the Bit: Place the new bit into the chuck. Make sure it sits straight and is inserted to the proper depth.
- Tighten the Chuck: Rotate the chuck clockwise to tighten it around the bit. Ensure it’s snug and secure to avoid any wobbles during use.
Securing the bit properly is crucial for safety and efficiency. A loose bit can fly out during operation, which is not only dangerous but also a real pain. Think of it like fastening your seatbelt – you wouldn’t want it loose, would you?
There you have it! With these easy steps, you’re ready to tackle your next project with confidence. Happy drilling!
Testing The Installation
Test the installation by securely fastening the new drill bit into your Dewalt 20V Max Impact. Ensure the drill bit is tight and aligned correctly.
After changing the drill bit on your Dewalt 20V Max Impact, it’s crucial to test the installation. Proper testing ensures that the bit is securely in place and ready for use. Follow these steps to make sure everything is functioning correctly.Performing A Test Run
Start by turning on the drill. Run it at a low speed. This helps you check if the bit wobbles or moves. A steady bit means the installation is proper. Increase the speed gradually. Observe the bit’s behavior at higher speeds too. A stable bit at all speeds indicates a successful installation.Ensuring Proper Fit
Next, ensure the bit fits well in the chuck. Hold the drill and give the bit a gentle pull. It should stay in place. If it moves, tighten the chuck more. The bit should not slide out during use. Also, try drilling into a scrap piece of wood. This real-world test confirms that the bit is secure and effective. If everything works well, your installation is complete. “`Troubleshooting
When changing the drill bit on your Dewalt 20V Max Impact, you might face some issues. No worries. This section will help you troubleshoot common problems. It will also provide quick fixes to get you back on track.
Common Issues
One common issue is the chuck not loosening. This can happen if the chuck is too tight. Another problem is the bit slipping. This occurs when the bit is not properly secured.
Quick Fixes
If the chuck is too tight, use a wrench. Turn it counterclockwise to loosen. If the bit is slipping, ensure it is seated correctly. Tighten the chuck until it clicks. If the issue persists, check for debris. Clean the chuck and bit to ensure a good fit.
Maintenance Tips
Keeping your Dewalt 20V Max Impact Drill in top shape is essential. You want it to work flawlessly every time you pick it up, right? Well, let’s dive into some simple maintenance tips that will help you keep your drill running smoothly. Trust me, a little care goes a long way!
Regular Cleaning
First things first, let’s talk about cleanliness. A clean drill is a happy drill. After each use, make it a habit to remove dust and debris. Use a soft brush or cloth to wipe down the exterior. For those hard-to-reach places, a can of compressed air works wonders.
Why is this important? Well, dust and debris can clog the vents, leading to overheating. And we all know that’s not good news. Also, it can affect the performance of your drill. So, spend a few minutes cleaning your drill after use. Your drill will thank you!
Proper Storage
Now, let’s chat about storage. How you store your drill can impact its longevity. Keep your drill in a dry, cool place. Avoid damp or humid areas as they can cause rust and corrosion. If your drill came with a case, use it! It’s there for a reason.
Why not hang it on a tool rack? It keeps your workspace organized and ensures your drill is safe from accidental drops. Plus, it’s easy to grab when you need it. Proper storage not only protects your drill but also keeps your workspace tidy. Win-win!
Lubrication
Let’s not forget lubrication. Moving parts need a little love too. Check your drill’s manual for lubrication points. A drop of oil here and there can make a big difference. It reduces friction and wear, ensuring smooth operation.
Remember, don’t overdo it. A little bit goes a long way. Too much oil can attract dust and dirt, which is counterproductive. So, follow the manual and keep those parts well-lubricated.
Battery Care
Last but not least, take care of your battery. Charge it regularly and avoid letting it drain completely. Store it in a cool, dry place, separate from the drill if possible. Over time, batteries lose their charge capacity. Proper care can extend their life.
Consider having a spare battery. It’s a lifesaver when you’re in the middle of a project, and your battery runs out. Just swap it out and keep going. No interruptions, no frustration.
Follow these simple maintenance tips, and your Dewalt 20V Max Impact Drill will serve you well for years to come. Happy drilling!
Credit: diy.stackexchange.com
Frequently Asked Questions
How Do You Change The Drill Bit On A Dewalt 20v Max?
To change the drill bit on a Dewalt 20V Max, hold the chuck, turn it counterclockwise to loosen, insert the new bit, then turn clockwise to tighten.
How To Remove Drill Bit From Dewalt Impact?
To remove the drill bit from a DeWalt impact, pull the collar forward, then gently pull the bit out.
How To Put A Bit Into A Dewalt Impact Driver?
Insert the bit by pulling the collet forward. Slide the bit into the chuck. Release the collet to secure it.
How Do You Release The Chuck On A Dewalt Drill?
To release the chuck on a Dewalt drill, rotate the chuck counterclockwise. Hold the drill firmly, then remove the bit.
Conclusion
Changing a drill bit on the Dewalt 20V Max Impact is simple. Follow these steps to ensure a safe and effective switch. Always power off your tool first. Use the chuck to remove the old bit. Insert the new bit securely.
Test the bit to confirm it’s firm. Practice these steps, and you’ll gain confidence. With this guide, even beginners can change bits easily. Enjoy your projects with your Dewalt 20V Max Impact. Happy drilling!