Changing the drill bit on a Dewalt 18V drill is simple. Start by loosening the chuck.
Then, remove the old bit and insert the new one. Knowing how to change the drill bit on your Dewalt 18V drill can save you time and effort. Whether you are a DIY enthusiast or a professional, this skill is essential.
The process is easy and quick, so you can switch between tasks smoothly. In this guide, we will walk you through each step to ensure you do it correctly. You will need no special tools, just your Dewalt 18V drill and the new bit. Let’s get started on making your next project a breeze!
Article Summary
Safety First
When it comes to changing a drill bit on your Dewalt 18V, safety should always be your top priority. You might be eager to get started on your project, but taking a few moments to ensure you’re protected can save you from potential injuries. Let’s dive into the essential safety steps you need to follow before changing your drill bit.
Wear Protective Gear
First things first, always wear protective gear. This includes safety glasses and work gloves. Why? Because flying debris can easily injure your eyes, and sharp drill bits can cut your hands. Even if you consider yourself a pro, accidents happen when you least expect them.
- Safety Glasses: Protects your eyes from any flying bits or dust.
- Work Gloves: Keeps your hands safe from sharp edges and accidental slips.
Remember that saying, “Better safe than sorry”? It absolutely applies here. So, gear up before you get down to business!
Disconnect The Battery
This might sound like a no-brainer, but it’s an easy step to overlook. Before you even think about changing the drill bit, make sure to disconnect the battery. Why? Because the last thing you want is the drill to accidentally power on while you’re handling it.
- Locate the battery at the base of your Dewalt 18V drill.
- Press the release button and slide the battery out.
- Place the battery in a safe spot away from your work area.
By disconnecting the battery, you eliminate the risk of accidental starts, ensuring a safer environment for you to work in.
Changing the drill bit on your Dewalt 18V drill is straightforward, but these safety steps are crucial. Taking a moment to protect yourself can make a world of difference. Stay safe and happy drilling!
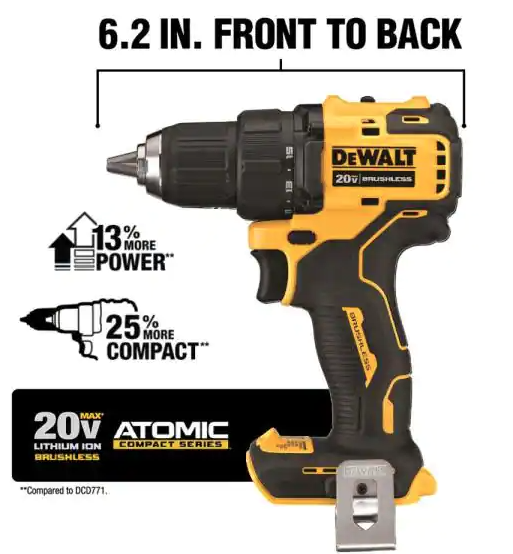
Identifying The Chuck Type
Changing the drill bit on a Dewalt 18V drill requires identifying the chuck type. The chuck is the part that holds the drill bit in place. There are two main types of chucks: keyed and keyless. Knowing which one your drill uses will make the process easier.
Keyed Chuck
A keyed chuck requires a special tool called a chuck key. The key fits into a hole on the side of the chuck. Turn the key to loosen or tighten the chuck. Insert the drill bit and secure it by turning the key in the opposite direction. Make sure the bit is tight before using the drill. This type of chuck offers a very secure grip on the bit.
Keyless Chuck
A keyless chuck is easier to use. You don’t need a separate tool. Hold the chuck with one hand and the drill with the other. Turn the chuck counterclockwise to open it. Insert the drill bit and turn the chuck clockwise to tighten it. Make sure the bit is secure before using the drill. This type of chuck is convenient for quick bit changes.
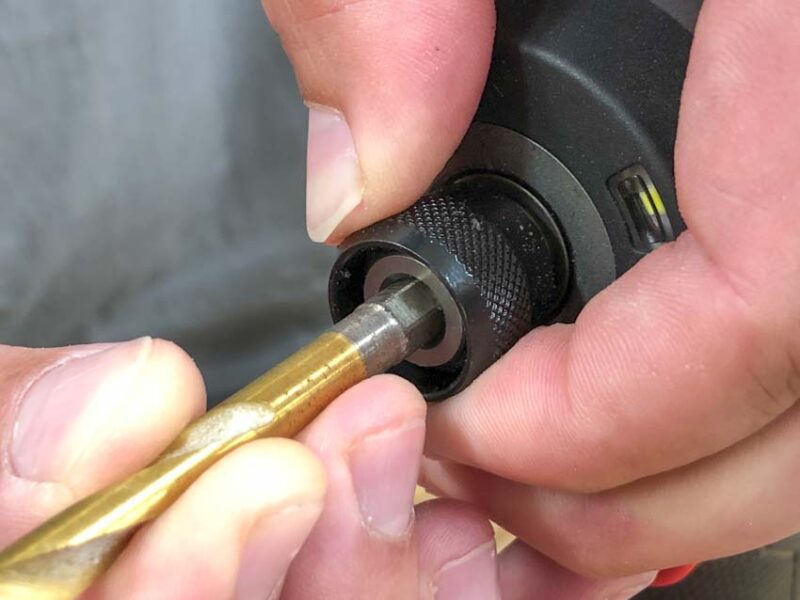
Removing The Old Bit
Changing the drill bit on your Dewalt 18V drill is simple. Follow these steps to remove the old bit efficiently. You will need to loosen the chuck and extract the bit. Let’s dive into the details.
Loosening The Chuck
First, you need to loosen the chuck. The chuck is the part that holds the drill bit in place. To do this, hold the drill in one hand. With the other hand, turn the chuck counterclockwise. You might need to use some force. Keep turning until the chuck is loose enough.
Extracting The Bit
Once the chuck is loose, you can remove the old bit. Hold the drill steady. Gently pull the bit out of the chuck. If it is stuck, wiggle it slightly. This should help release it. Once the bit is out, set it aside. Now, your drill is ready for a new bit.

Credit: www.youtube.com
Inserting The New Bit
Changing the bit on your Dewalt 18V drill can seem like a daunting task, but with a little patience and the right guidance, it becomes quite simple. In this section, we’ll guide you through the process of inserting the new bit. By following these steps, you’ll ensure that the new bit is securely in place and ready for use. Let’s dive in!
Aligning The Bit
First things first, you need to align the new bit correctly. This step is crucial because a misaligned bit can lead to poor performance or even damage your drill. Here’s how you do it:
- Hold the bit with one hand and the chuck (the cylindrical part at the front of the drill) with the other.
- Insert the bit into the chuck. Make sure it goes in straight and not at an angle.
- Push the bit in as far as it will go. You might need to wiggle it slightly to ensure it’s properly seated.
Remember, if the bit is not properly aligned, it can wobble during use. This can not only affect your work but also pose a safety risk. So, take your time with this step.
Tightening The Chuck
Once the bit is correctly aligned, the next step is to tighten the chuck. This ensures the bit stays in place while you work. Here’s what you need to do:
- Hold the chuck with one hand and turn it clockwise to tighten. You should feel some resistance as it tightens.
- Keep turning until the chuck feels snug around the bit. Don’t overtighten as this can damage the chuck or the bit.
- To test if the bit is secure, give it a gentle tug. If it doesn’t move, you’re good to go. If it does, tighten the chuck a bit more.
It’s a good idea to periodically check the chuck’s tightness during use. This ensures the bit remains secure and your drill operates safely and efficiently.
| Step | Description |
|---|---|
| Aligning the Bit | Insert the bit straight into the chuck and push it in as far as it will go. |
| Tightening the Chuck | Turn the chuck clockwise to tighten until the bit is securely in place. |
There you have it! With these simple steps, you can easily change the bit on your Dewalt 18V drill. Remember, practice makes perfect. The more you do it, the more confident you’ll become. Happy drilling!
Testing The Installation
Testing the installation of a new drill bit in your Dewalt 18V drill is crucial. It ensures that the bit is secure and functions correctly. Follow these steps to make sure your drill bit is properly installed and ready for use.
Secure The Bit
First, ensure the bit is tightly secured in the chuck. Hold the drill in one hand and the chuck in the other. Rotate the chuck clockwise until the bit is firmly in place. A loose bit can cause damage or injury. Double-check that the bit does not wobble or move.
Test The Drill
Next, test the drill to confirm the bit’s stability. Select a low-speed setting on your Dewalt 18V drill. Gently press the trigger and observe the bit’s movement. The bit should spin smoothly without any wobbling. If it wobbles, re-secure it.
Then, drill a small test hole in a piece of scrap wood. This ensures the bit is correctly installed and functions properly. If the bit struggles to penetrate the wood, it might not be installed correctly. Re-check the bit’s placement in the chuck.
Testing the installation takes a few minutes but ensures safety and efficiency. A well-secured bit means smoother drilling and better results.
Troubleshooting Tips
Changing a drill bit on your Dewalt 18V drill can sometimes be tricky, especially if you’re new to using power tools. Even seasoned users can face issues from time to time. In this section, we’ll go over some common troubleshooting tips to help you with any hiccups you might encounter. By addressing these issues head-on, you’ll save time and avoid frustration. Let’s dive in!
Bit Slippage
One common issue you might face is bit slippage. This happens when the bit doesn’t stay firmly in place and begins to spin freely. Not only is this annoying, but it can also be dangerous.
- Check the Chuck: Make sure the chuck (the part that holds the bit) is clean. Debris or dust can cause the bit to slip. Wipe it down with a clean cloth.
- Tighten Properly: Ensure that you’re tightening the chuck correctly. Hold the drill firmly and turn the chuck clockwise until it’s snug. A loose chuck is often the culprit behind bit slippage.
- Use the Right Bit: Sometimes the bit itself is the problem. Make sure you’re using a bit that’s compatible with your Dewalt 18V drill.
Chuck Won’t Tighten
Another issue you may encounter is a chuck that won’t tighten. This can be frustrating when you’re in the middle of a project and need to change bits quickly.
- Inspect for Damage: First, check the chuck for any visible damage. If it’s cracked or broken, it may need to be replaced.
- Lubricate the Chuck: Sometimes, a bit of lubrication can do wonders. Apply a small amount of machine oil to the chuck and try tightening it again.
- Use Both Hands: If the chuck is being stubborn, use both hands to tighten it. Hold the drill steady with one hand and use the other to turn the chuck. It provides better control and more torque.
If you follow these troubleshooting tips, you’ll likely solve the most common issues you might face when changing a drill bit on your Dewalt 18V. Remember, even the best tools can have minor issues, but with a little know-how, you can keep things running smoothly. Happy drilling!
Maintenance Tips
Maintaining your Dewalt 18V drill is crucial to ensuring its longevity and efficiency. If you neglect regular maintenance, you might find yourself dealing with a poorly performing tool or, worse, a broken one. Below, we share some essential maintenance tips that will keep your drill in tip-top shape. Let’s dive in!
Regular Cleaning
Just like how you wouldn’t leave your car dirty, your Dewalt 18V drill needs regular cleaning too. It’s simple, but it makes a big difference. After each use, make sure to:
- Wipe down the exterior: Use a clean, dry cloth to remove any dust or debris. This prevents build-up that can affect the drill’s performance.
- Clean the vents: The vents can easily get clogged with dust. Use a small brush or compressed air to clear them out.
- Check the chuck: Make sure there are no particles stuck inside. These can affect how well the drill bit fits.
Keeping your drill clean not only ensures it works well but also extends its life. Think of it as giving your trusty tool a little TLC.
Proper Storage
Storing your drill correctly is just as important as cleaning it. Here’s how you can ensure your Dewalt 18V drill is stored properly:
- Use a case: Always store your drill in its case when not in use. This protects it from dust and accidental damage.
- Keep it dry: Store your drill in a dry place. Moisture can cause rust and damage the internal components.
- Store batteries separately: If you’re not using your drill for a while, remove the batteries and store them separately. This prevents any potential battery leakage or corrosion.
Proper storage is like putting your drill to bed. It ensures it’s ready and raring to go next time you need it.
Maintaining your Dewalt 18V drill is not rocket science. With regular cleaning and proper storage, you can keep your drill performing at its best. Remember, a well-maintained tool is a happy tool!
Credit: diy.stackexchange.com
Credit: www.gibbonsfuneralhome.com
Frequently Asked Questions
How Do You Remove A Drill Bit From A Dewalt 18v?
To remove a drill bit from a Dewalt 18v, first, set the drill to reverse. Hold the chuck, then gently pull the bit out.
How Do You Put A Drill Bit In A Dewalt Drill?
To put a drill bit in a Dewalt drill, open the chuck by turning it counterclockwise. Insert the drill bit, then tighten the chuck by turning it clockwise. Ensure the bit is secure before use.
How Do You Unlock The Chuck On A Dewalt Drill?
To unlock the chuck on a Dewalt drill, turn the chuck counterclockwise. Hold the drill firmly and rotate the chuck.
How Do You Change A Drill Bit On A M18?
To change a drill bit on an M18, first, remove the battery. Then, open the chuck by turning it counterclockwise. Insert the new bit and tighten the chuck by turning it clockwise. Reattach the battery and you’re ready to go.
Conclusion
Changing the drill bit on your Dewalt 18V is simple. Follow the steps shared, and you’ll do it in no time. Remember to always unplug the battery first. Safety comes first. Keep your tools in good shape. Regular maintenance helps.
Now you’re ready for your next project. Happy drilling!