Changing the drill bit on a Black and Decker 20V drill is simple. First, ensure the drill is off.
Then, follow a few steps to switch the bit. Using a drill becomes easier when you know how to change the bit. The Black and Decker 20V drill is a popular choice for many DIY enthusiasts. Whether you are a beginner or an experienced user, knowing this skill is essential.
It saves time and keeps your projects running smoothly. In this guide, we will walk you through the process step-by-step. Soon, you will change drill bits with confidence and ease. Let’s get started and make your DIY tasks more efficient.

Credit: www.blackanddecker.com
Article Summary
Tools You Need
Changing the drill bit on your Black And Decker 20V drill doesn’t have to be a daunting task. With a few essential tools and some basic knowledge, you’ll be able to swap out your drill bits like a pro. Below, we’ll go over the specific tools you need, including Drill Specifications and Safety Gear. Let’s dive in!
Drill Specifications
First and foremost, you need to understand your drill. The Black And Decker 20V drill is a versatile and powerful tool, perfect for a wide range of tasks. But, to change the drill bit, you need to know the following:
- Chuck Size: The chuck is the part of the drill that holds the bit in place. For the 20V model, the chuck size is typically 3/8 inch or 1/2 inch. Make sure you have the correct bit size to fit.
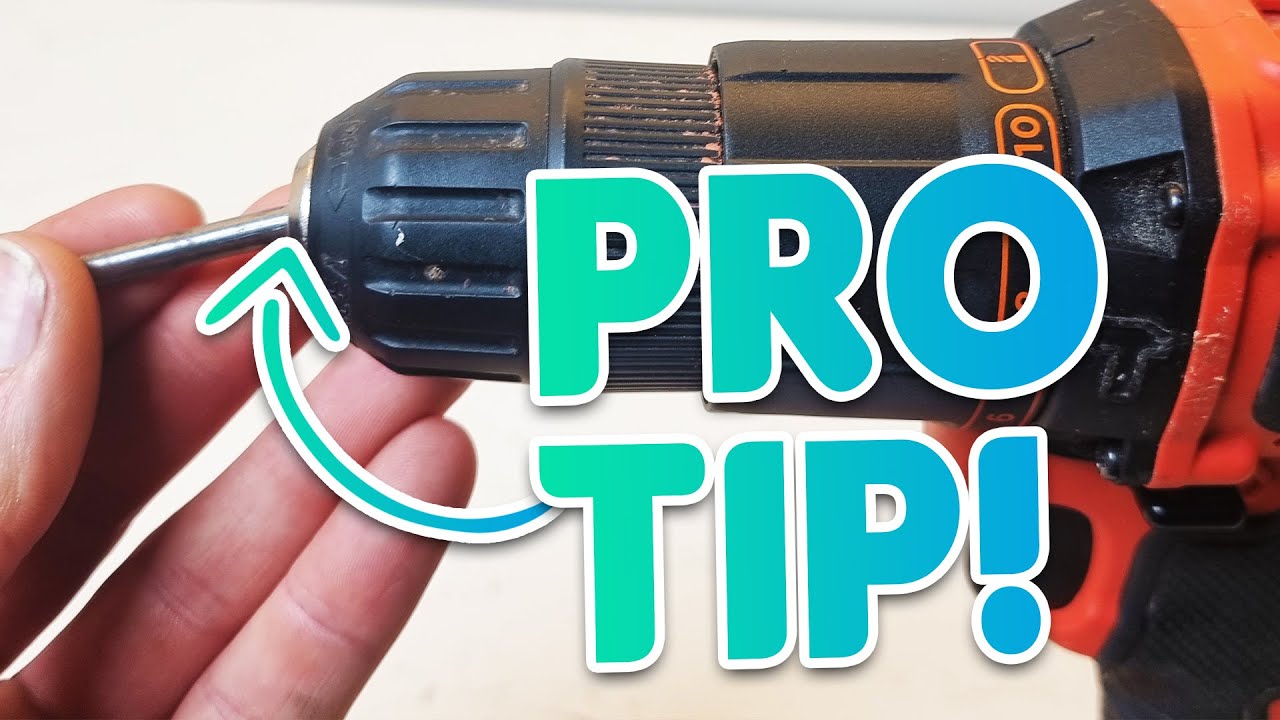
- Keyless Chuck: This model often comes with a keyless chuck, which means you can change bits without needing a special key. Just twist the chuck to loosen or tighten the bit.
Safety Gear
Safety should always come first when working with power tools. Here’s a quick list of essential safety gear:
- Safety Glasses: Protect your eyes from flying debris and dust. Trust me, you don’t want anything getting in your eyes while you’re concentrating on your work.
- Gloves: Wear gloves to protect your hands from sharp bits and to get a better grip on the drill.
- Ear Protection: Drills can be loud, especially in enclosed spaces. Earplugs or earmuffs can save your hearing.
In addition to these, it’s always good practice to have a clean, well-lit workspace. This reduces the chance of accidents and makes the job easier.
Remember, the right tools and safety gear not only make the job easier but also keep you safe. Ready to learn how to change that drill bit? Let’s get started!
Credit: www.youtube.com
Preparing The Drill
Before changing the drill bit on your Black and Decker 20V, you need to prepare the drill. Proper preparation ensures safety and ease during the process. Follow these steps to get your drill ready.
Power Off The Drill
First, power off the drill. This is crucial for safety. Locate the power switch and turn it to the “off” position. Ensure the drill is completely off before proceeding to the next step.
Remove The Battery
Next, remove the battery from the drill. Find the battery release button. Press it to detach the battery. Removing the battery prevents any accidental starts. It also makes the drill lighter and easier to handle.
Removing The Old Bit
Changing the drill bit on your Black And Decker 20V drill is simple. The first step is removing the old bit. This part is crucial for a successful bit change. Follow the steps below to remove the old bit with ease.
Loosening The Chuck
The chuck holds the drill bit in place. Start by loosening it. Grip the chuck with your hand. Turn it counterclockwise. This action will loosen the grip on the drill bit. Keep turning until the bit is free.
Taking Out The Bit
Once the chuck is loose, you can remove the bit. Gently pull the old bit out of the chuck. Check for any debris inside the chuck. Clean it if necessary. This will ensure a good fit for the new bit.
Selecting The New Bit
Changing a drill bit in your Black and Decker 20V drill is easy. The first step is selecting the new bit. This step ensures your project runs smoothly. Let’s dive into how to choose and inspect the new bit.
Choosing The Right Size
Selecting the correct bit size is crucial. Check your project’s requirements. Different tasks need different bit sizes. Measure the size of the screw or hole. Match it with the bit size. This helps avoid damage to your material.
Use a bit size chart if unsure. It guides you to the right choice. Remember, using the wrong size can cause problems. The bit may slip or break. Always double-check the size before moving forward.
Inspecting The Bit
Look at the bit closely. Ensure it’s not damaged or dull. A damaged bit can’t perform well. It may also harm your project. Spin the bit to check for any bends. A straight bit is necessary for accurate drilling.
Keep your bits clean. Remove any debris or dust. This helps in smooth operation. A clean bit reduces friction. It also extends the bit’s life. Regular inspection keeps your tools in top shape.
Inserting The New Bit
Changing the drill bit on your Black And Decker 20V drill can seem like a daunting task, especially if you’re new to using power tools. But don’t worry, it’s actually quite simple once you know the steps. In this section, we’ll guide you through the process of inserting a new bit, ensuring you can get back to your DIY project in no time.
Placing The Bit In The Chuck
First things first, you need to understand what the chuck is. The chuck is the part of the drill that holds the bit in place. To place the new bit in the chuck, follow these steps:
- Open the Chuck: Hold the drill firmly and rotate the chuck counterclockwise. This will loosen its grip and open the jaws wide enough to insert the new bit.
- Select the Right Bit: Ensure you have the appropriate bit for the task at hand. Whether it’s a drill bit or a screwdriver bit, make sure it’s the right size for your job.
- Insert the Bit: Place the shank (the smooth part of the bit) into the chuck. Insert it as far as it will go to ensure it’s properly seated.
Tightening The Chuck
Once the bit is in place, it’s crucial to tighten the chuck securely. A loose bit can lead to slippage and potentially damage your workpiece or, worse, cause injury. Here’s how to do it:
- Turn the Chuck Clockwise: Using your hand, rotate the chuck clockwise. As you do, you’ll notice the jaws begin to close around the bit. Continue tightening until you can’t turn it any further.
- Use the Drill’s Keyless Feature: Many Black And Decker 20V drills come with a keyless chuck. This feature allows you to tighten the chuck even more by applying a final twist with the drill’s motor. Simply set the drill to the lowest torque setting and give it a slight squeeze to ensure the bit is firmly in place.
- Double-Check the Bit: Give the bit a gentle tug to make sure it’s securely fastened. It should not move or wiggle if properly tightened.
And there you have it! Changing the drill bit on your Black And Decker 20V drill is as easy as pie. So, next time you need to swap out bits, you’ll know exactly what to do. Happy drilling!

Credit: www.youtube.com
Securing The Bit
Securing the bit in your Black and Decker 20V drill is essential. A loose bit can cause accidents and damage the project. Follow these steps to ensure the bit is secure and ready for use.
Checking Alignment
First, make sure the bit is properly aligned. Insert the bit into the chuck. Twist it gently to align. This ensures it fits snugly and straight. Misalignment can cause wobbling. It can also lead to inaccurate drilling.
Ensuring Tight Fit
Next, ensure the bit is tightly secured. Hold the chuck firmly. Rotate it clockwise until the bit is tight. Check by pulling the bit slightly. It should not move. A tight fit is crucial for safety and precision. Now, your bit is ready for use.
Testing The Drill
Changing the drill bit on a Black and Decker 20V is simple. First, loosen the chuck by turning it counterclockwise. Next, remove the old bit and insert the new one. Finally, tighten the chuck by turning it clockwise.
After changing the drill bit on your Black and Decker 20V, it is essential to test the drill. This ensures the new bit is secure and the drill functions correctly. Follow these steps to properly test the drill.Reattaching The Battery
First, reattach the battery to the drill. Ensure it clicks into place securely. If the battery is loose, the drill may not work properly. A firm connection is crucial for safety and performance.Running A Test
With the battery securely attached, run a test on the drill. Start by gently pressing the trigger. The drill should power up smoothly. Listen for any unusual sounds. Check if the bit spins evenly. If it wobbles, the bit may not be secure. Next, try drilling into a scrap piece of wood. Apply gentle pressure. Observe if the bit cuts into the wood easily. If it struggles, double-check the bit attachment. A successful test means your drill is ready for use. “`Maintenance Tips
Keeping your Black and Decker 20V drill in top shape can make your DIY projects easier and more enjoyable. It’s not just about knowing how to change the drill bit, but also about regular maintenance to ensure your tool stays reliable and efficient. In this section, we’ll explore some simple maintenance tips to keep your drill working like new.
Regular Cleaning
Regular cleaning is crucial to extend the life of your drill. After each use, wipe down the exterior with a clean, dry cloth to remove any dust or debris. For tougher dirt, use a slightly damp cloth but be sure not to get any moisture inside the drill.
- Dust Removal: Use a small brush or compressed air to clean out the vents and other small crevices where dust can accumulate.
- Check the Chuck: The chuck, which holds the drill bit, should be free of any debris. Open it up and clean out any particles that might have gotten stuck inside.
Proper Storage
Storing your drill correctly is just as important as cleaning it. Proper storage can prevent damage and ensure your tool is ready to go when you need it.
- Use the Case: If your drill came with a case, use it. The case protects the drill from dust and damage.
- Keep in a Cool, Dry Place: Store your drill in a cool, dry place to avoid moisture, which can cause rust and other damage.
- Organize Accessories: Keep drill bits and other accessories organized and in good condition. This makes it easier to find what you need and keeps everything in top shape.
By following these simple maintenance tips, you can keep your Black and Decker 20V drill in excellent condition, ready for any project that comes your way. Remember, a well-maintained tool not only performs better but also lasts longer, saving you time and money in the long run. So, treat your drill well, and it will treat you well in return!
Frequently Asked Questions
How To Remove Stuck Drill Bit From Black And Decker?
Turn off and unplug the drill. Use pliers or a wrench to grip the drill bit. Twist counterclockwise to remove.
How Do I Get My Drill To Release The Bit?
To release the bit, turn the chuck counterclockwise. Hold the drill firmly and continue until the bit loosens.
How To Change Drill Bit On Cordless Drill?
To change the drill bit on a cordless drill, first, turn off and unplug the drill. Loosen the chuck by rotating it counterclockwise. Remove the old bit and insert the new one. Tighten the chuck by rotating it clockwise. Ensure the bit is secure before use.
How To Change A Drill Bit On A Keyless Chuck?
To change a drill bit on a keyless chuck, hold the chuck and turn it counterclockwise. Remove the old bit and insert the new one. Tighten the chuck by turning it clockwise. Ensure the bit is secure before using the drill.
Conclusion
Changing the drill bit on a Black And Decker 20V is simple. Remember to unplug the drill before starting. This ensures safety. Follow the steps, and you’ll be back to work quickly. Always use the right bit for your project.
Proper tools make tasks easier. Keep practicing, and it will become second nature. Thank you for reading. Happy drilling!