If you’ve ever stood in your yard, looked at a patch of land, and wondered, “How long would it take to drill a well here?”—you’re not alone. As someone who’s worked in both residential construction and industrial project planning, I’ve seen this question come up time and again. Whether you’re building your dream home off-grid, setting up a farm, or simply trying to reduce reliance on municipal water, understanding the well drilling timeline is crucial for planning your project—and your budget.
I still remember the first time I helped drill a residential well during a hot summer in Texas. We hit water faster than expected, but the permitting and prep work took much longer than the actual drilling. That experience taught me an important lesson: the time it takes to drill a well isn’t just about how deep you go. It’s about the terrain, equipment, weather, permits, and even the contractor’s schedule.
In this guide, I’ll walk you through every step of the well drilling process—from the initial site prep to the moment you turn on the tap and clean water flows. We’ll look at what affects drilling time, how long each stage takes, and what you can do to speed things up without sacrificing quality or safety.
Let’s dive in and break it all down so you know exactly what to expect when drilling your own well.

Article Summary
- Factors That Affect How Long It Takes to Drill a Well
- Typical Timeline for Drilling a Residential Water Well
- How Long Does It Take to Get Water After Drilling?
- How to Speed Up the Well Drilling Process
- Well Drilling Time by Type of Well
- Tips for First-Time Well Owners
- Common Mistakes That Delay Drilling Projects
- Cost vs. Time: Is Faster Always Better?
- Conclusion: What You Need to Know Before You Start Drilling
Factors That Affect How Long It Takes to Drill a Well
When people ask me how long it takes to drill a well, I always say—it depends. There’s no one-size-fits-all answer. Many factors affect the total time it takes to complete the job. Some of these are in your control, while others aren’t.
Soil and Rock Conditions
The type of ground you’re drilling into makes a huge difference. Drilling through soft soil takes far less time than dense rock. I once worked on a property with loose clay, and we finished drilling in under a day. But I’ve also spent two full days pushing through granite.
If your land has mixed layers—sand, shale, bedrock—it slows the process. The drill needs to change speeds, and sometimes even switch bits.
Well Depth Requirements
Shallow wells can be done quickly. Deep wells take more time, more power, and sometimes, more than one drill bit. For residential wells, the depth usually ranges between 100 and 400 feet. In areas with low groundwater, you might need to go much deeper.
You can check your local groundwater depth using tools like the USGS Groundwater Data.
Type of Drilling Equipment Used
There’s a big difference between using a manual rig and a professional rotary drill. Rotary rigs work faster, but they cost more. Air rotary drills are especially efficient for deeper wells in rocky areas.
I recommend choosing a licensed driller with modern equipment. It’ll save time and reduce delays due to mechanical issues.
Residential vs. Commercial Projects
Residential wells are usually faster to drill because they’re smaller and less regulated. Commercial projects take longer due to size, complexity, and stricter inspections.
If you’re installing a well for irrigation or industrial use, expect a longer timeline.
Weather and Seasonal Impact
Drilling in wet or freezing conditions slows everything down. I’ve seen rigs get stuck in muddy terrain or delayed by frozen pipes. Spring and fall are often the best seasons—less extreme weather and more stable soil.
Permitting and Regulations
Getting the right permits can take longer than drilling itself. Every state—and sometimes county—has its own rules. Some areas also require a hydrological survey.
To avoid surprises, check your local well regulations through your state’s water authority.
Average Drilling Times Based on Soil Type and Depth
| Soil/Rock Type | Typical Depth (ft) | Estimated Time to Drill |
| Soft soil (clay/sand) | 100–200 | 1–2 days |
| Mixed soil and rock | 200–300 | 2–3 days |
| Hard rock (granite/limestone) | 300–500+ | 3–5 days |
Typical Timeline for Drilling a Residential Water Well
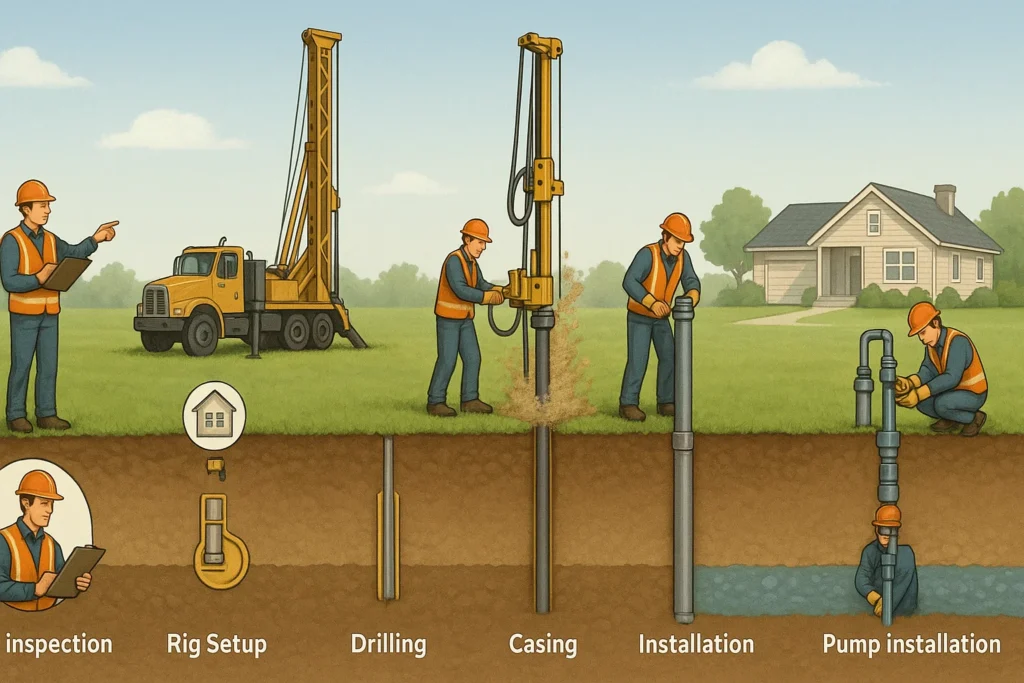
Drilling a water well is more than just showing up and boring a hole. It’s a multi-step process with a lot of moving parts. Here’s a breakdown based on years of field experience.
Site Preparation and Inspection (1–2 Days)
Before drilling, the area needs to be cleared. The crew sets up access, checks for underground utilities, and verifies that the site is safe. A geotechnical survey might be done to check soil types.
I’ve worked on sites that had to be moved at the last minute due to septic tank proximity—so it’s worth doing this part right.
Permitting Process (Varies by Location, 1–3 Weeks)
Permits are required almost everywhere. In some states, you can get one in a few days. In others, it could take weeks. I recommend starting this process early. You can usually apply through your state environmental agency or local county office.
Actual Drilling Time (1–3 Days)
This is the part everyone looks forward to. With the right rig and crew, most wells are drilled in one to three days. The deeper the well and the harder the ground, the longer it takes.
On average, you can expect a drilling speed of about 20–40 feet per hour depending on conditions.
Casing, Grouting, and Sealing (1 Day)
Once the hole is drilled, the well needs to be lined with a steel or PVC casing. Grouting fills the space between the casing and the ground to keep out contaminants. Sealing the top prevents surface water from leaking in.
This step is required by law in most states and improves your water quality.
Pump Installation and Water Testing (1–2 Days)
The final stage includes installing the pump and testing the water. Your driller will usually flush out debris and run a well yield test to check flow rate. Water samples may be sent to a lab for bacteria or mineral content testing.
How Long Does It Take to Get Water After Drilling?
A lot of people think once drilling is done, water just starts flowing. It’s not quite that simple.
Water Flow Testing and Recovery Time
After drilling, the well needs time to “recover.” That means letting groundwater naturally refill the well after being disturbed. Sometimes this takes a few hours. Other times, especially in low-yield areas, it could take a few days.
Flow testing helps figure out if the well can supply enough water for your home. For residential use, most states recommend a minimum flow of 5 gallons per minute (GPM).
Disinfection and Final Setup
Before using your new well, the system has to be disinfected. This usually involves flushing it with a chlorine solution. It’s a safety step that kills any bacteria that may have entered during drilling.
You can learn more about proper well disinfection from the CDC’s guide.
When You Can Start Using the Water
After testing and disinfection, you can usually start using the water in 1 to 3 days. The timeline may stretch if lab results show contamination or if your pump needs adjustment.
In most of my installs, families were able to start using their well water within a week of drilling—sometimes even sooner.
How to Speed Up the Well Drilling Process
If you’re on a tight schedule like I’ve been many times on job sites, you’ll want to move the drilling process along as fast as possible—without cutting corners. Here are a few proven ways I’ve used to shave off time and avoid frustrating delays.
Plan Permits and Surveys Early
This is the number one time-saver. I always tell homeowners and builders to start their well permit applications as soon as they finalize the site. Waiting until after drilling prep wastes precious days—or weeks.
Also, get any required geological or environmental surveys done in advance. That way, you won’t face last-minute hold-ups from local regulators.
Choose the Right Drilling Contractor
Not all drillers work at the same pace or bring the same gear. I’ve worked with both slow and fast crews, and the difference often comes down to experience and equipment. Look for a licensed, bonded driller with modern rotary or air rigs.
Ask them about their average timeline for similar projects, and check customer reviews. If they consistently finish ahead of schedule, you’re in good hands.
Use Advanced Drilling Equipment
Faster equipment doesn’t just cut time—it often results in a cleaner, safer well. Air rotary rigs, in particular, can handle most soil types and drill at speeds up to 70 feet per hour under ideal conditions.
If your site allows it, this is the method I recommend. The upfront cost is worth the time saved.
Ensure Site Readiness
Make sure your property is ready before the crew arrives. Clear debris, secure access paths, and have a water source available for flushing equipment. I once saw a two-hour delay because a fence hadn’t been removed—something that could’ve been handled days earlier.
Schedule During the Off-Season
Spring and early fall are the busiest times for drillers. If you can schedule your project during late winter or early summer, you might avoid backlogs. Plus, you’ll have more flexibility in choosing your contractor.
Well Drilling Time by Type of Well
Not all wells are created equal. Over the years, I’ve worked on everything from basic shallow wells to complex geothermal systems. Each one has its own timeline depending on its design, use, and depth.
Comparison of Drilling Time for Different Well Types
| Type of Well | Typical Depth (ft) | Average Drilling Time | Primary Use |
| Dug/Bored Well | 25–50 | 1–2 days | Low-demand rural use |
| Driven Well | 30–50 | 1 day | Emergency or backup supply |
| Drilled Water Well | 100–400+ | 1–3 days | Residential/domestic use |
| Irrigation/Agricultural | 200–600+ | 2–5 days | Farming and livestock |
| Geothermal Well | 150–500+ | 3–7 days | Heating and cooling systems |
Shallow vs. Deep Wells
Shallow wells (usually under 50 feet) are the fastest to complete. I’ve installed a few in sandy areas that took just half a day. They’re ideal for soft soil and areas with a high water table.
Deeper wells, especially those for irrigation or geothermal use, require more time and equipment. You’re often drilling through multiple layers of rock and soil, which slows progress.
Geothermal and Irrigation Wells
These are more complex by nature. Geothermal wells, in particular, often require horizontal loop fields or specialized closed-loop systems, which take additional time to plan and install.
Agricultural wells can also require larger casing and more rigorous flow testing due to high water demand.
Tips for First-Time Well Owners
I’ve worked with plenty of first-time well owners, and I get it—drilling a well feels like a big, complicated project. But with the right approach, you’ll feel confident and prepared.
Work with a Licensed Driller
This one can’t be stressed enough. A licensed well contractor follows local codes, protects your groundwater, and gets the job done right. They’ll also handle permits, inspections, and paperwork—things that can be a headache for DIYers.
I always advise clients to double-check credentials before signing any contracts.
Test Water Quality Early and Often
Don’t wait until you’re drinking it to test your water. I recommend testing right after drilling and again after pump installation. Common concerns include coliform bacteria, nitrates, and arsenic.
It’s also smart to install a filtration system suited to your local groundwater chemistry.
Know Your Well Yield and Pump Capacity
Make sure your system is sized correctly for your needs. A low-yield well might still work if paired with a storage tank and efficient pump. Your driller should perform a well yield test to determine how much water it produces per minute.
I’ve seen homeowners upgrade pumps only to realize the problem was their well’s natural flow.
Schedule Annual Maintenance
Wells aren’t “set it and forget it.” Have your system inspected once a year. A pro will check for leaks, pressure problems, and test water quality. This small step can save thousands in repair costs later on.
I’ve serviced neglected wells that needed complete pump replacements—something that could’ve been avoided with routine care.
Common Mistakes That Delay Drilling Projects
After years in the field, I’ve seen firsthand how small mistakes can turn a simple well drilling job into a drawn-out headache. If you’re new to this, or even if you’ve done it before, here are a few pitfalls I always warn my clients about.
Skipping the Site Survey
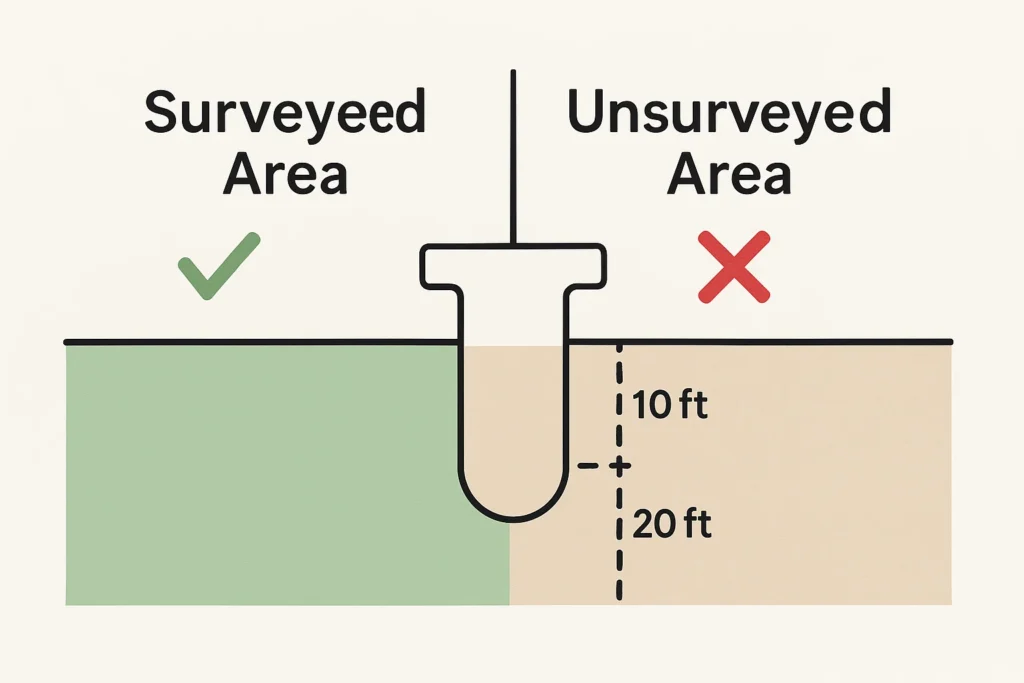
One of the most common mistakes I’ve seen is rushing into drilling without a proper hydrogeological survey. Without it, you risk drilling in a low-yield spot—or worse, hitting a contaminated aquifer. That alone can set your project back by weeks.
A quick, professional survey up front might cost a bit more, but it saves a lot of time (and money) down the road.
Poor Communication with Contractors
I’ve been on both sides of this. Misunderstandings between the property owner and driller can delay scheduling, change orders, and inspections. Before drilling begins, I recommend sitting down and discussing:
- Expected drilling depth and timeline
- Equipment access needs
- Permit responsibilities
- Cleanup expectations
This avoids confusion and helps everyone stay on the same page.
Underestimating Soil Conditions
I’ve drilled through everything from soft sand to granite. Each type of ground affects how long the job takes. Rocky areas often need specialized equipment like hammer drills or casing advances. If your contractor isn’t prepared, delays are almost guaranteed.
That’s why I always encourage site assessments that include soil boring tests. They give a clearer picture of what to expect.
Last-Minute Permit Issues
Nothing stalls a project like paperwork problems. Permits must match local regulations, which vary by state and even county. I once had a client who assumed the builder would handle the permits—turns out, they didn’t. The project sat idle for two weeks waiting on approvals.
Use your local health department or environmental agency for up-to-date requirements.
Cost vs. Time: Is Faster Always Better?
Time is money—but that doesn’t mean faster is always the better choice when drilling a well. I’ve had clients eager to cut days off the schedule, only to pay the price in quality or durability later.
Faster Drilling May Mean Lower Precision
When speed is the top priority, some drillers may skip best practices like proper grouting, step testing, or flushing. That might save hours in the short term, but poor installation can lead to contamination or pump failures.
It’s like trying to rush a concrete pour—you’re likely to end up with cracks.
Balance Matters: Quality, Safety, and Cost
I always tell people to think of well drilling like building a foundation. Do it right the first time, even if it takes an extra day or two. Here’s how I break it down:
Trade-offs Between Speed, Cost, and Quality in Well Drilling
| Speed Level | Cost | Quality & Longevity | Best For |
| High (rush jobs) | Higher due to risk | May cut corners; shorter lifespan | Emergency wells, temporary use |
| Moderate (standard pace) | Balanced | High-quality installation, safe yield | Long-term residential/ag use |
| Slow (precision-focused) | Lower short-term | Best for complex or sensitive terrain | Geothermal, deep bedrock wells |
I always recommend aiming for that middle lane—efficient but thorough. It offers the best return over the life of the well.
Cheap Contractors May Cut Corners
If a quote seems too good to be true, it probably is. I’ve seen low-budget outfits skip essential steps like casing sealing or yield testing, just to meet tight deadlines. That leads to contamination risks, frequent breakdowns, and even total well failure.
Stick with certified drillers who follow national standards and provide warranties on their work.
Conclusion: What You Need to Know Before You Start Drilling
If you’re planning to drill a well, whether for your home, farm, or business, the biggest favor you can do for yourself is to prepare early, ask questions, and hire the right team.
In my years of experience—from backyards in soft clay to deep rock formations—I’ve learned that the drilling timeline depends on much more than just how deep you go. Site conditions, permits, equipment, and even weather can all play a role.
If you want your well drilled quickly and correctly, here’s what I suggest:
- Start permits and surveys as soon as possible.
- Choose a skilled, licensed driller with modern tools.
- Understand the type of well that suits your needs.
- Don’t rush—prioritize quality over speed.
Trust me, a few extra hours spent planning now can save you weeks of frustration later. And once that clear, clean water starts flowing from your new well, it’ll all be worth it.