Drill bits create holes, while driver bits turn screws. Using the wrong bit can damage your workpiece and the bit itself. This guide will clearly explain their distinct purposes and how to choose the right one for any job.
The Right Tool for the Job: Understanding the Difference Between Drill Bits and Driver Bits
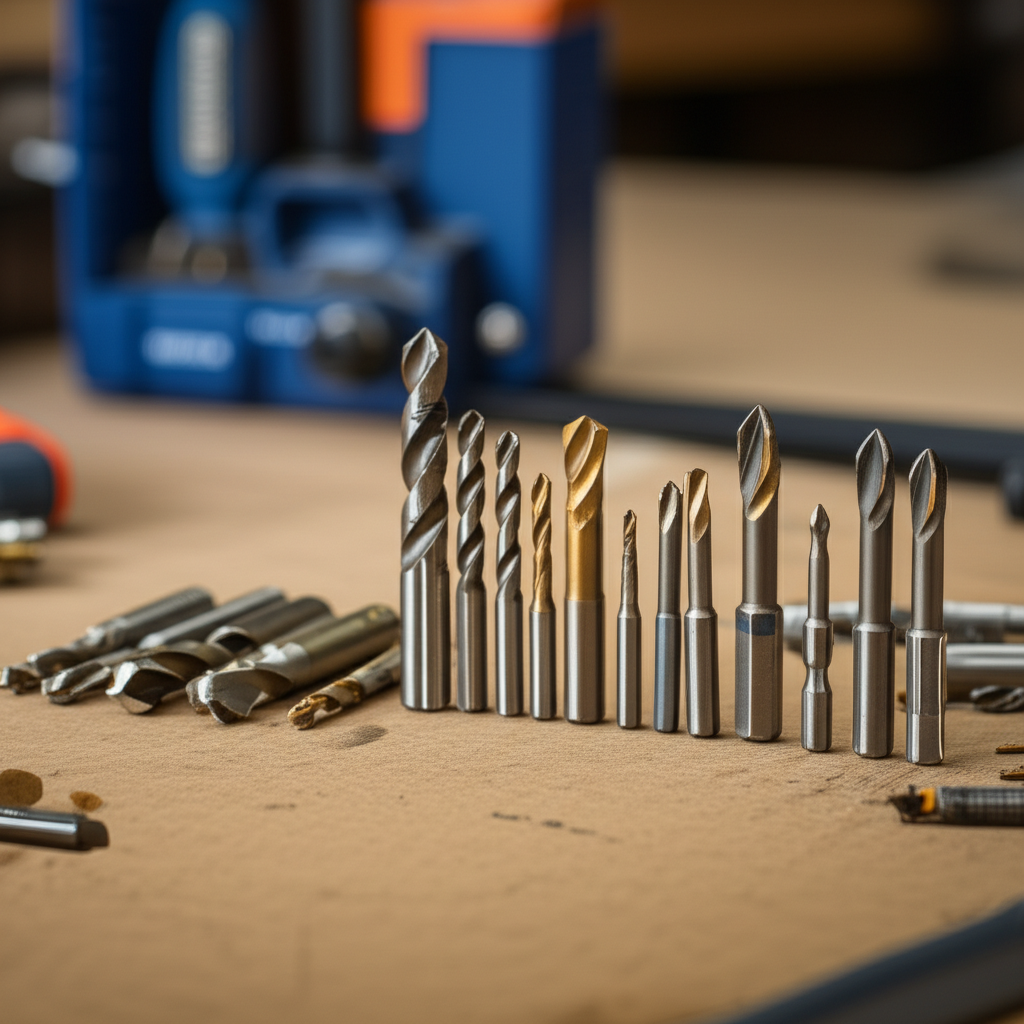
Ever stared at a collection of bits, wondering which one is for drilling and which is for driving? You’re not alone! It’s a common point of confusion, especially when you’re just starting out with DIY projects or setting up a new home workshop. The good news is, it’s actually quite straightforward once you know the basics. Getting this right saves you time, prevents frustration, and keeps your projects looking their best. This guide will walk you through everything you need to know about drill bits and driver bits, so you’ll feel confident choosing and using the right one every time. Let’s get those projects started!
—
The Fundamental Difference: What Each Bit Does
At the heart of it, the distinction between drill bits and driver bits is their primary function. Think of them as specialized tools designed for specific tasks.
Drill Bits: These are designed to create holes. They have sharp cutting edges that bore through materials like wood, metal, plastic, or masonry. You’ll use a drill bit whenever you need to make a new opening.
Driver Bits: These are designed to turn fasteners, primarily screws. They have shaped tips that engage with the slots or recesses on screw heads, allowing you to drive them in or remove them.
Here’s a simple analogy: Imagine you’re building a birdhouse. You’d use a drill bit to make the holes for the nails or screws, and then you’d use a driver bit with your drill (or a separate screwdriver) to actually put those screws into place.
Drill Bits: The Hole Makers
Drill bits come in a vast array of types, each optimized for different materials and drilling tasks. Their design is crucial for their function:
Cutting Edge: The tip of the drill bit has sharp edges that shave away material as it rotates.
Flutes: These are the spiral grooves that run up the shaft of the bit. They serve two main purposes: to help evacuate the material being cut (like sawdust or metal shavings) and to help keep the bit centered.
Shank: This is the part of the bit that the drill chuck grips. Shanks can be round, hex, or SDS, depending on the drill and the bit’s intended use.
Common Types of Drill Bits:
| Drill Bit Type | Material it Excels In | Primary Use | Key Features |
| :——————– | :————————- | :————————————————- | :———————————————————– |
| Twist Drill Bits | Wood, Metal, Plastic | General-purpose hole drilling | Most common type, helical flutes |
| Brad Point Bits | Wood | Precise drilling in wood, furniture making | Central point for accurate starting, spurs to prevent blowout |
| Spade/Paddle Bits | Wood | Large diameter holes in wood | Flat, paddle-like blade, often used for wiring or plumbing accessions |
| Masonry Bits | Concrete, Brick, Stone | Drilling into hard, brittle materials | Carbide-tipped point, often used with hammer drills |
| Auger Bits | Wood | Deep, clean holes in wood, often for bolts or dowels | Screw-like tip for pulling the bit through material |
| Hole Saws | Wood, Metal, Plastic, Drywall | Large diameter holes (e.g., for pipes, vents) | Cylindrical saw with teeth, attaches to a pilot drill bit |
When to Use a Drill Bit:
Attaching hinges to a door frame.
Drilling pilot holes for screws (this prevents wood from splitting).
Running wires or plumbing through walls.
Creating decorative holes or patterns.
Mounting shelves or curtain rods.
Making a hole for a bolt.
Driver Bits: The Screw Turners
Driver bits are designed to interface with the head of a screw. Their tip shape is critical for a good grip, preventing “cam-out” (where the bit slips out of the screw head) and stripping the screw.
Tip Shape: This is the most important feature, matching the screw head.
Shank: Usually a hexagonal shape, designed to be held securely in a drill chuck or a magnetic bit holder.
Common Types of Driver Bits:
| Driver Bit Type | Common Screw Head Type It Matches | Primary Use | Key Features |
| :——————- | :——————————– | :——————————————- | :————————————————————————– |
| Phillips | Cross-shaped | Very common in construction and electronics | (+) shaped tip, designed to cam out at high torque to prevent over-tightening |
| Slotted/Flathead | Single slot | Older screws, some electrical fixtures | (-) shaped tip, can be tricky as they easily slip out |
| Torx/Star | Star-shaped | Automotive, electronics, cabinets | 6-pointed star shape, offers excellent torque transfer and cam-out resistance |
| Square/Robertson | Square-shaped | Popular in Canada, woodworking, electrical | Square hole, provides a very secure grip and minimal cam-out |
| Hex/Allen | Hexagonal recess | Furniture assembly, bicycles, machinery | Hexagonal recess, common in furniture and machinery |
The Importance of Matching Driver Bits to Screw Heads:
Using the wrong driver bit is a surefire way to strip a screw head, making it impossible to remove or tighten. This can turn a simple job into a frustrating ordeal. Always inspect the screw head and choose the driver bit that fits snugly and perfectly.
Example: If you have a screw with a cross-shaped recess, you need a Phillips head driver bit. If the screw head has a star-shaped recess, you’ll need a Torx bit.
When to Use a Driver Bit:
Assembling furniture.
Installing drywall.
Attaching decking.
Putting up trim or molding.
Securing anything with screws.
Removing existing screws.
Can a Drill Bit Be Used as a Driver, or Vice-Versa?
In short, no, and attempting to do so can lead to problems.
Using a Drill Bit to Drive Screws: A drill bit’s tip is designed for cutting, not for gripping screw heads. It will likely slip, damage the screw head (stripping it), and potentially damage the material you’re working with. Most drill bits don’t have a shank designed for the torque of driving.
Using a Driver Bit to Drill Holes: A driver bit is not designed to cut material. It lacks the cutting edges and flutes needed to bore through wood, metal, or other substances. At best, it might slightly indent the surface; at worst, it could break or damage your drill.
While some multi-tools or specialized bits might blur the lines slightly, the fundamental design difference makes them unsuitable for each other’s primary tasks.
How to Choose the Right Bit for Your Task
Selecting the correct bit is crucial for efficiency and a professional finish. Here’s a practical approach:
1. Identify Your Primary Task: Are you making a hole, or are you fastening something?
Making a hole? You need a drill bit.
Fastening a screw? You need a driver bit.
2. Consider the Material:
Wood: Most standard twist bits, brad point bits, or spade bits work well. For softwoods, even a basic twist bit is fine. For hardwoods, consider bits designed for less heat buildup.
Metal: You’ll need bits specifically designed for metal (often cobalt or high-speed steel), which are harder and can handle the friction. Drilling metal often requires slower speeds and lubrication.
Masonry (Concrete, Brick): These require specialized masonry bits with carbide tips, usually used with a hammer drill function.
Plastic: Most standard wood bits can drill plastic, but go slow to avoid melting.
3. Determine the Hole Size or Screw Type:
Drill Bits: Measure the diameter of the hole you need. Bits are usually marked with their size in inches or millimeters. For pilot holes, the size depends on the screw’s shank diameter (smaller than the threads).
Driver Bits: Examine the screw head carefully. Identify if it’s Phillips, Slotted, Torx, or Square. Also, note the size. For example, a Phillips #2 bit is very common. Using a bit that’s too small will strip the screw; one that’s too large won’t engage properly.
4. Consider Your Drill/Driver:
Drill Chuck: Most common drill bits have round or hex shanks that fit standard drill chucks. SDS bits are for specific SDS hammer drills.
Driver Bit Holders: Most driver bits have a 1/4-inch hex shank that fits into a magnetic bit holder or directly into the chuck of an impact driver or drill/driver.
Common Scenarios and Bit Choices:
Assembling flat-pack furniture: You’ll primarily use driver bits matching the screws provided (often Phillips or Hex/Allen). You might use a drill bit if you need to create a new hole for a dowel or if a specific screw requires a pilot hole.
Hanging a picture frame on drywall: You’ll likely use a drill bit (often a common twist bit or a masonry bit if you hit a stud) to create holes for screws or anchors. If you’re screwing directly into a stud, the screw itself will need a matching driver bit.
Building a deck: You’ll need drill bits for pilot holes (if required) and driver bits (often Torx or Square) for driving deck screws. For larger holes (e.g., for railing posts), you might use a spade bit or hole saw.
Installing cabinet hinges: You’ll use drill bits to create pilot holes for the hinge screws. The screws themselves will then require specific driver bits (usually Phillips or Torx).
Understanding Drill Bit Sizes and Driver Bit Sizes
Drill Bits: Sizes are usually marked directly on the shank. They can be imperial (fractions of an inch or gauge numbers) or metric (millimeters). For example, a 1/4-inch drill bit will create a 1/4-inch hole. For pilot holes, a good rule of thumb is to choose a bit diameter that matches the screw’s unthreaded shank.
Driver Bits: These are sized according to the screw head type. For Phillips, you’ll see sizes like #0, #1, #2, #3 (with #2 being the most common). For Torx, you’ll see T10, T15, T20, T25, etc. For Hex, you’ll see sizes like 3mm, 4mm, 5mm, or 1/8″, 3/16″, 1/4″. The key is a snug fit.
Using a Drill/Driver with Different Bits
Your drill or impact driver is the motor; the bits are the attachments.
Drill/Drivers: These tools have chucks that grip the shank of either a drill bit or a driver bit (often via a magnetic holder). They have variable speed and torque settings.
Impact Drivers: These are specialized for driving screws. They deliver rotational blows (impacts) that provide high torque, making it easier to drive long screws or into hard materials. They typically only accept hex-shank driver bits.
Pro Tip: For longer driver bits or when working in tight spaces, a magnetic bit holder can be invaluable. It extends the reach and holds the bit securely.
Safety First: Using Bits Correctly
Safety is paramount when working with power tools.
Wear Safety Glasses: Always wear safety glasses to protect your eyes from flying debris.
Secure Your Workpiece: Use clamps to hold your material in place. This prevents it from spinning and causing injury or damage.
Choose the Right Speed: Slower speeds are generally better for starting holes and for driving screws, especially into hardwood. Faster speeds can be used for drilling into softer materials or for removing screws.
Ensure a Secure Grip: Make sure the bit is firmly seated in the drill chuck or driver holder. A loose bit can wobble, break, or fly out.
Disconnect Power: Always unplug your drill or remove the battery before changing bits.
* Be Aware of Your Surroundings: Ensure there are no electrical wires or pipes behind where you are drilling. You can use a stud finder with wire/pipe detection for added safety. For more on safely locating these, check out the U.S. Consumer Product Safety Commission’s guidelines on home electrical safety.
Bits for Every Project: A Quick Comparison Table
| Feature | Drill Bits | Driver Bits |
| :—————– | :———————————————— | :————————————————– |
| Primary Function | Creating holes | Turning screws (driving/removing) |
| Design | Cutting edges, flutes to remove material | Shaped tips to engage screw heads |
| Common Materials | Wood, metal, plastic, masonry | N/A (works with fasteners) |
| Material Removal| Yes, essential for function | No |
| Variability | Many types for different materials and hole sizes | Many types for different screw head configurations |
| Common Use Case| Making any new opening | Fastening or unfastening screws |
| Risk with Wrong Use | Ineffective, bit damage, poor hole quality | Stripped screw heads, damaged bit, poor grip |
Frequently Asked Questions (FAQ)
1. What’s the difference between a drill bit and a screw bit?
A drill bit is designed to bore holes into materials. A screw bit, also called a driver bit, is designed to turn screws. They have fundamentally different tip shapes and purposes.
2. Can I use a drill bit to put in a screw?
No, you should not. A drill bit is not shaped to grip a screw head and will likely slip, strip the screw, and potentially damage your work.
3. Can I use a driver bit to drill a hole?
No. A driver bit has no cutting edges and cannot bore through materials like wood or metal. Attempting to do so will not create a hole and could damage the bit or your drill.
4. What is the most common type of driver bit?
The Phillips head driver bit is probably the most common, recognizable by its cross shape. However, Torx and Square (Robertson) bits are also very prevalent in modern construction and furniture.
5. How do I know what size drill bit to use?
For making a specific size hole, choose a drill bit marked with that diameter. For pilot holes, select a bit that is slightly smaller than the screw’s shank diameter (the unthreaded part).
6. What are the best drill bits for metal?
Drill bits made from High-Speed Steel (HSS) or Cobalt are best for drilling metal. Cobalt bits are harder and more heat-resistant, making them ideal for tougher metals.
7. My drill has a chuck. Can it hold both drill bits and driver bits?
Yes, most standard drill chucks can hold drill bits directly. For driver bits, they typically have a 1/4-inch hex shank that fits into a magnetic bit holder, which then goes into the chuck, or directly into the chuck of some drills and most impact drivers.
—
Conclusion: Mastering Your Bits for Better Projects
Understanding the difference between drill bits and driver bits is a foundational skill for anyone using a power drill or driver. By recognizing their distinct roles – drill bits for making holes and driver bits for turning screws – you can approach any project with confidence. Always pair the right bit with the right task and material, and remember that a snug fit for driver bits is key to avoiding stripped screws.
Don’t forget safety: wear your eye protection, secure your workpiece, and always disconnect power before changing bits. With this knowledge, you’re well-equipped to select the correct bits, perform your tasks efficiently, and achieve professional-looking results. Happy drilling and driving!