Drilling a well for water is a big step toward independence and security, especially if you live in a rural area or your local water supply is unreliable. A personal water well can provide clean, fresh water for drinking, irrigation, and daily use.
However, drilling a well is not as simple as digging a hole in your backyard. You need careful planning, the right equipment, and some basic knowledge of geology and safety. This guide walks you through the process, from the first planning steps to maintaining your well for long-term use.
Article Summary
- Understanding The Basics Of Water Well Drilling
- Planning Your Well: What You Need To Know
- Choosing The Right Drilling Method
- Step-by-step: How To Drill A Well For Water
- Costs And Budgeting
- Common Mistakes To Avoid
- Maintaining Your Water Well
- When To Call A Professional
- Two Insights Many Miss
- Resources And Next Steps
- Frequently Asked Questions
Understanding The Basics Of Water Well Drilling
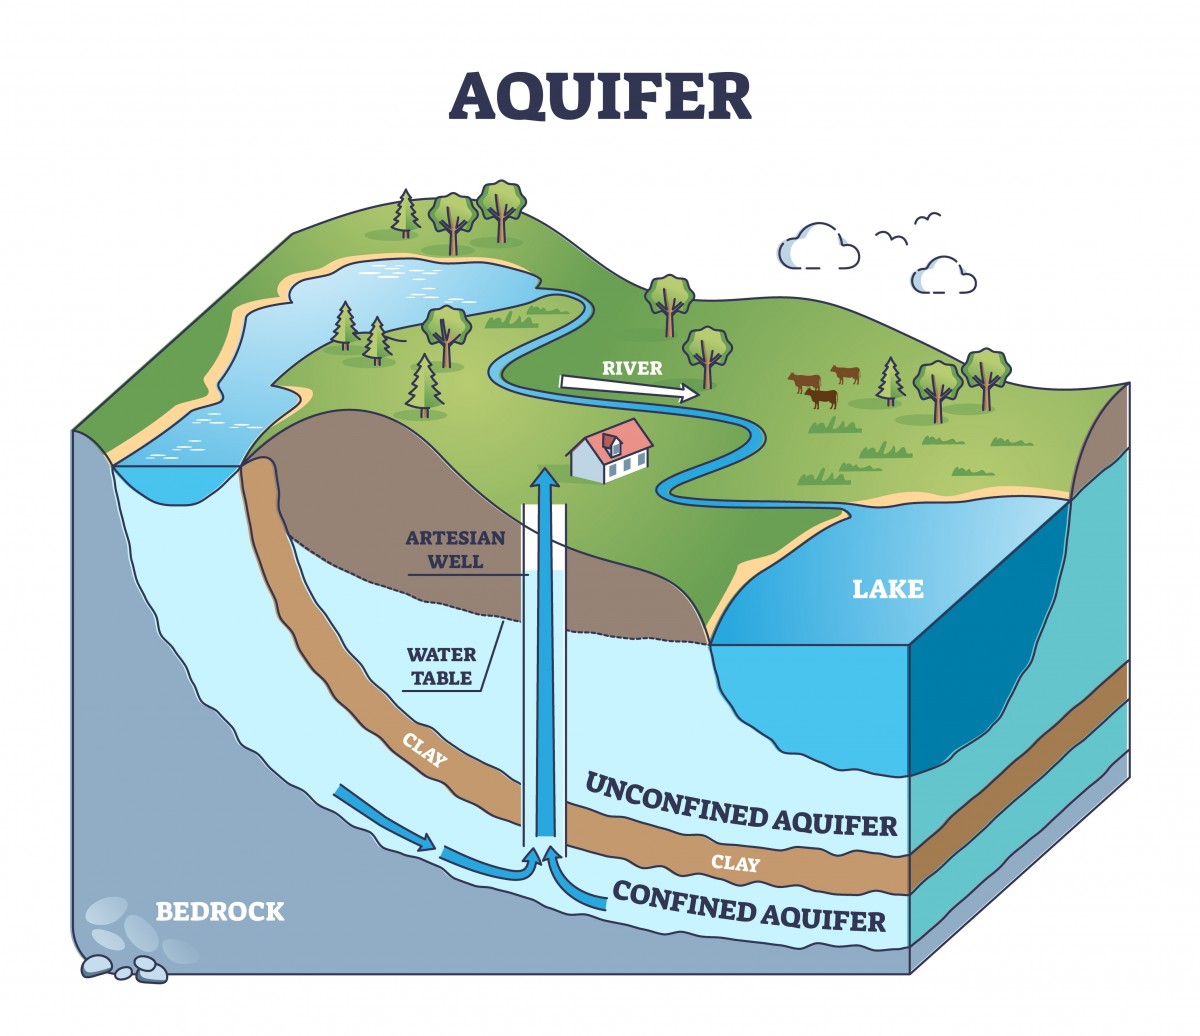
Before you start, it’s important to understand what a water well is and how it works. A well is a structure created by digging, driving, boring, or drilling into the ground to access groundwater. The groundwater is stored in aquifers—layers of water-bearing rock or sand beneath the earth’s surface. Drilling a well allows you to reach this water and pump it to the surface for use.
There are several types of wells:
- Dug wells: Created by digging with a shovel or backhoe, usually shallow and more prone to contamination.
- Driven wells: Made by driving a small-diameter pipe into soft earth, suitable for shallow aquifers.
- Drilled wells: Made using drilling machines, can reach deeper, protected aquifers, and usually offer the safest and cleanest water.
For most people, a drilled well is the best option due to its depth and durability.
Planning Your Well: What You Need To Know
Before any drilling, you need to plan carefully. Mistakes can be costly and even dangerous.
1. Check Local Laws And Regulations
Most areas have strict rules about drilling wells. These include permits, required distances from septic tanks and property lines, and rules to prevent contamination. Contact your local government or health department to understand what’s allowed. Skipping this step can result in fines or having to close your well.
2. Choose The Best Location
Picking the right spot is critical. A poor location can lead to dirty water, low yield, or even a dry well. Here’s what to consider:
- Distance from pollution sources: Wells should be at least 50 feet from septic tanks, livestock yards, and chemical storage.
- Elevation: Choose a spot higher than surrounding land to prevent surface water from flowing into the well.
- Access: Make sure equipment can reach the site and there’s room for maintenance.
Local well drillers and hydrogeologists can help you pick the safest, most productive spot.
3. Estimate Water Needs
Calculate how much water your household or farm uses. A typical home needs about 100-120 gallons per person per day. Farms or gardens need more. Knowing your demand helps decide how deep and wide your well should be.
4. Research The Geology
The type of soil and rock under your property decides how deep you must drill and how much water you’ll get. Check local well logs or ask neighbors with wells how deep they went. A professional hydrogeologist can do a survey for more accuracy.
Credit: rieswelldrilling.com
Choosing The Right Drilling Method
Different methods work for different locations and budgets.
| Drilling Method | Best For | Pros | Cons |
|---|---|---|---|
| Rotary Drilling | All soil types, deep wells | Fast, efficient, deep reach | Expensive, needs heavy machinery |
| Percussion (Cable Tool) | Hard rock, shallow to medium depth | Simple, handles rock well | Slower, labor-intensive |
| Hand Auger | Soft soil, shallow wells | Low cost, minimal equipment | Limited depth, not for rock |
For most modern wells, rotary drilling is preferred, but it requires professional equipment and skills.
Step-by-step: How To Drill A Well For Water
Now let’s break down the actual process.
1. Prepare The Site
Clear the area of obstacles. Mark property lines and avoid underground utilities—call your local “before you dig” service. Set up equipment access.
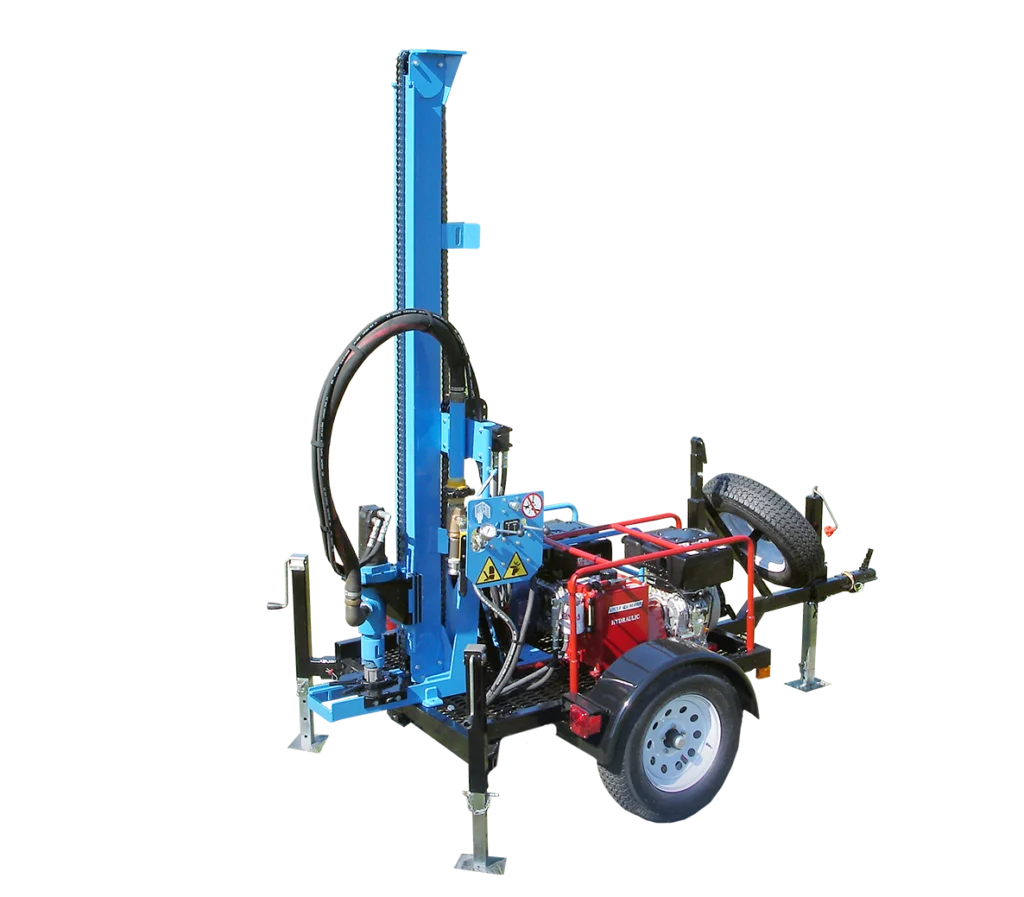
2. Mobilize Equipment
Drilling a well requires heavy machinery, like a drill rig, casing pipes, and tools for measuring depth and water flow. Most people hire a licensed well driller, but small hand-drilling kits are available for very shallow wells.
3. Drill The Borehole
Start drilling at your marked location. The drill cuts through soil and rock, sending debris to the surface. The depth depends on local conditions—most residential wells are 100 to 400 feet deep, but some go much deeper.
A common mistake is stopping too soon. If you only drill into the first water layer, your well may dry up or get contaminated. It’s usually better to reach a deep, confined aquifer for safer water.
4. Install The Casing
Casing is a pipe (often PVC or steel) placed inside the borehole to keep it from collapsing and to block surface contaminants. The casing must extend above ground level to prevent surface water from running in.
A seal called a “well screen” is placed at the bottom to let water in but keep out sand and gravel. The space between the casing and borehole is filled with gravel, then sealed with clay (bentonite) to stop contaminants.
5. Develop The Well
This step cleans the area around the well screen. Water is surged in and out or air is pumped to remove fine particles, making it easier for water to flow in. Skipping this step can lead to slow recovery and dirty water.
6. Test Water Yield And Quality
Once drilling is done, test how much water the well produces (yield) and how clean it is. A good well for a house should yield at least 5 gallons per minute. Send a sample to a certified lab to test for bacteria, chemicals, and minerals.
7. Install The Pump And Plumbing
Most wells use a submersible pump placed deep in the well. For shallow wells, a jet pump above ground may work. Pipes connect the pump to your house. A pressure tank is added to keep water flowing steadily.
8. Seal The Well Cap
A sanitary well cap seals the top to keep out insects, debris, and surface water. This is a small but vital detail—many contamination cases come from poor sealing.
9. Disinfect And Register The Well
Flush the well with a chlorine solution to kill bacteria. Let it sit, then run water until the chlorine smell is gone. Register your well with local authorities if required.
Costs And Budgeting
Drilling a well is a big investment. Costs vary by location, depth, and method.
| Item | Typical Cost (USD) |
|---|---|
| Drilling (per foot) | $15 – $50 |
| Casing and Materials | $500 – $3,000 |
| Pump and Plumbing | $500 – $2,000 |
| Water Testing | $50 – $300 |
| Total (average well) | $3,000 – $15,000 |
Remember, deeper wells and tough geology raise costs. Get quotes from several licensed drillers.
Common Mistakes To Avoid
Many beginners make costly errors. Watch out for these:
- Ignoring local rules: Drilling without permits can force you to close your well and pay fines.
- Choosing a poor location: Too close to septic tanks or low areas increases contamination risk.
- Going too shallow: Shallow wells dry up faster and are easier to pollute.
- Skipping professional advice: Local geology is complex. An expert can save you from expensive mistakes.
- Neglecting maintenance: Wells need regular testing and upkeep to stay safe.
Maintaining Your Water Well
A well is not “set and forget. ” Proper care keeps your water safe and the system working for years.
Regular Water Testing
Test your water at least once a year for bacteria, nitrates, and chemicals. After heavy rains or repairs, test again. Some areas have free or low-cost testing through health departments.
Inspect The Well Cap And Area
Check the cap for cracks and the ground for puddles or signs of contamination. Keep the area clean—don’t store chemicals or park vehicles near the well.
Service The Pump
Pumps last 8-15 years, but low pressure, air in the lines, or strange noises mean it’s time for repair or replacement.
Shock Chlorination
If tests show bacteria, disinfect the well by adding chlorine, following proper guidelines. Too much can damage the system, so follow instructions or hire a pro.
Keep Records
Log all tests, repairs, and upgrades. This helps track problems and is useful if you sell your property.
When To Call A Professional
While some people attempt simple wells on their own, most water wells require skilled drillers and hydrogeologists. Call a pro if:
- You need to drill deeper than 50 feet
- The ground is rocky or unstable
- You’re unsure about safety or water quality
- Local laws require licensed drilling
Professionals have the tools and experience to handle surprises underground.

Credit: www.motherearthnews.com
Two Insights Many Miss
- Well depth isn’t everything: Some people think deeper always means better. In reality, too deep can tap into salty or mineral-heavy water. The right depth targets the best quality aquifer.
- Yield can change over time: Water tables can drop during drought or after heavy use. Plan for seasonal changes and test your well’s yield during dry periods.
Resources And Next Steps
Learning more about local groundwater can save time and money. Many governments provide maps, well logs, and advice. The United States Geological Survey (USGS) offers excellent information about groundwater and wells. Visit the USGS Groundwater Information page for more details.
Credit: www.lonestardrills.com
Frequently Asked Questions
How Deep Should I Drill My Water Well?
The depth depends on local geology and water needs. Most home wells are 100 to 400 feet deep, but some may be shallower or much deeper. Always check nearby well depths and consult local experts.
Can I Drill A Well Myself?
You can hand-drill a shallow well in soft soil, but deeper wells need heavy equipment and skill. Most areas require a licensed driller, especially for drinking water wells.
How Long Does It Take To Drill A Well?
Drilling usually takes 1-3 days, but preparation and setup can add more time. Complicated geology or weather delays may extend the process.
Is Well Water Safe To Drink?
Well water can be very safe, but only if the well is properly located, constructed, and maintained. Always test water quality before use and at least once a year.
What If My Well Runs Dry?
A well can run dry if the water table drops or too many wells draw from the same aquifer. Sometimes, deepening the well or drilling a new one is necessary. Reduce water use and consult a local expert if this happens.
Drilling your own water well is a serious project, but with careful planning and professional help, you can enjoy reliable, clean water for many years. Take the time to do it right, and your well will be an asset for generations.