Drilling holes for cabinet knobs is easy with the right tools and a few simple steps! Measure accurately, mark your spots, and drill straight using a drill and the correct size drill bit. This guide will walk you through the process, ensuring your cabinet knobs look perfect.
Article Summary
What You’ll Need
Before you start, gather your tools. Having everything ready makes the job smoother.
- Drill: A cordless drill is ideal for maneuverability.
- Drill Bits: The correct size for your knob screws (usually between 1/8″ and 3/16″). Check your knob’s specifications.
- Measuring Tape: For accurate measurements.
- Pencil: To mark the drilling locations.
- Drill Template (Optional): Simplifies the process, especially for multiple cabinets.
- Safety Glasses: Protect your eyes.
- Gloves (Optional): Provide extra grip and protection.
- Level: To ensure your knobs are straight.
- Clamps (Optional): To secure the cabinet door.
Step-by-Step Guide: Drilling Holes for Cabinet Knobs
Follow these simple steps to drill perfect holes for your cabinet knobs:
-
- Step 1: Prepare Your Cabinet Door
If possible, remove the cabinet door from the cabinet frame. This gives you more control and stability. If you can’t remove it, make sure the door is stable and supported.
-
- Step 2: Measure and Mark
This is the most critical step.
-
- Determine Knob Placement: Decide where you want to place the knobs on your cabinet doors. Usually, knobs are centered horizontally and vertically. The exact position depends on your cabinet style and preference. Consider the rail and stile width.
- Measure for Accuracy: Use your measuring tape and pencil to mark the exact spot for each knob. Double-check your measurements!
- Use a Template (Optional): A drilling template can be extremely helpful, especially if you have multiple cabinets. Center the template and mark through the template holes.
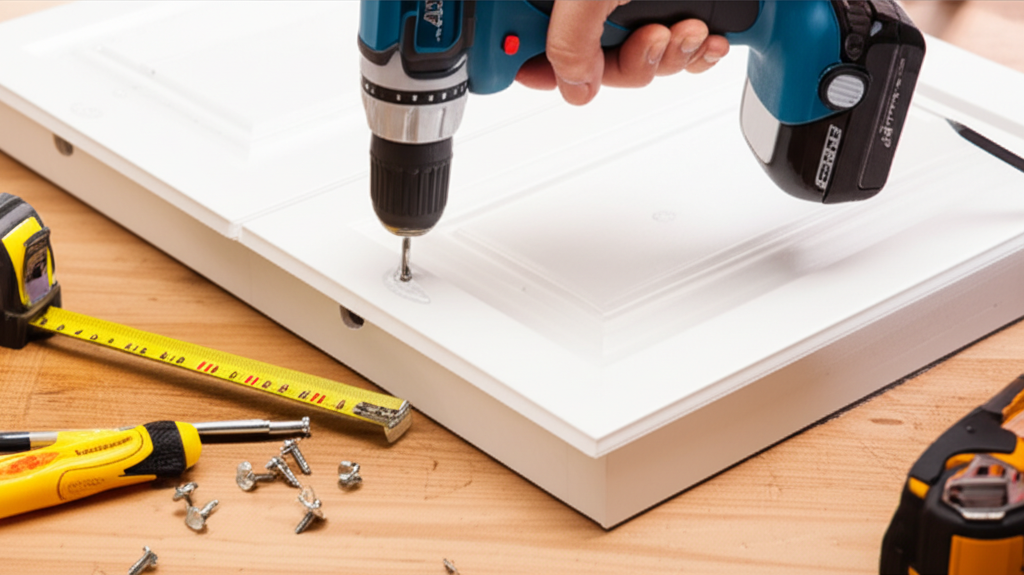
- Step 3: Drill the Pilot Hole
- Choose the Right Bit: Select a drill bit slightly smaller than the screw size of your knob. This is crucial for a secure fit.
- Start Drilling: Place the tip of the drill bit on your marked spot. Hold the drill perpendicular to the cabinet door.
- Drill Slowly: Start drilling slowly and steadily. Don’t force it. Let the drill do the work.
- Drill Straight: Keep the drill perfectly level to ensure the hole is straight.
- Drill Through: Drill through the door. Stop when the drill bit goes through.
- Step 4: Enlarge the Hole (If Necessary)
- Check the Fit: Try fitting the knob’s screw into the drilled hole. If it’s too tight, you may need to enlarge the hole slightly.
- Use the Correct Bit: If you need to enlarge the hole, use the appropriate drill bit size as per the screw.
- Drill Carefully: Drill slowly and precisely, only enlarging the hole as needed.
- Step 5: Install the Knob
- Align the Knob: Place the knob over the drilled hole from the outside of the cabinet door.
- Insert the Screw: Insert the screw from the inside of the cabinet door through the hole.
- Tighten the Screw: Tighten the screw by hand or with a screwdriver until the knob is snug. Don’t overtighten.
- Step 6: Level and Adjust (If Needed)
- Check the Level: Use a level to ensure the knob is straight. Adjust if necessary.
- Repeat: Repeat this process for all your cabinet doors.
Drill Bit Sizes: A Quick Guide
Choosing the right drill bit size is crucial. Here’s a simple guide to help you:
| Screw Size (Diameter) | Recommended Drill Bit Size | Notes |
|---|---|---|
| Typically, smaller screws | 1/8″ to 5/32″ | Check the knob specifications |
| Larger screws | 3/16″ | Ensure appropriate fit |
Note: Always check the specifications of your cabinet knobs for the recommended screw and drill bit sizes. If you are unsure, it’s always better to start with a slightly smaller bit and enlarge the hole if needed.
Tips for Success
Here are some extra tips to make your project even easier:
- Practice on Scrap Wood: If you’re new to drilling, practice on a piece of scrap wood before drilling your cabinet doors.
- Use a Drill Guide: A drill guide helps keep the drill bit straight and prevents it from wandering.
- Clamp the Door: Clamping the door to a workbench makes drilling safer and easier.
- Take Your Time: Don’t rush the process. Accuracy is more important than speed.
- Protect the Finish: Place a piece of tape on the cabinet door where you’ll be drilling to protect the finish from scratches.
Common Mistakes to Avoid
Avoid these common mistakes to ensure a successful project:
- Measuring Errors: Double-check all your measurements.
- Drilling at an Angle: Always keep the drill perpendicular to the cabinet door.
- Using the Wrong Drill Bit Size: Use a bit that matches the screw size of your knob.
- Overtightening Screws: This can strip the screw or damage the cabinet door.
- Not Using Safety Glasses: Always wear safety glasses to protect your eyes.
Drill Types Explained
Understanding the types of drills can help you choose the right tool for the job. Here’s a quick overview:
- Cordless Drills: These are the most common type for DIY projects. They offer portability and are easy to use.
- Corded Drills: These drills provide continuous power and are suitable for heavy-duty tasks.
- Hammer Drills: These drills are designed for drilling into concrete and masonry.
- Impact Drivers: These tools are designed for driving screws with high torque. They are not generally used for drilling holes for knobs.
For drilling holes for cabinet knobs, a cordless drill is usually the best choice.
Choosing the Right Drill Bit
Knowing the different types of drill bits can help you choose the right one. Here’s a quick guide:
- Twist Drill Bits: These are the most common type and are suitable for wood, metal, and plastic.
- Brad Point Drill Bits: These bits are designed for precision drilling in wood and prevent splintering.
- Spade Bits: These bits are used for drilling larger holes.
For cabinet knobs, a twist drill bit or brad point bit is usually sufficient.
You can find more detailed information on drill bits from reputable sources such as the Family Handyman.
FAQ: Drilling Holes in Cabinets
Here are some frequently asked questions to help you further:
1. What size drill bit should I use for cabinet knobs?
The drill bit size depends on the screw size of your knob. Usually, it’s between 1/8″ and 3/16″. Always check the knob’s specifications for the recommended size. Starting with a slightly smaller bit is a good strategy.
2. Can I use a regular drill for cabinet knobs?
Yes, a regular cordless drill is perfect for drilling holes for cabinet knobs. Ensure it has enough power and a variable speed setting for better control.
3. How do I prevent splintering when drilling into wood?
To prevent splintering, use a brad point drill bit or place masking tape on the cabinet door where you’ll be drilling. Drill slowly and steadily.
4. What if I make a mistake and drill the hole in the wrong place?
If you make a mistake, you can fill the hole with wood filler, let it dry, and then re-drill in the correct location. Alternatively, consider using a cabinet knob with a larger backplate or a different style that covers the mistake.
5. Can I drill holes for cabinet knobs without removing the doors?
Yes, you can drill holes without removing the doors. However, it’s easier and more accurate if you remove them first. If you don’t remove the doors, make sure they are securely supported.
6. What is the best way to ensure my knobs are straight?
Use a level to check the alignment of your knobs after installation. During drilling, hold the drill perpendicular to the cabinet door. A drilling template can also help.
7. What if my knob screws are too long?
If your knob screws are too long, they will protrude from the back of the cabinet door. You can shorten them with a hacksaw or wire cutters. Alternatively, add a small washer between the screw head and the door to compensate for the extra length.
Conclusion
Congratulations! You’ve now learned how to drill holes in cabinets for knobs like a pro. Armed with these steps and tips, you can confidently tackle this DIY project and add a fresh new look to your cabinets. Remember to measure accurately, take your time, and prioritize safety. With practice, you’ll become a skilled cabinet knob installer. Enjoy the transformation!